Create a colourful bouquet that won’t need watering.
You will need
- Paper, pencil and scissors
- 5mm-thick balsa wood
- Craft knife from Resene
- Resene testpot brushes
- Old vases for painting
Vases
Floral shapes
- Resene Parsley
- Resene Caper
- Resene Boogie Wonderland
- Resene Perfume
- Resene Ecstasy
- Resene Twisted Sister
- Resene Polo Blue
- Resene Gulf Stream
- Resene Vibe
- Resene Glorious
This is a wonderfully creative craft to get the whole family involved in. Get them to draw shapes and paint a colour scheme that’s fresh and vibrant! You may want to help kids with the cutting, as it can be a little tricky. Alternatively, try using thick cardboard or foam board and scissors.
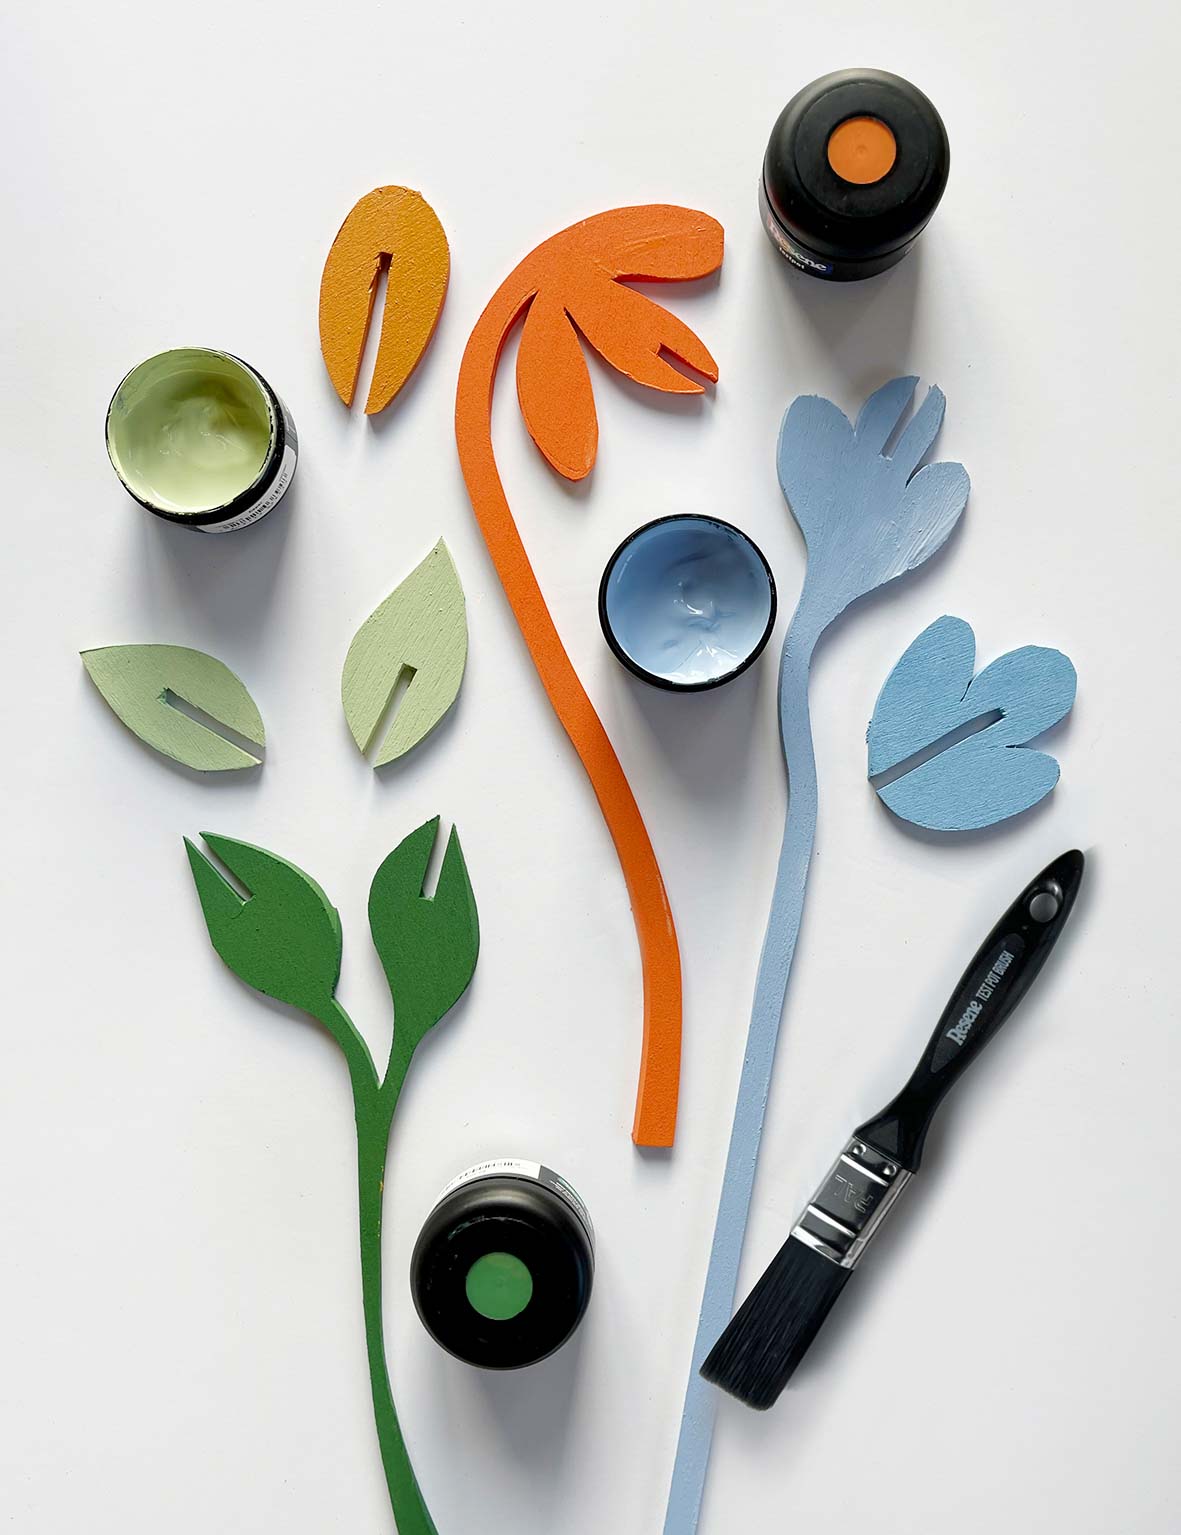
1. Start by drawing simple floral and leaf shapes onto a piece of scrap paper. This way you can judge how big or small you would like them. Experiment with shapes and sizes, but the simpler the better. Add curves in the stem for interest and so they sit in your vase on a variety of angles. Once you’re happy, cut the paper pieces out and trace around them onto your piece of balsa wood (A).
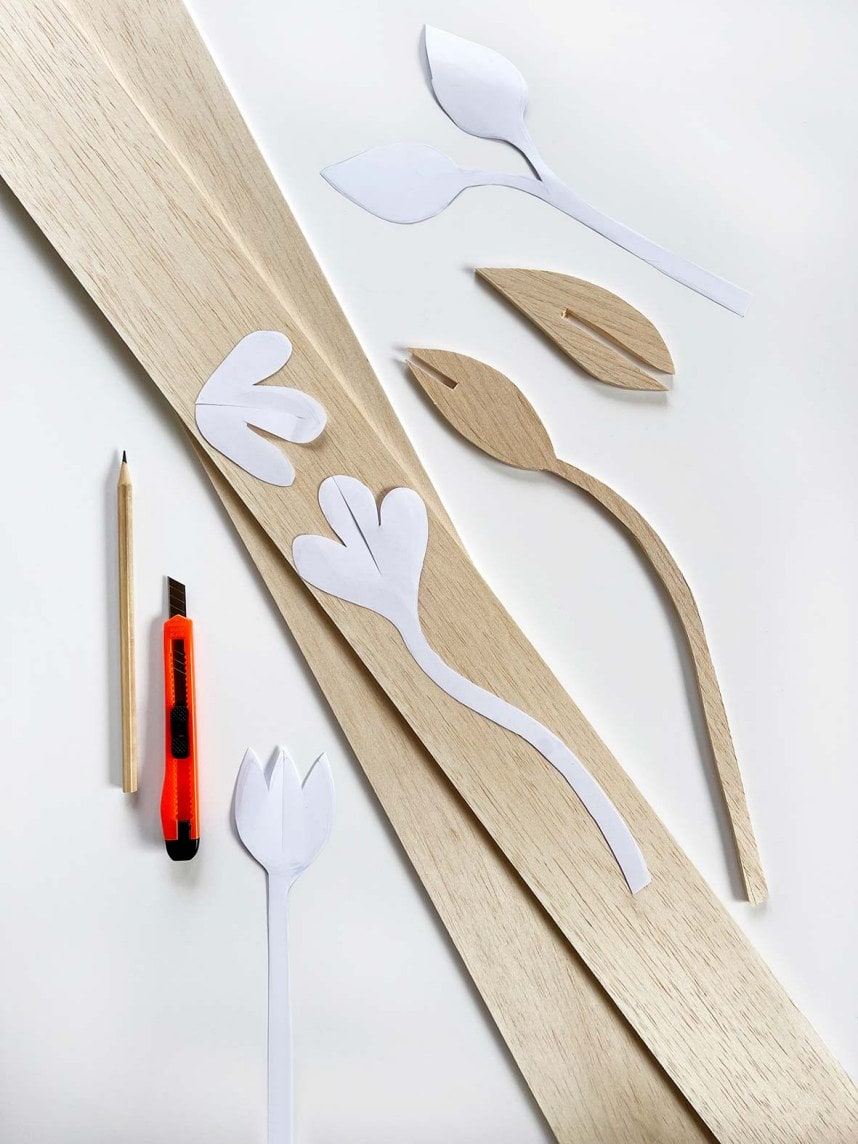
2. Each shape will have two parts, one long complete piece with stem and the other is just the head of either the flower or leaf repeated (no stem).
3. Using a sharp knife, carefully cut out your shapes. Take your time so you don’t split the wood. Snap off pieces of the blade regularly so you always have a sharp edge. This will ensure you have nice, clean edges and also you’ll avoid slipping.
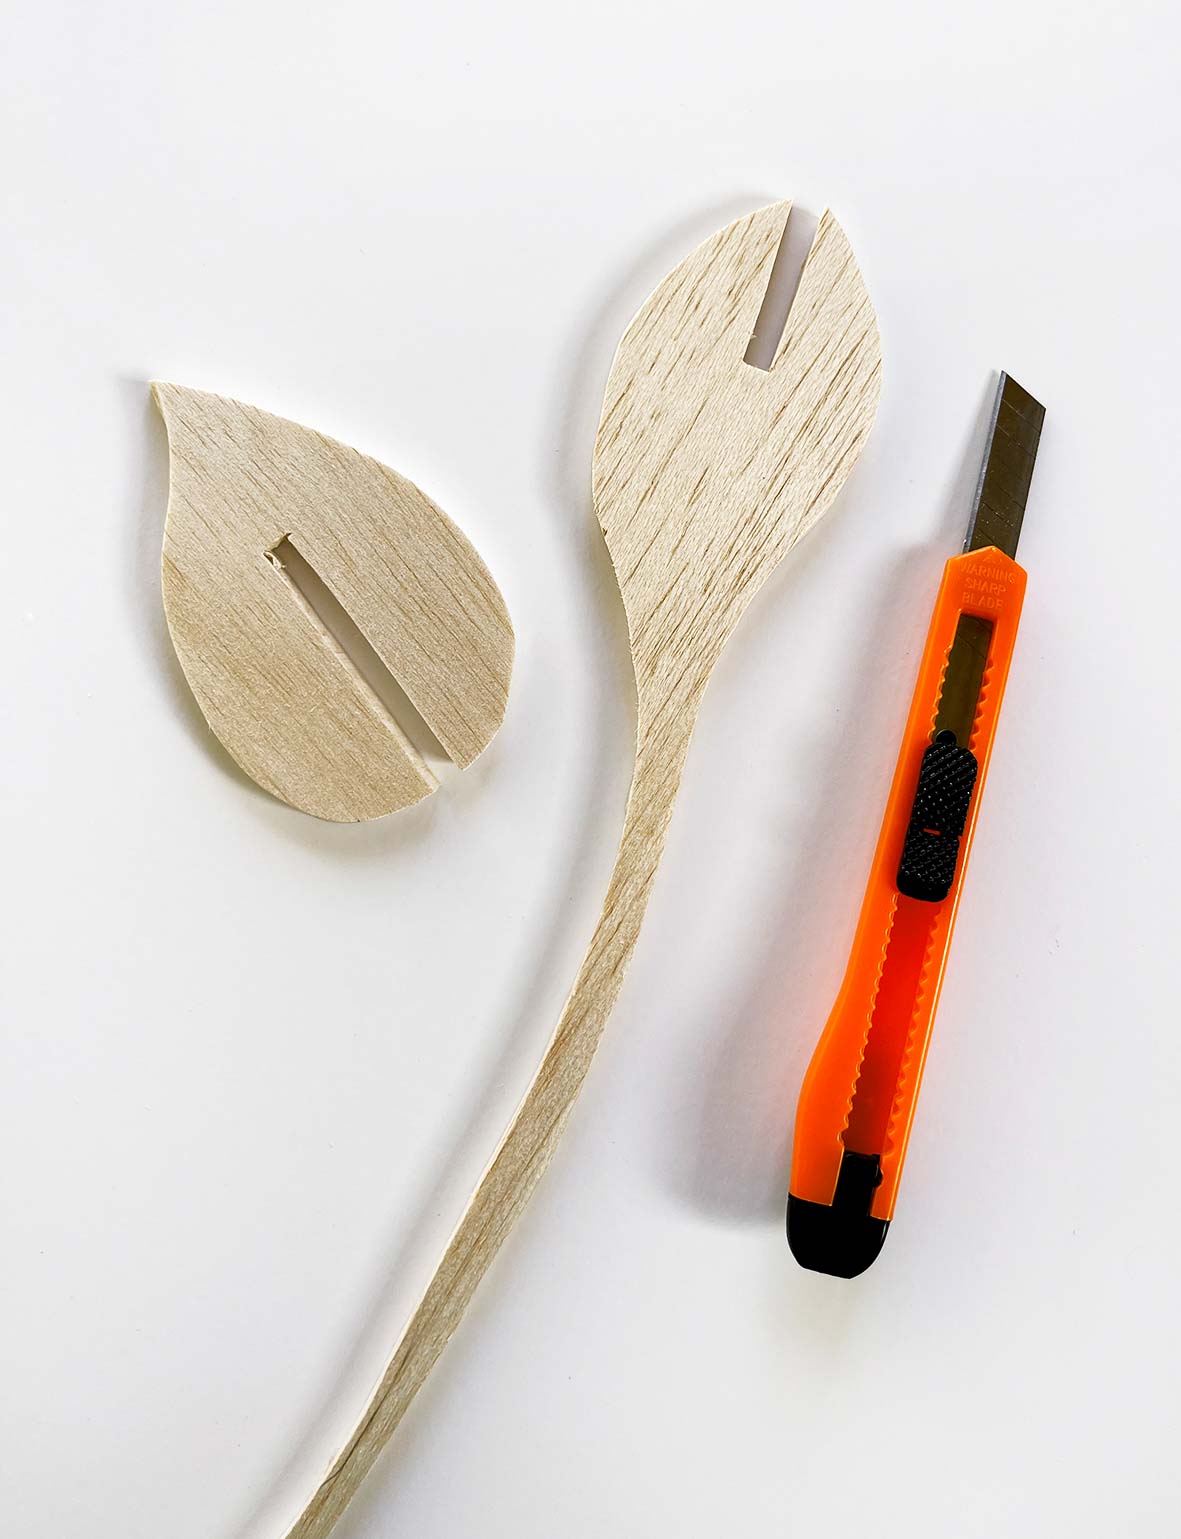
4. Cut a 5mm-wide wedge from both balsa wood pieces. One from the top of your long piece and one from the base of the leaf or flower head (B). This is so they slide and lock together creating a three- dimensional look (C).
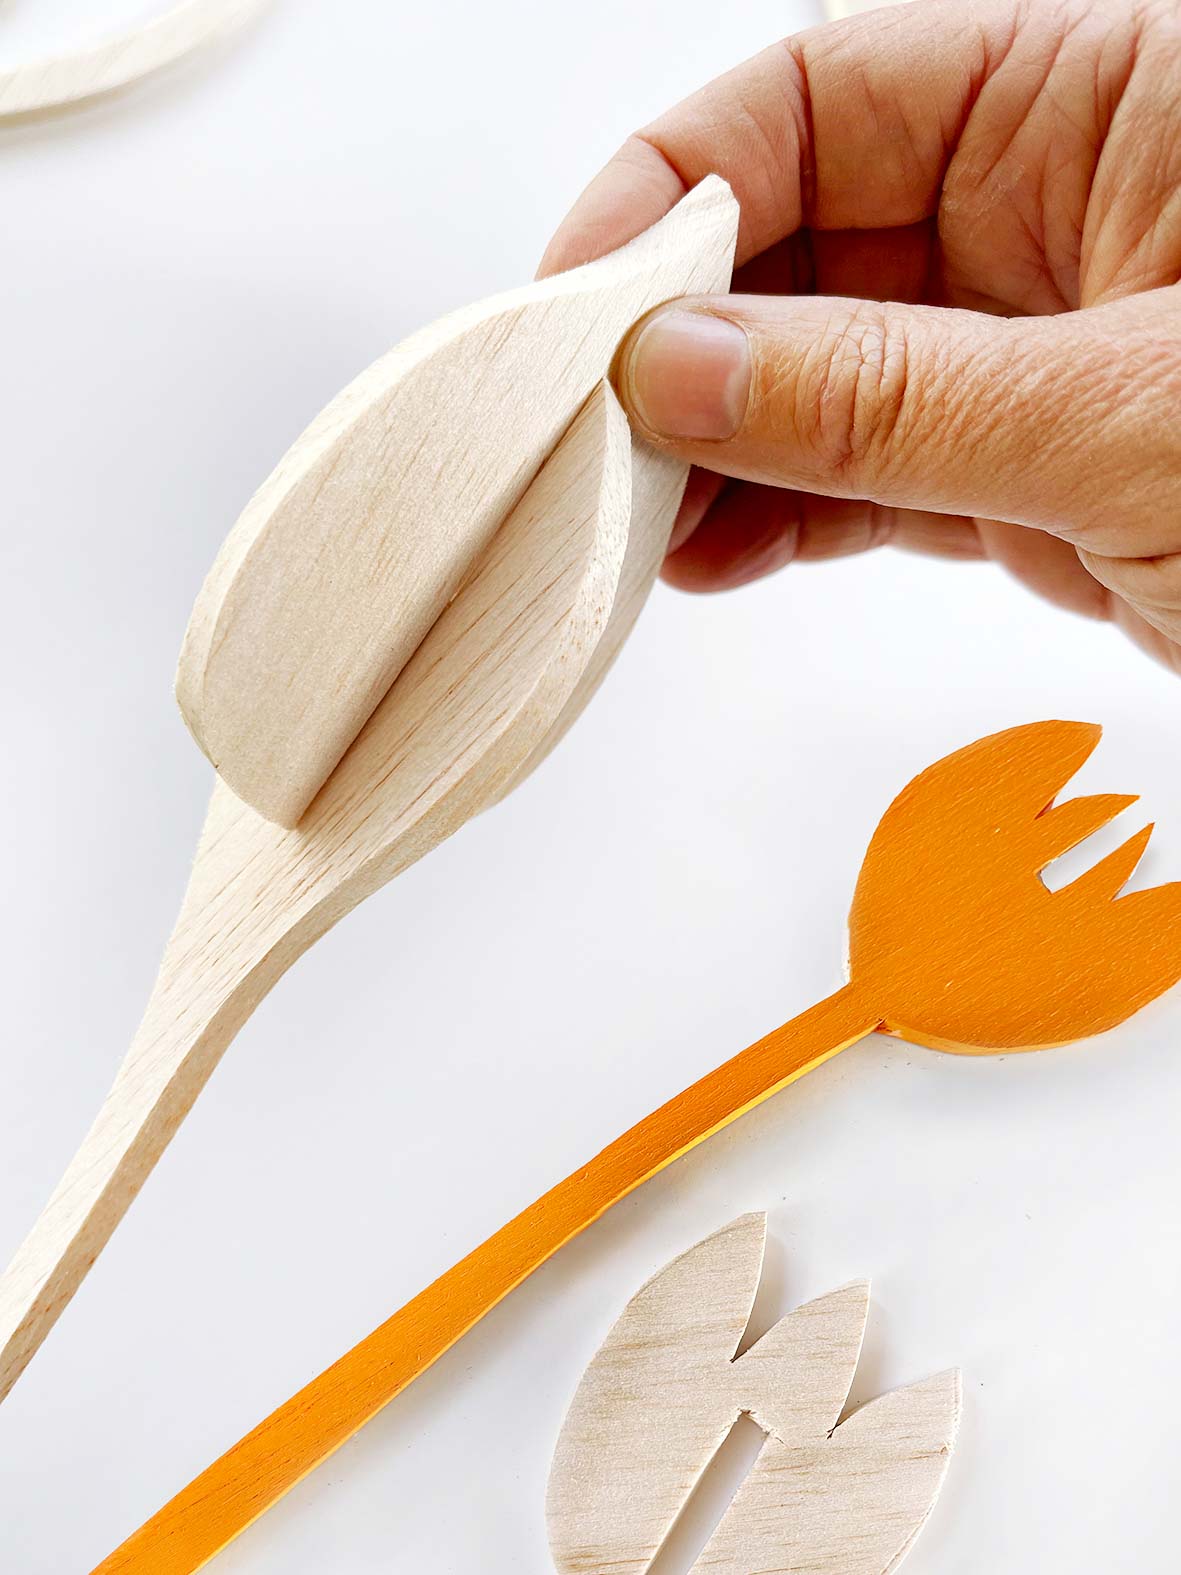
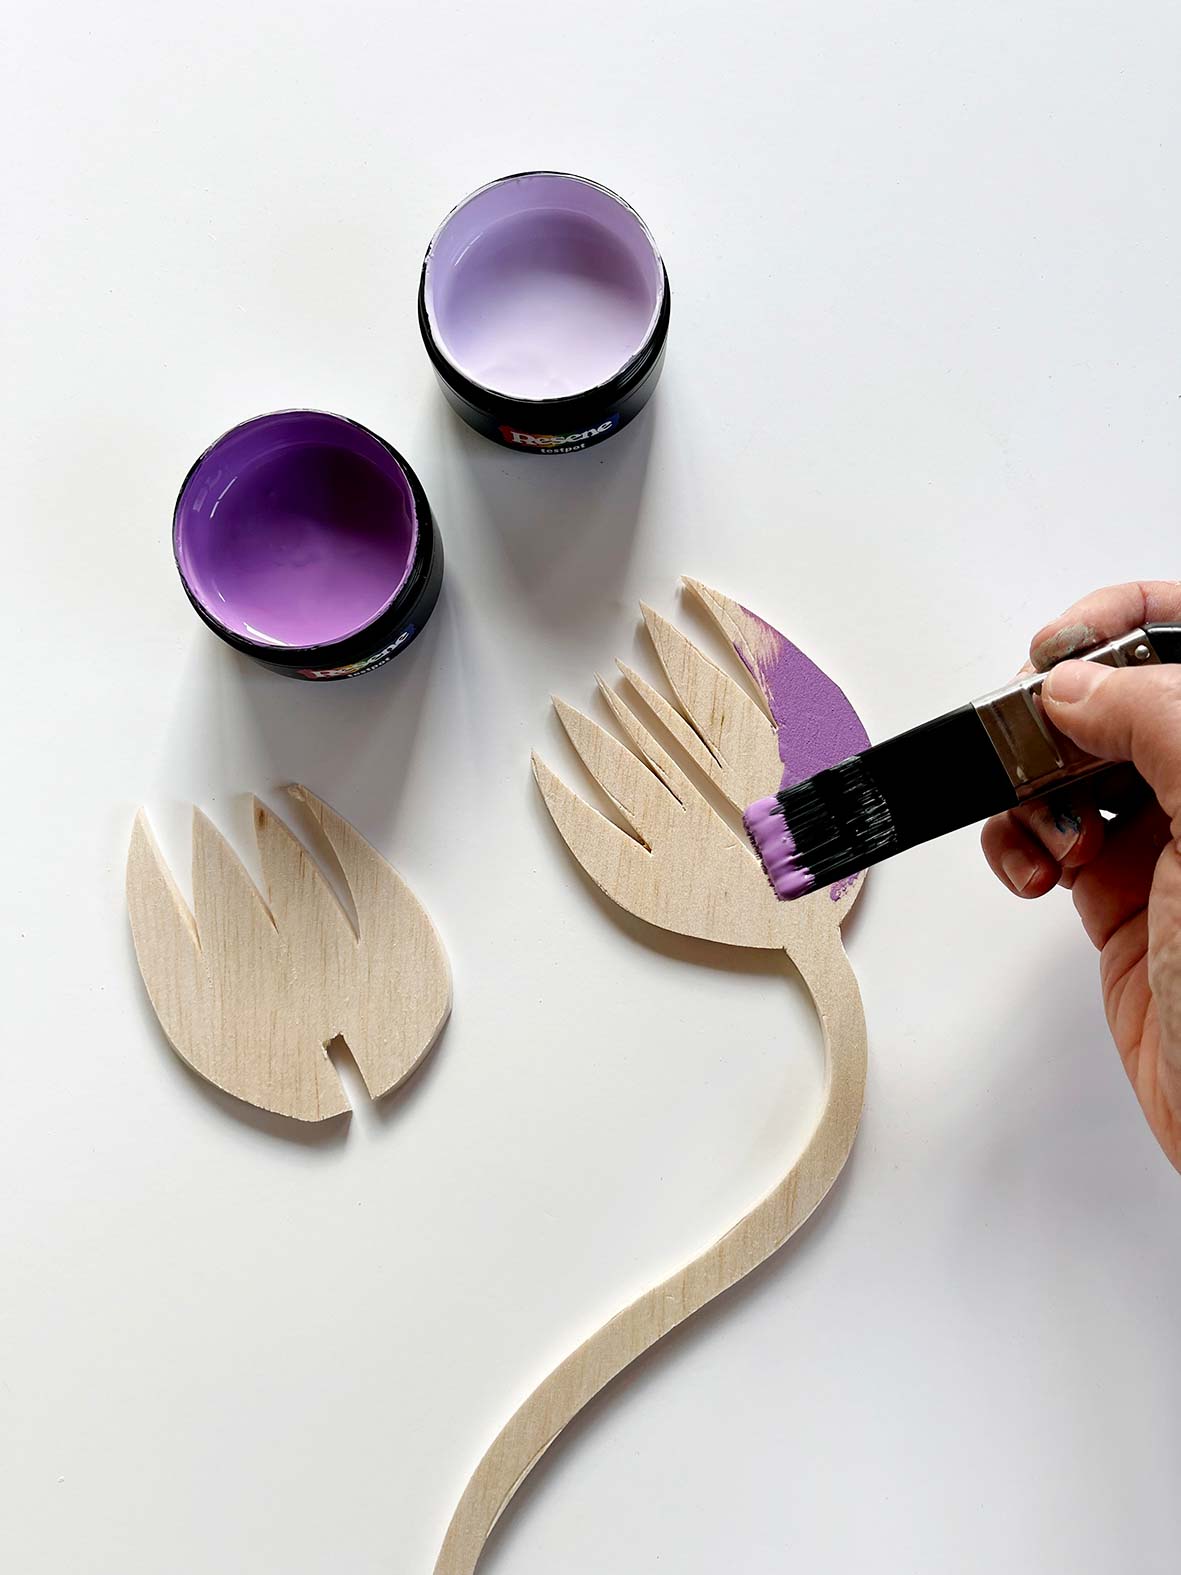
5. When painting your pieces, use two shades of a similar colour, such as Resene Boogie Wonderland and Resene Perfume (D). Paint the darker shade on your longest piece, making sure you paint both sides and all of the edges. Stand in a jar or cup to dry. Paint the smaller piece in the lighter shade, again covering both sides and all the edges. Once they’re dry, you can interlock them.
6. Repeat this technique for all of your leaves and floral stems (E). Arrange in small bunches and display with pride.
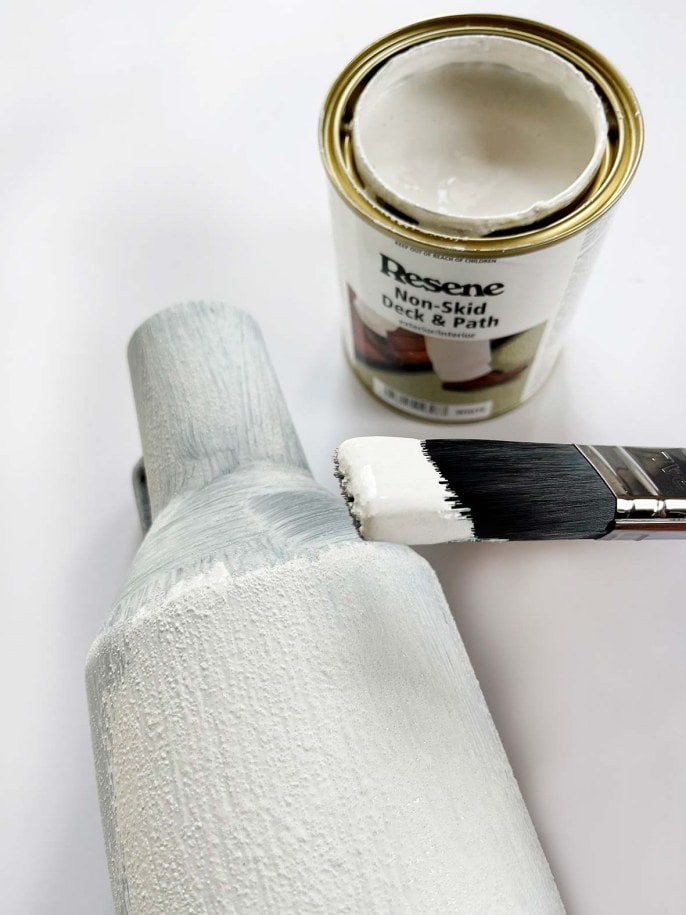
Vessels
To make the vases more on-trend, we painted each with three undercoats of Resene Non-Skid Deck & Path, leaving to dry between coats (F). This resulted in an interesting textural finish that made them more luxe and created a nice contrast between the vessel and the smooth floral shapes. Finish by applying two topcoats of your chosen Resene shade, such as Resene Glorious. If you are using smooth bottles or glazed vases, paint them first with Resene Smooth Surface Sealer, to create a “tooth” for the topcoats to stick to.
Resene tip: To make an ombre finish like the base shown here, paint the area with the darkest shade first. We used Resene Florentine Pink. Mix one part Resene FX Paint Effects medium with one part Resene Tacao (lighter shade). Painting from the bottom and working your way up, use the mixture to create a gradual change of colour.
Related article: DIY A Trinket Tray