Make stunning sets of trinket trays with a nod to the traditional craft of basket-making simply using clay and Resene shades of green.
You will need:
Two-tone basket weave bowl
Large crosshatch tray
- Resene Grey Olive
- Resene El Paso
Dimpled bowl
- Resene Yucca
- Resene Conch
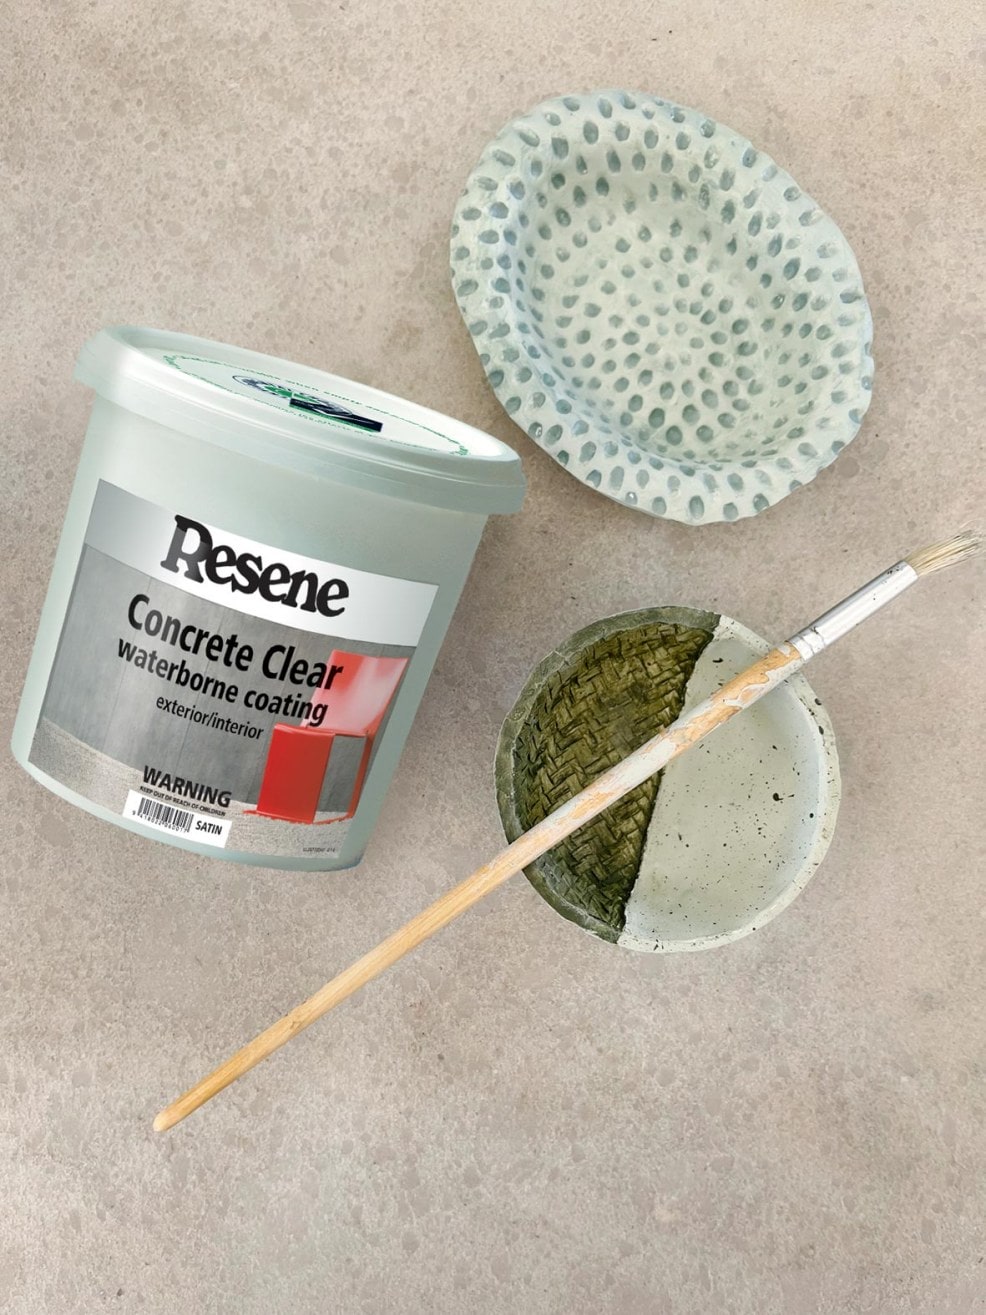
- Resene Concrete Clear gloss
- Resene art brush set
- Baking clay
- Rolling pin
- Craft or butter knife
- Woven mat or basket for textural imprint
- Paper towels
- Range of shallow bake-safe bowls or tins
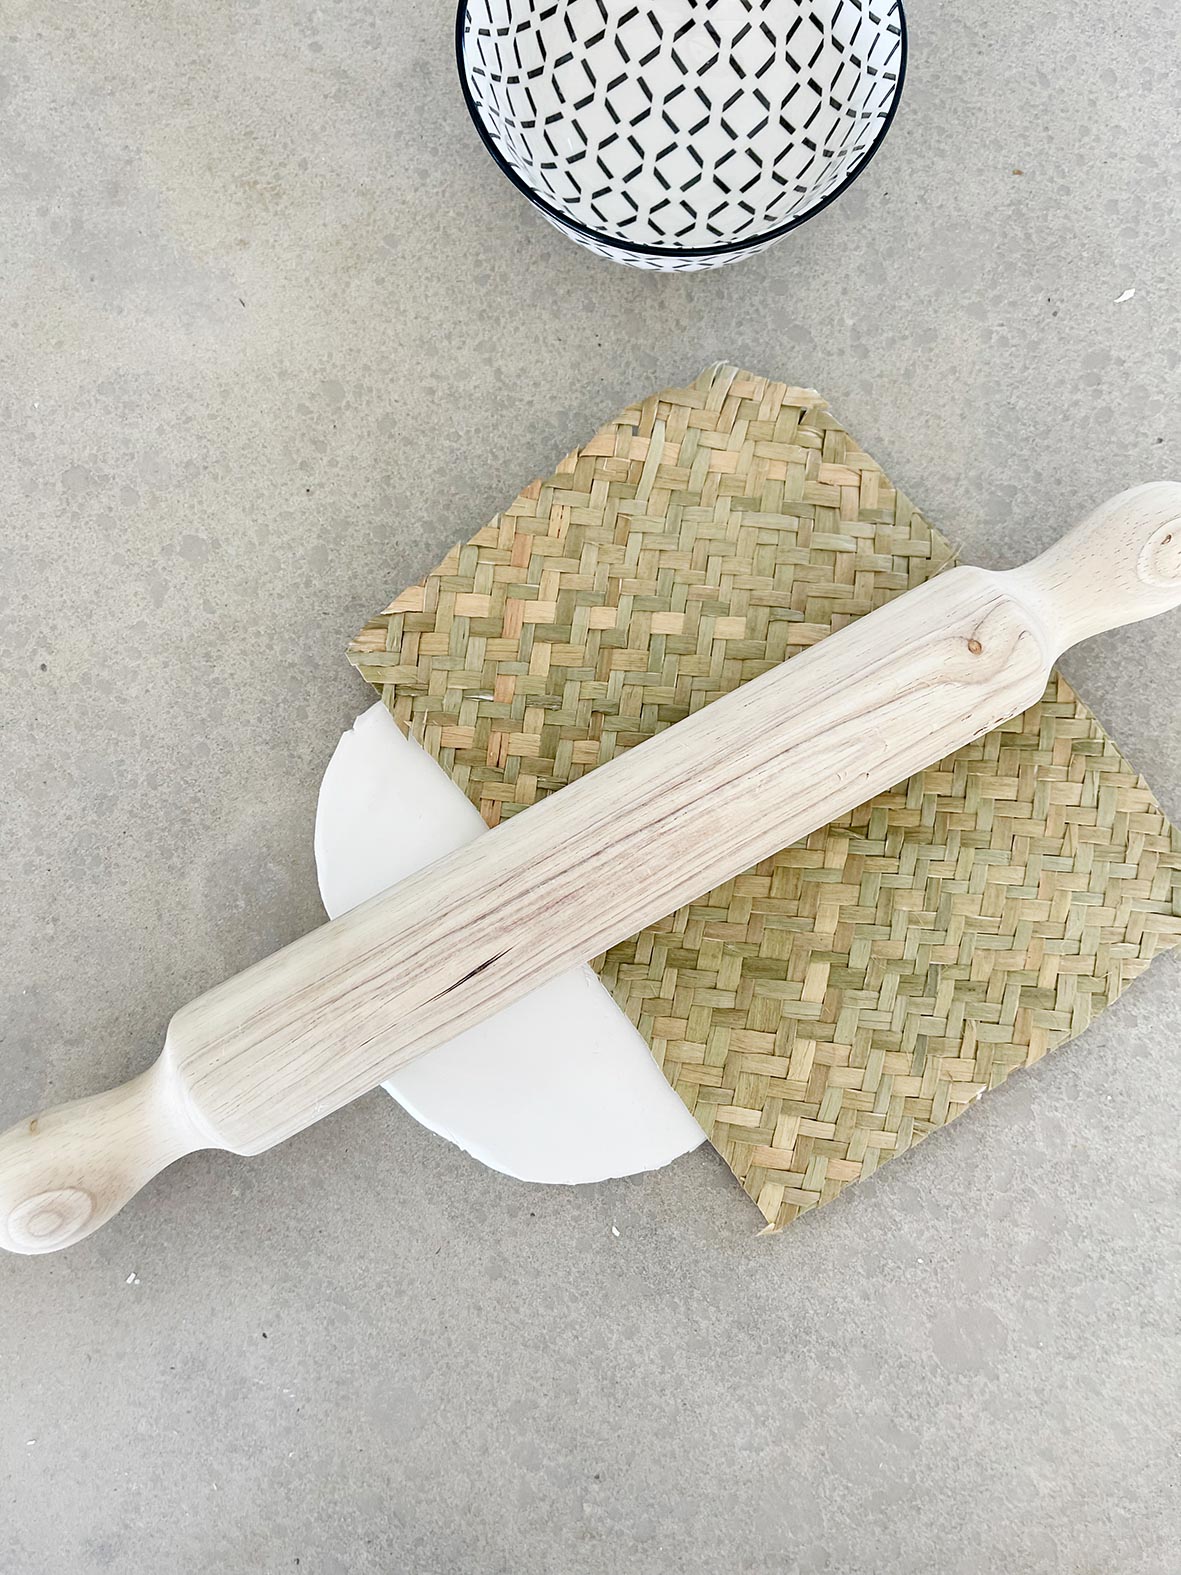
For each bowl or tray, knead your clay to a nice, pliable consistency, then roll it out, ensuring it is large enough and has an even thickness (about 7mm).
Two-tone basket weave bowl
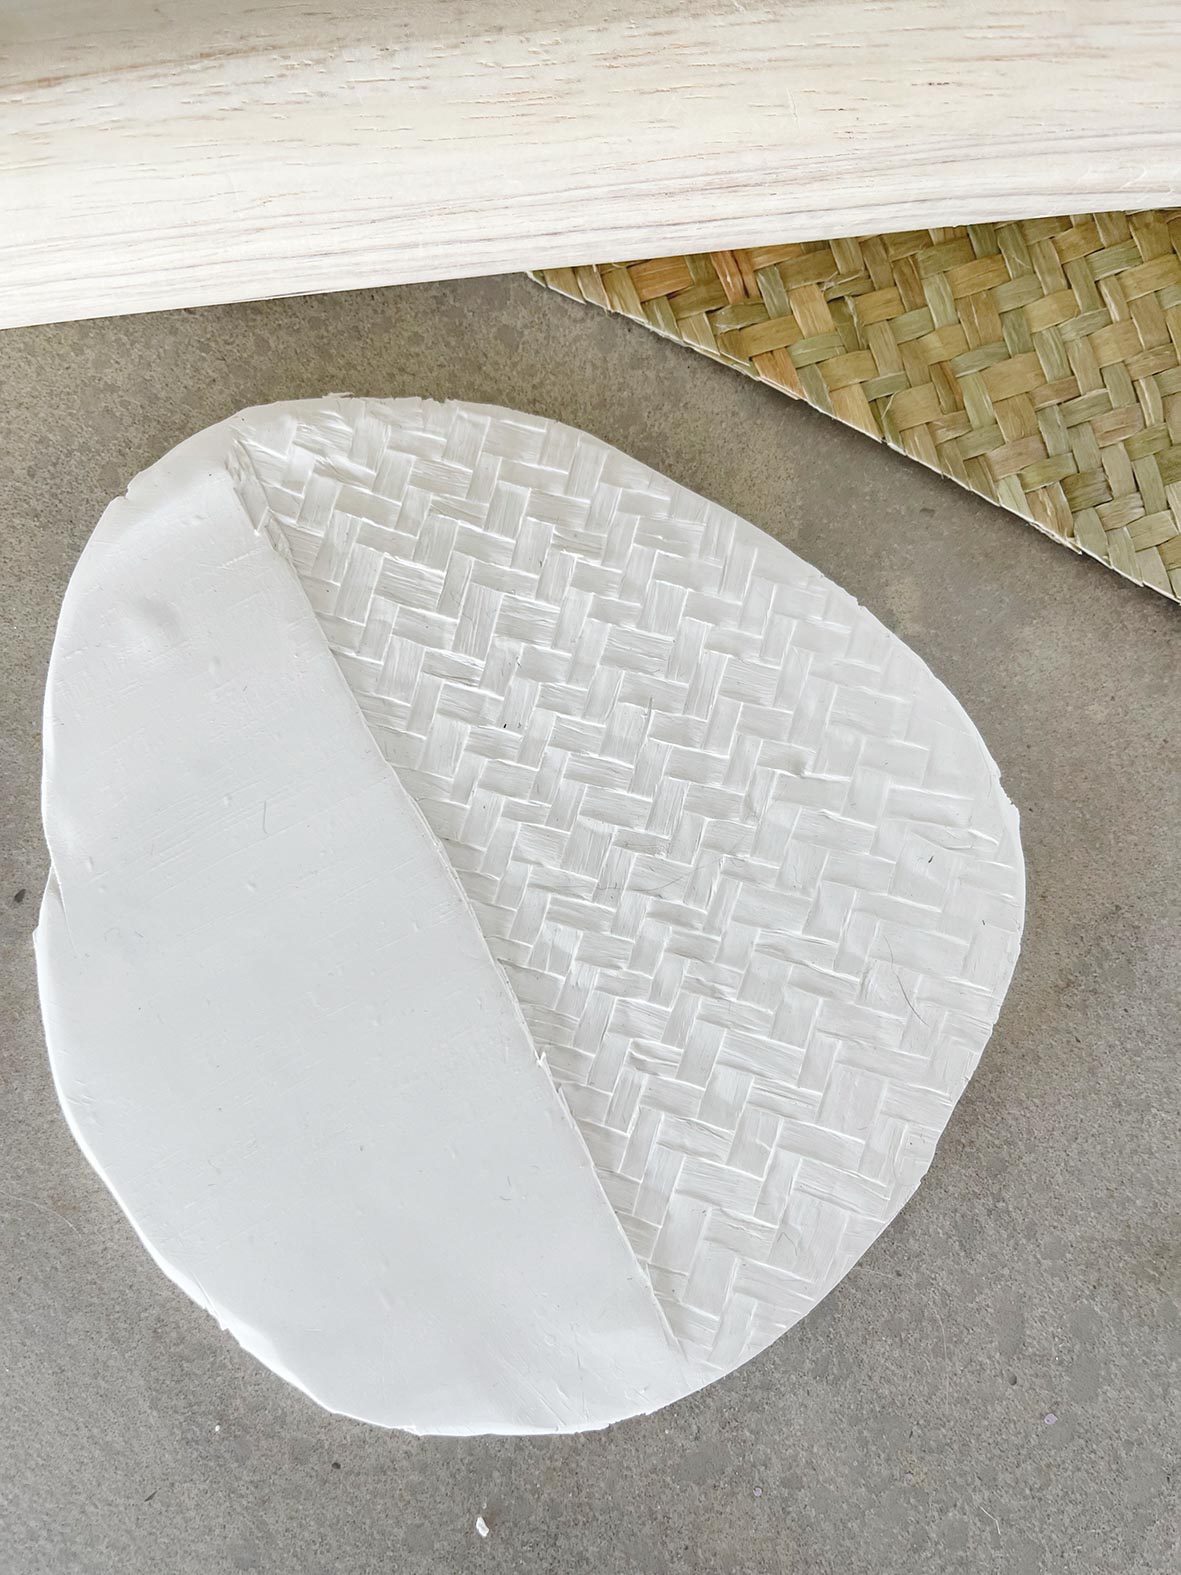
1. Roll out the clay, leaving it slightly thicker to allow for the indentation. Place some woven matting halfway across, then press firmly with a rolling pin to indent. It will now be the right thickness.
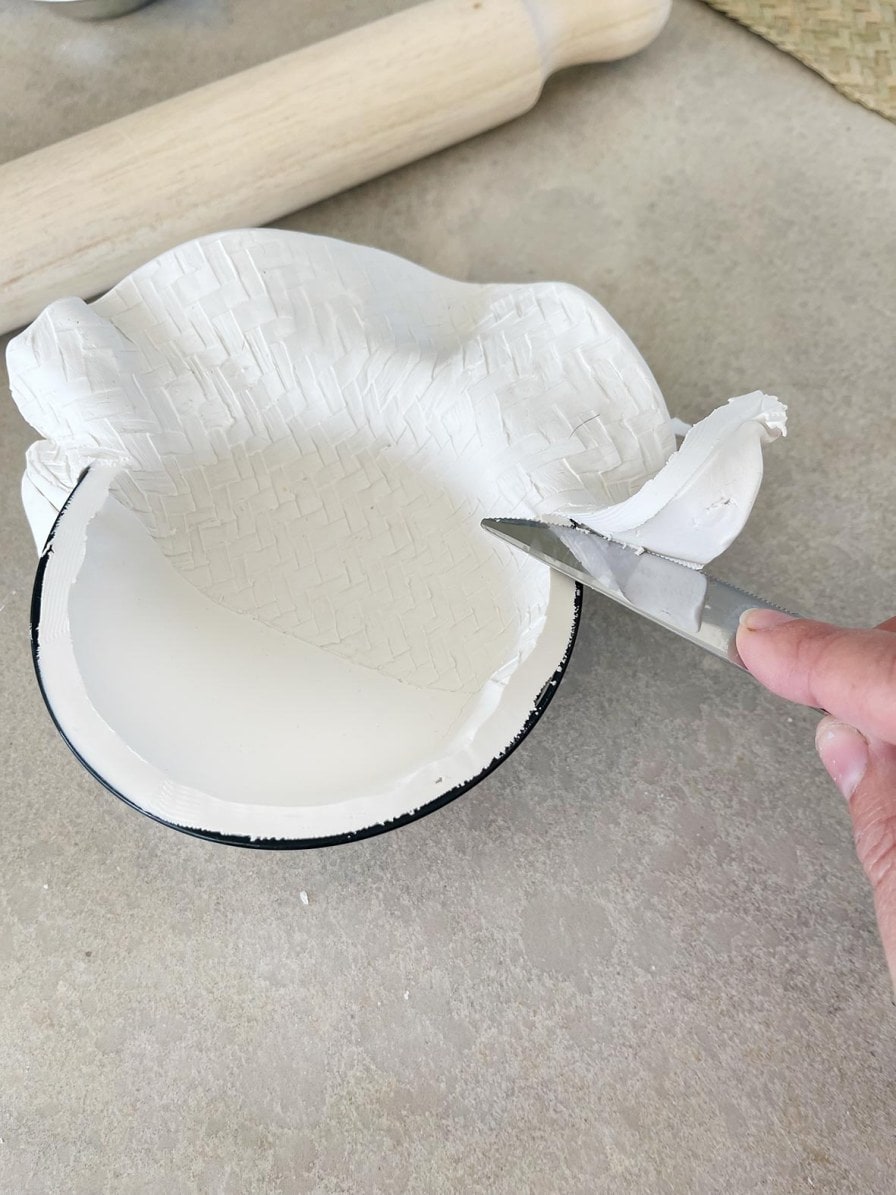
2. Carefully transfer the rolled-out pattern to a bowl. Try to let it sag naturally but without forcing it or making unnecessary fingerprints and folds. Using a knife, cut remove excess clay from the top edge. Smooth the edge with your finger (C).
3. Bake for 15 minutes at 130°C or as directed on the packet instructions.
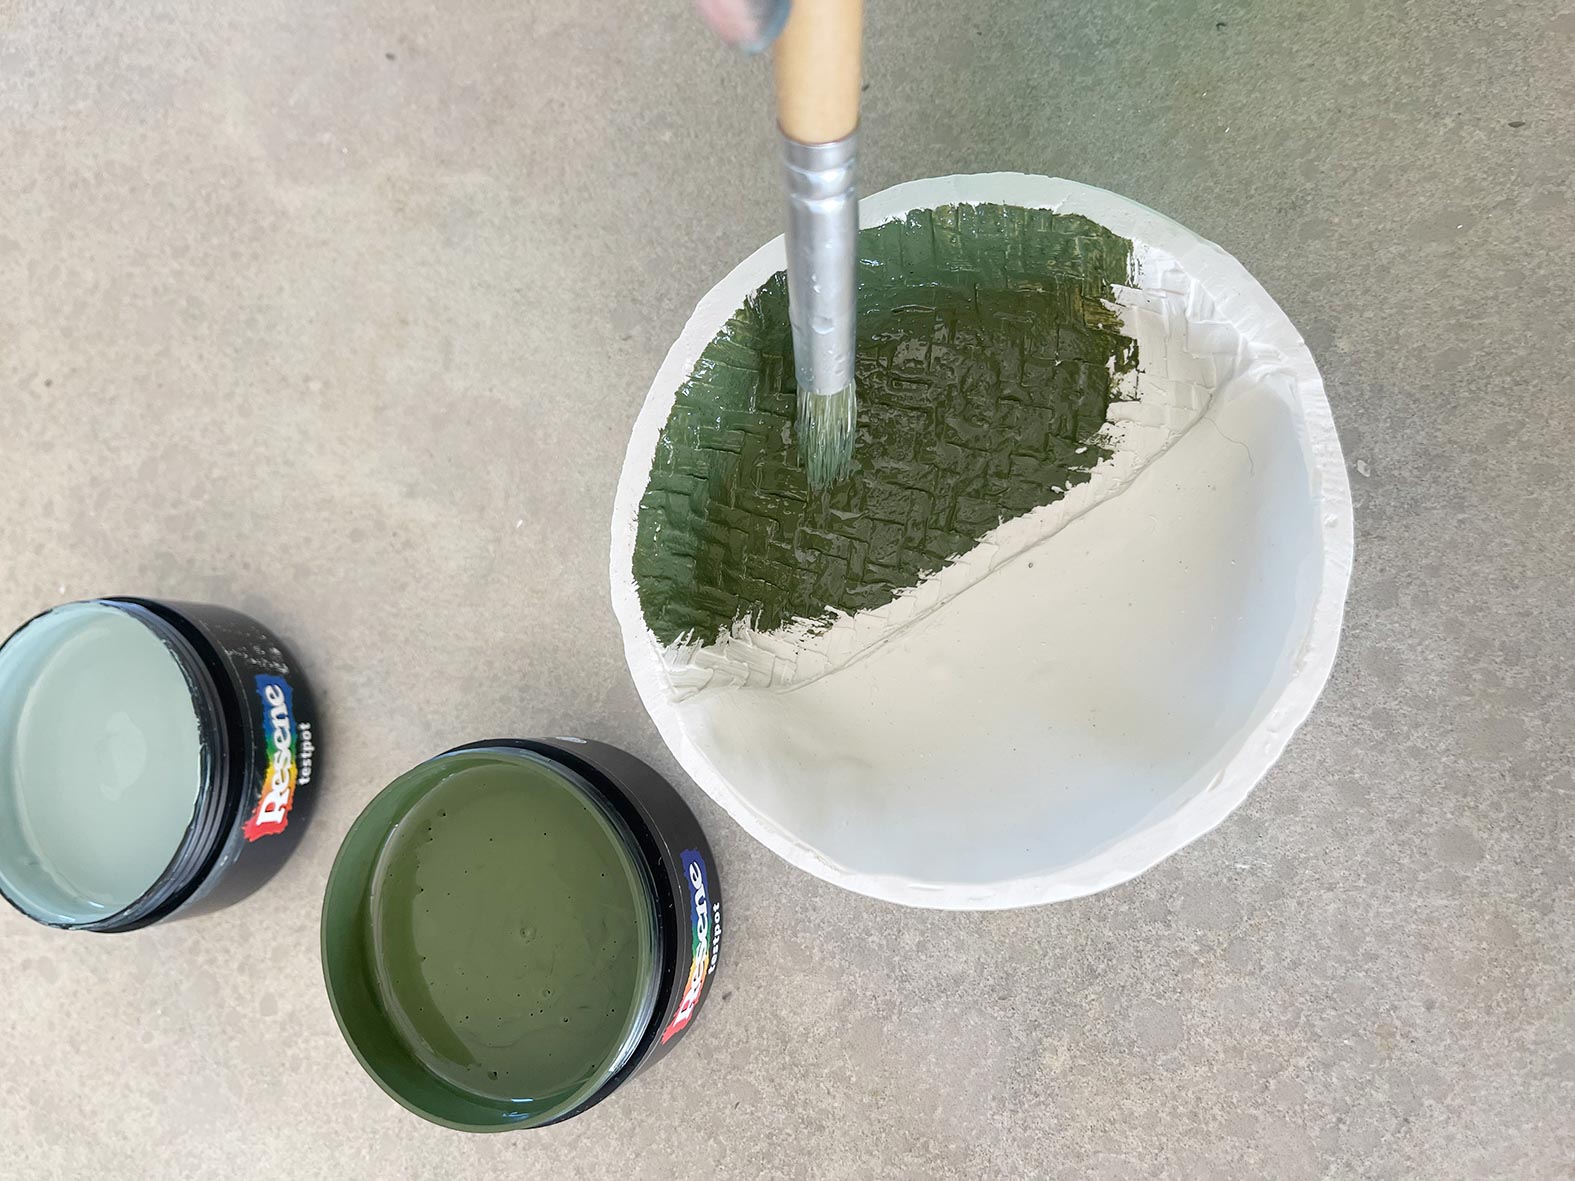
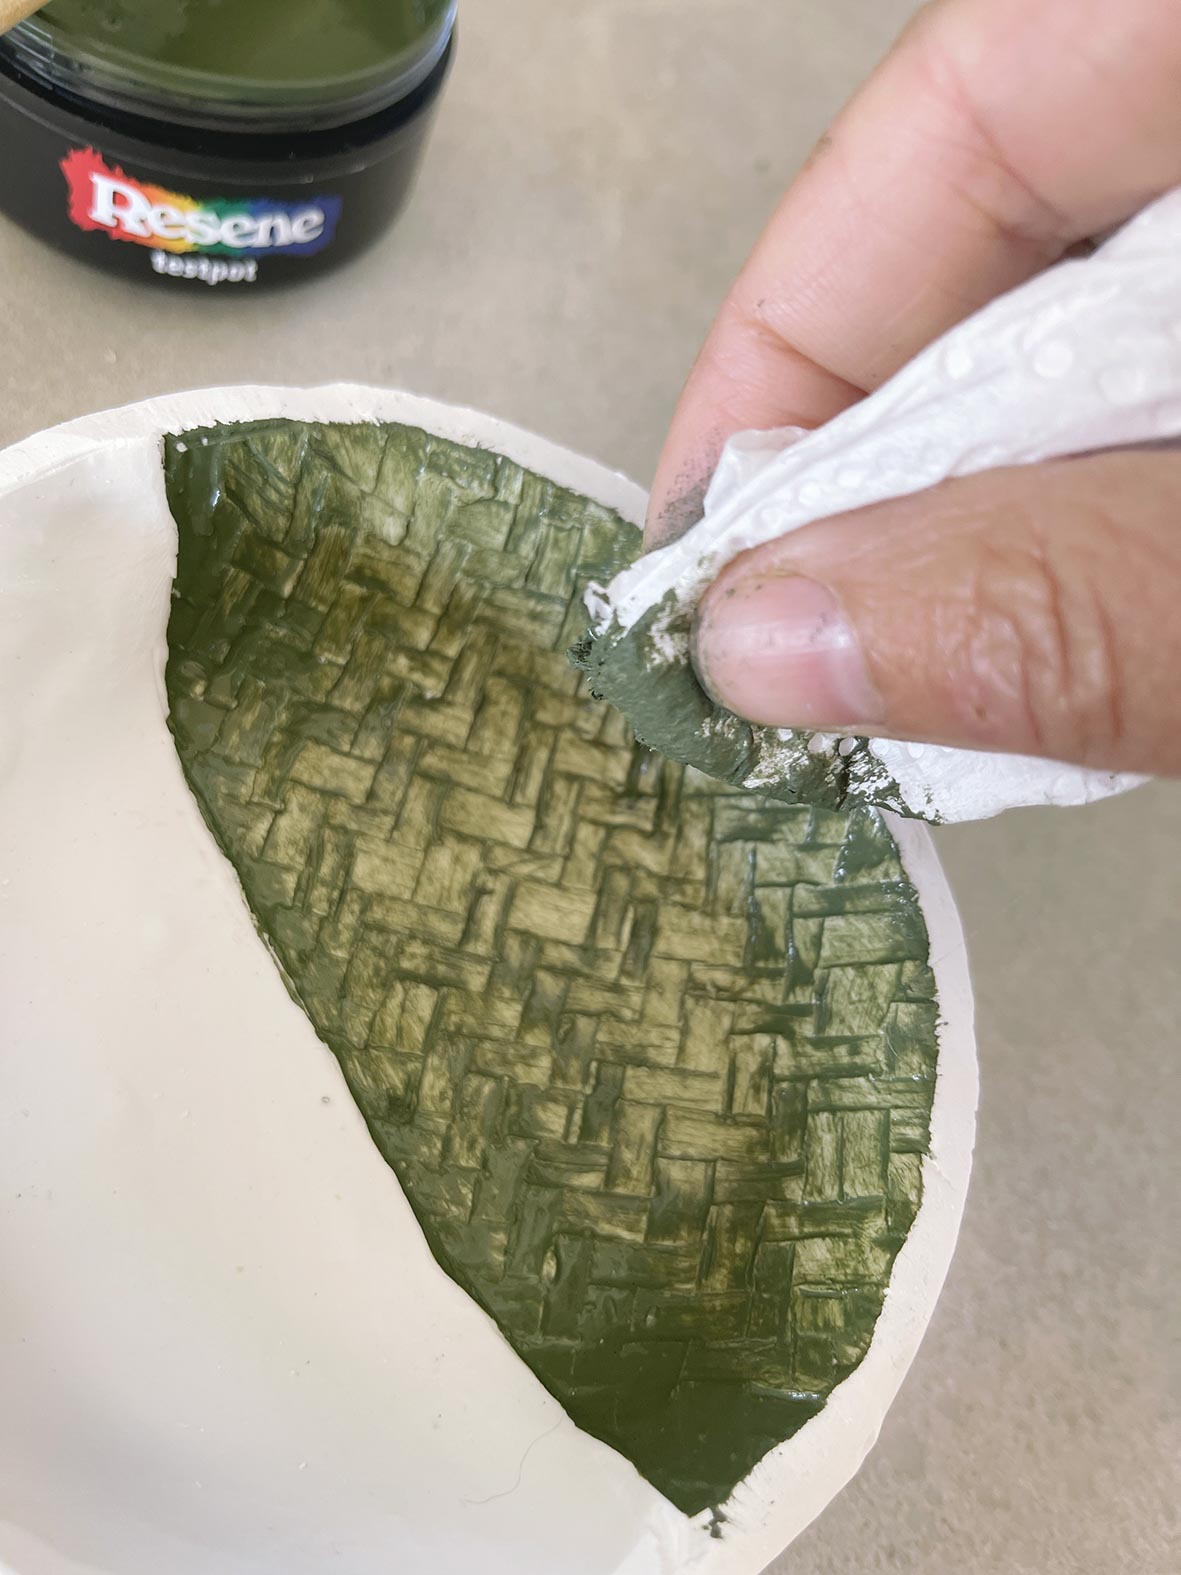
4. Once it’s cool and hardened, paint the textured side in Resene Olive Green. Use a paper towel or clean rag to rub off excess paint, allowing a lighter top finish with darker grooves. Leave to dry before painting the other half in Resene Green Spring.
5. When both sides are dry, dip your larger art brush in Resene El Paso and use your finger to flick the paint onto the non-textured side. This speckled effect creates a realistic ceramic look.

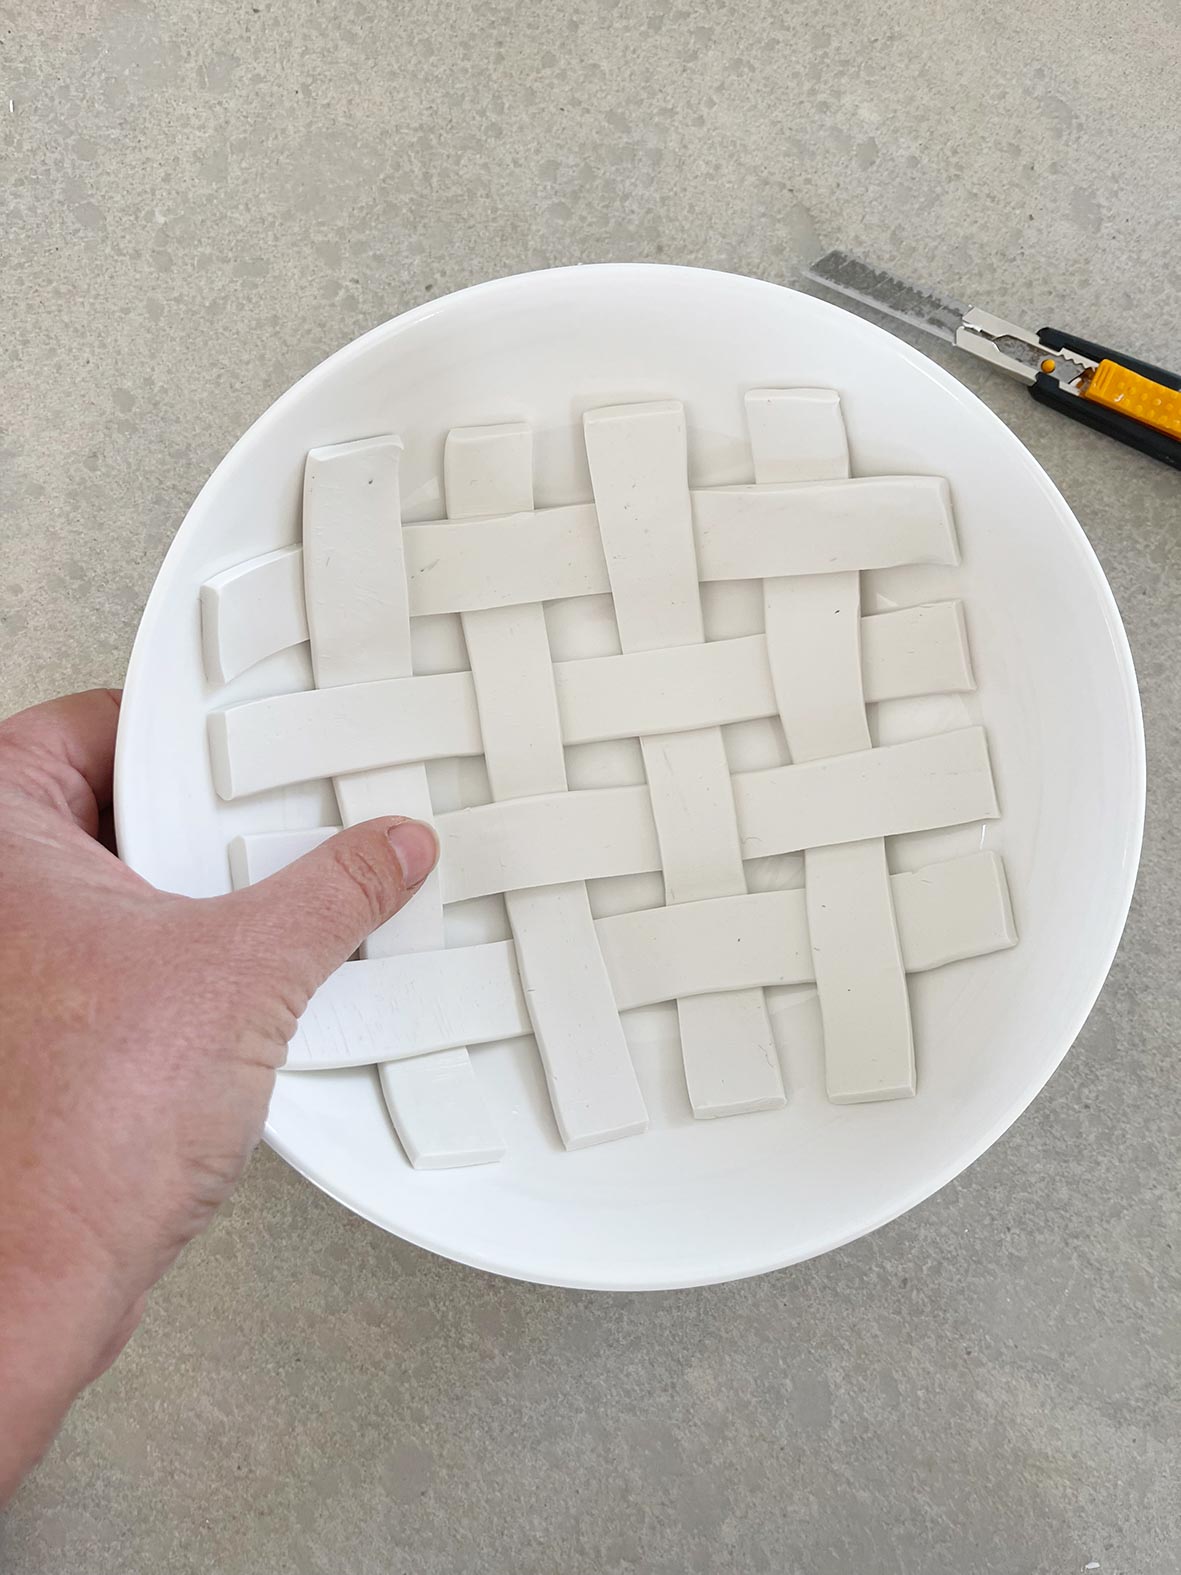
Large crosshatch tray
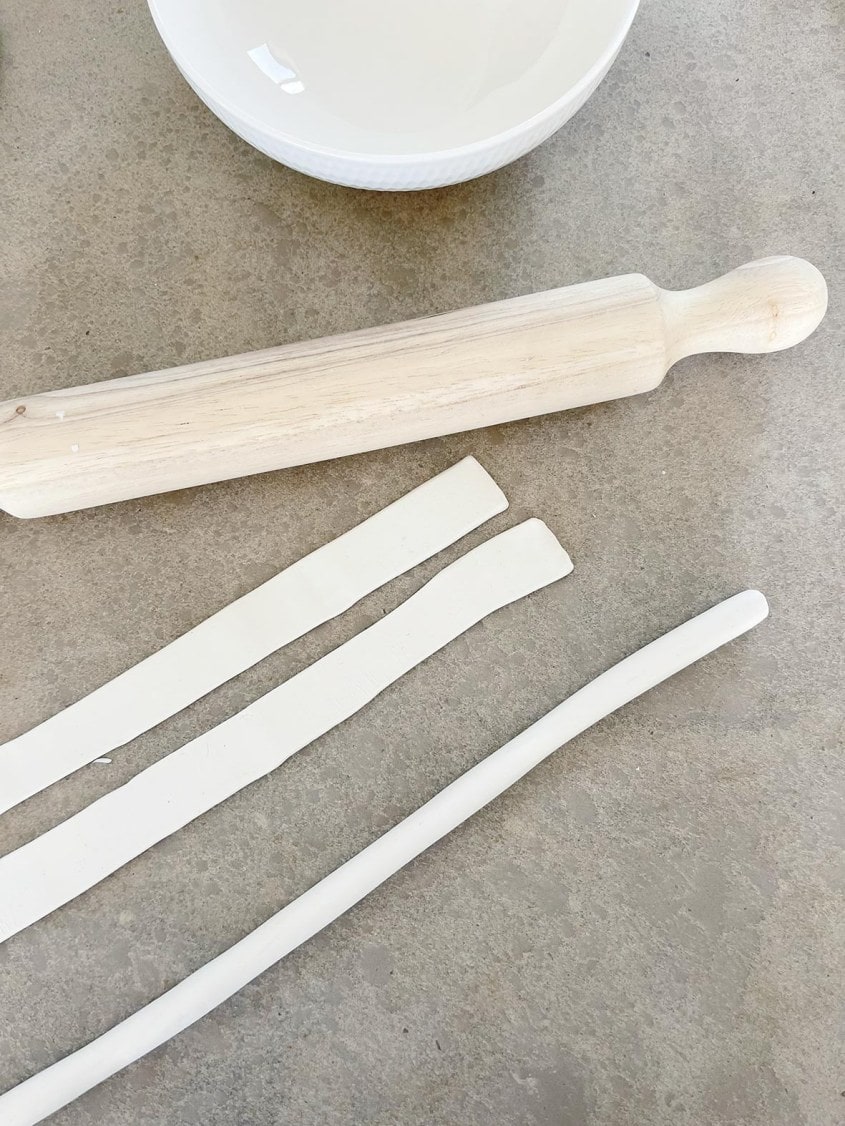
1. Roll out eight long strips of clay, then cut to the same width, about 2cm.
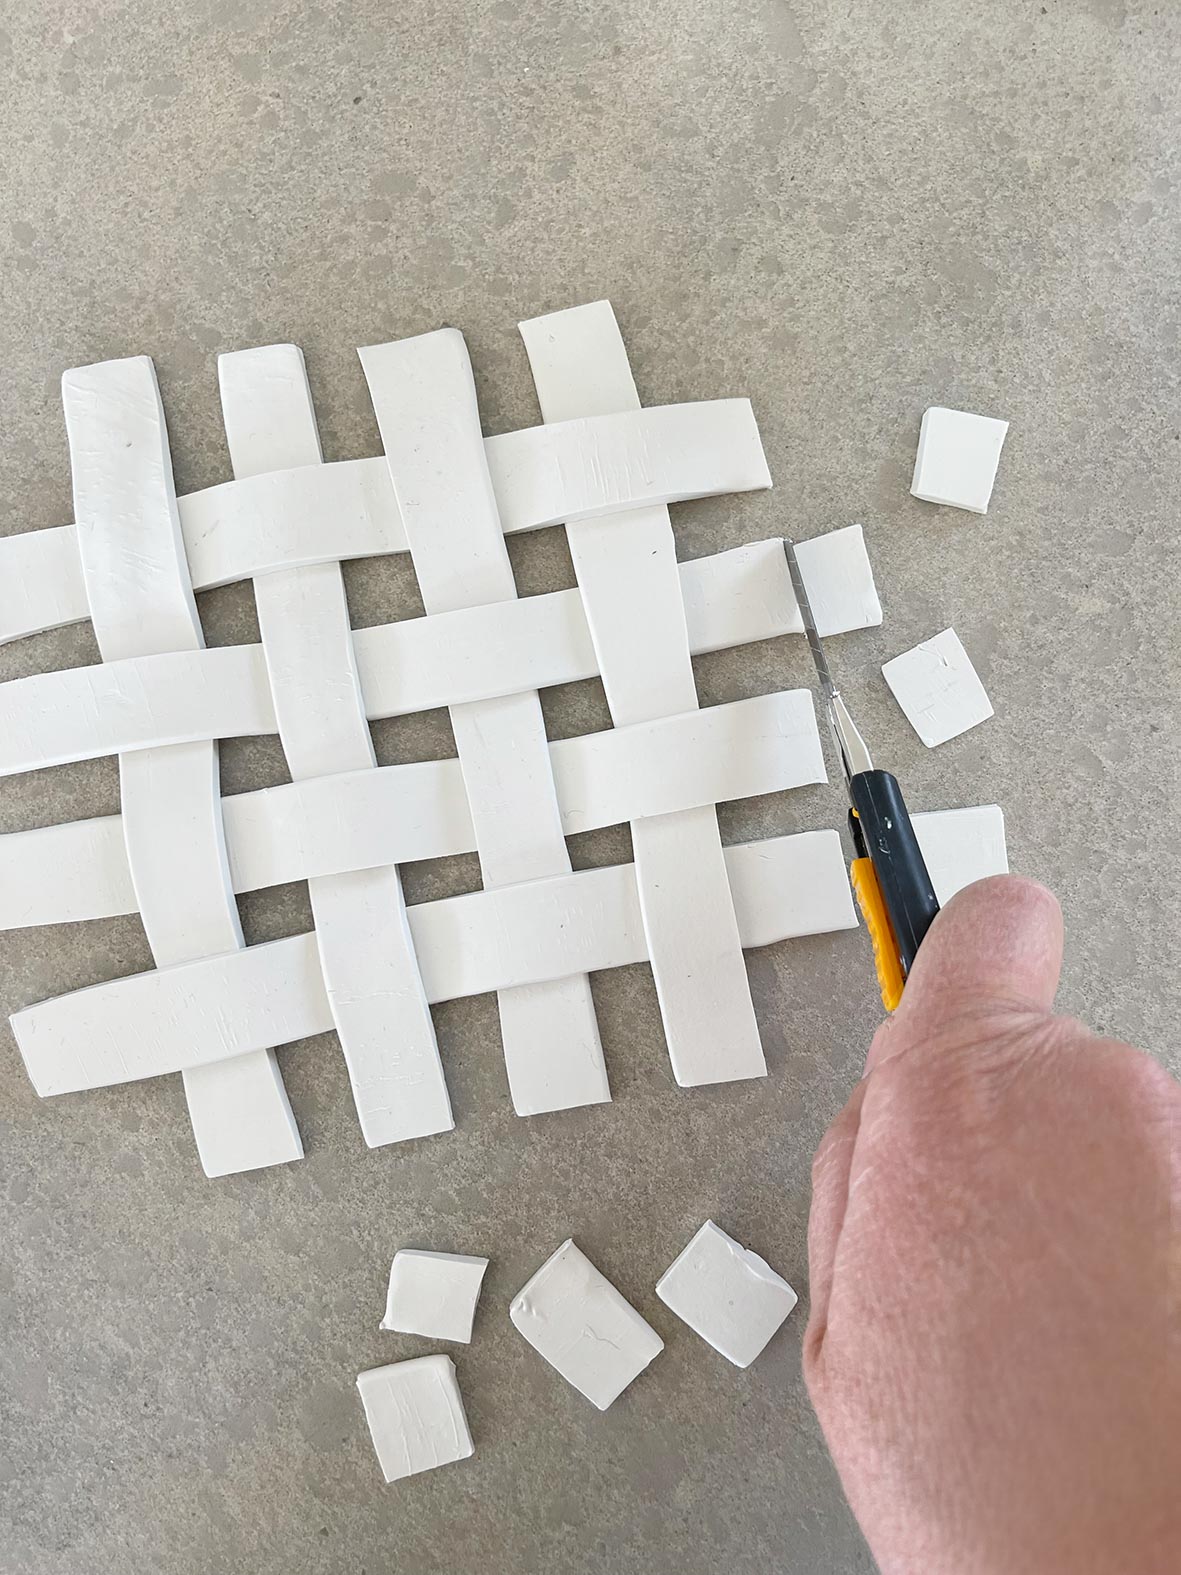
2. Lay four strips vertically for the base with about a 2cm gap between each. Then lay another four strips on top, horizontally weaving over and under and again leaving a space between. Press each overlap gently to secure, then trim the ends to make an even square. Place into a shallow bowl and bake as above.
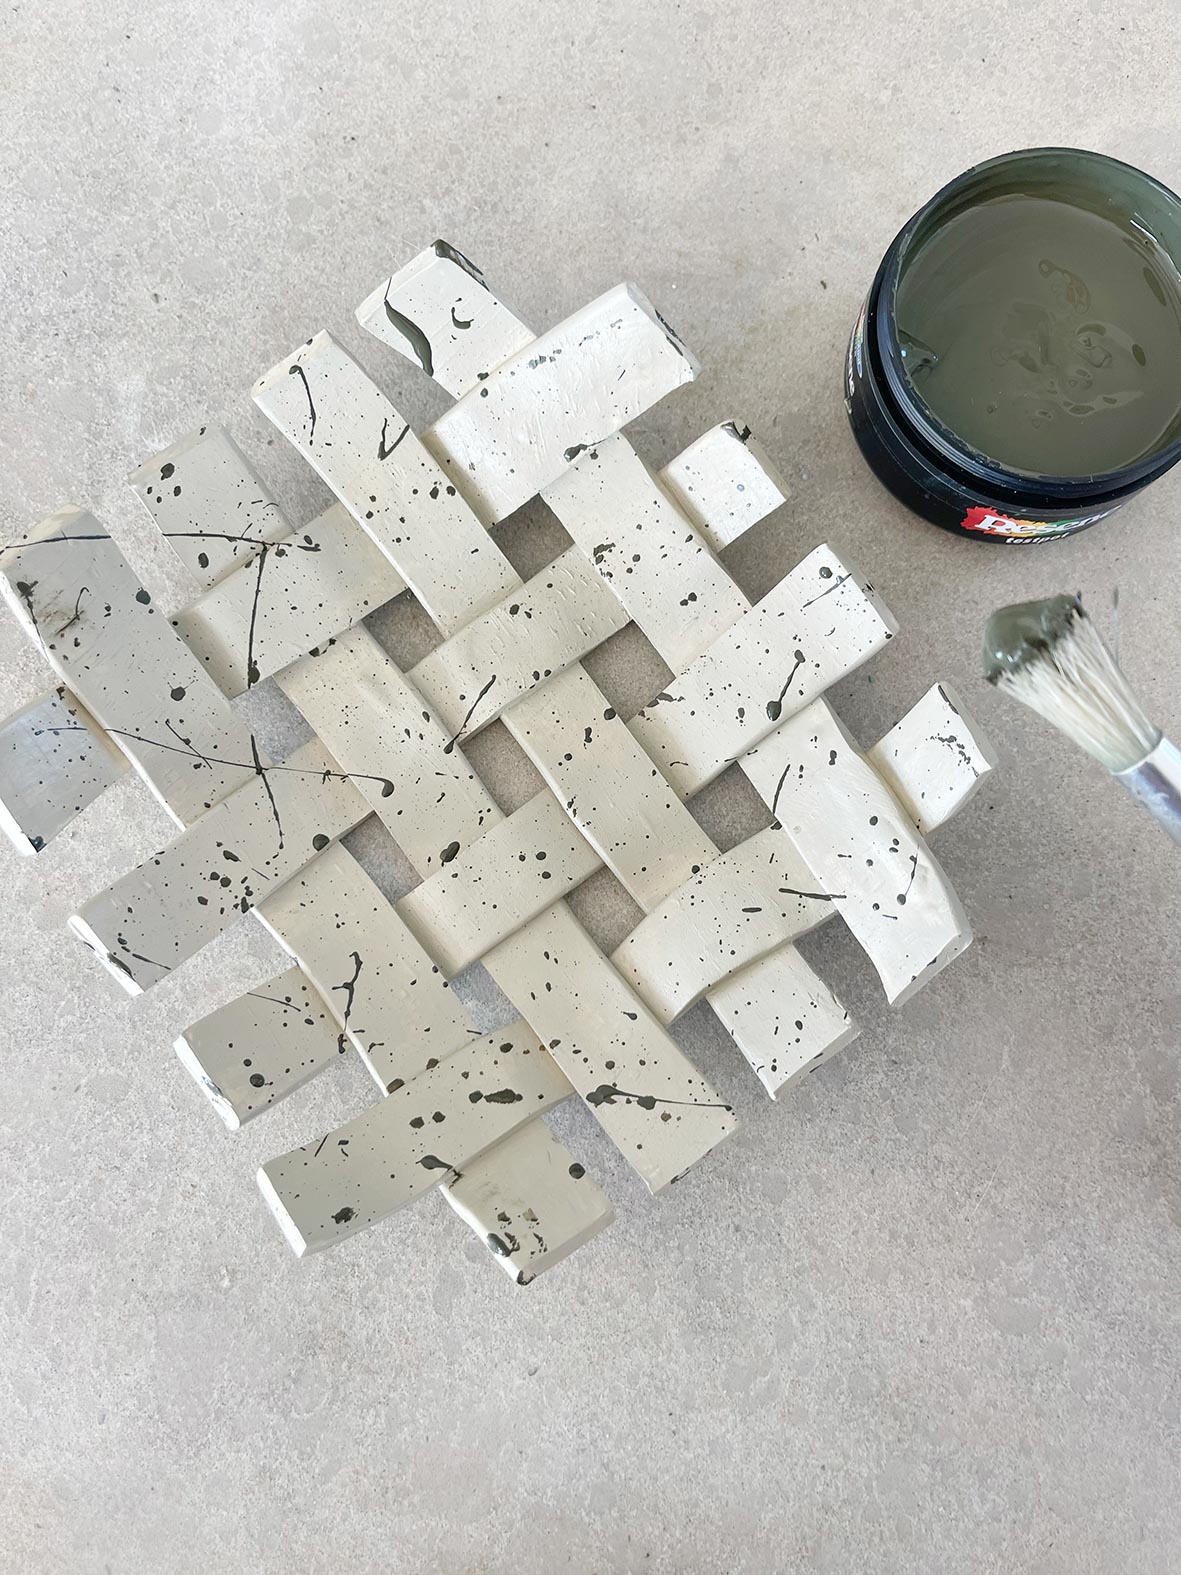
3. Once it’s cool and hardened, paint the entire tray in Resene Grey Olive, then once dry, use the same flicking technique to make splatters with Resene El Paso.
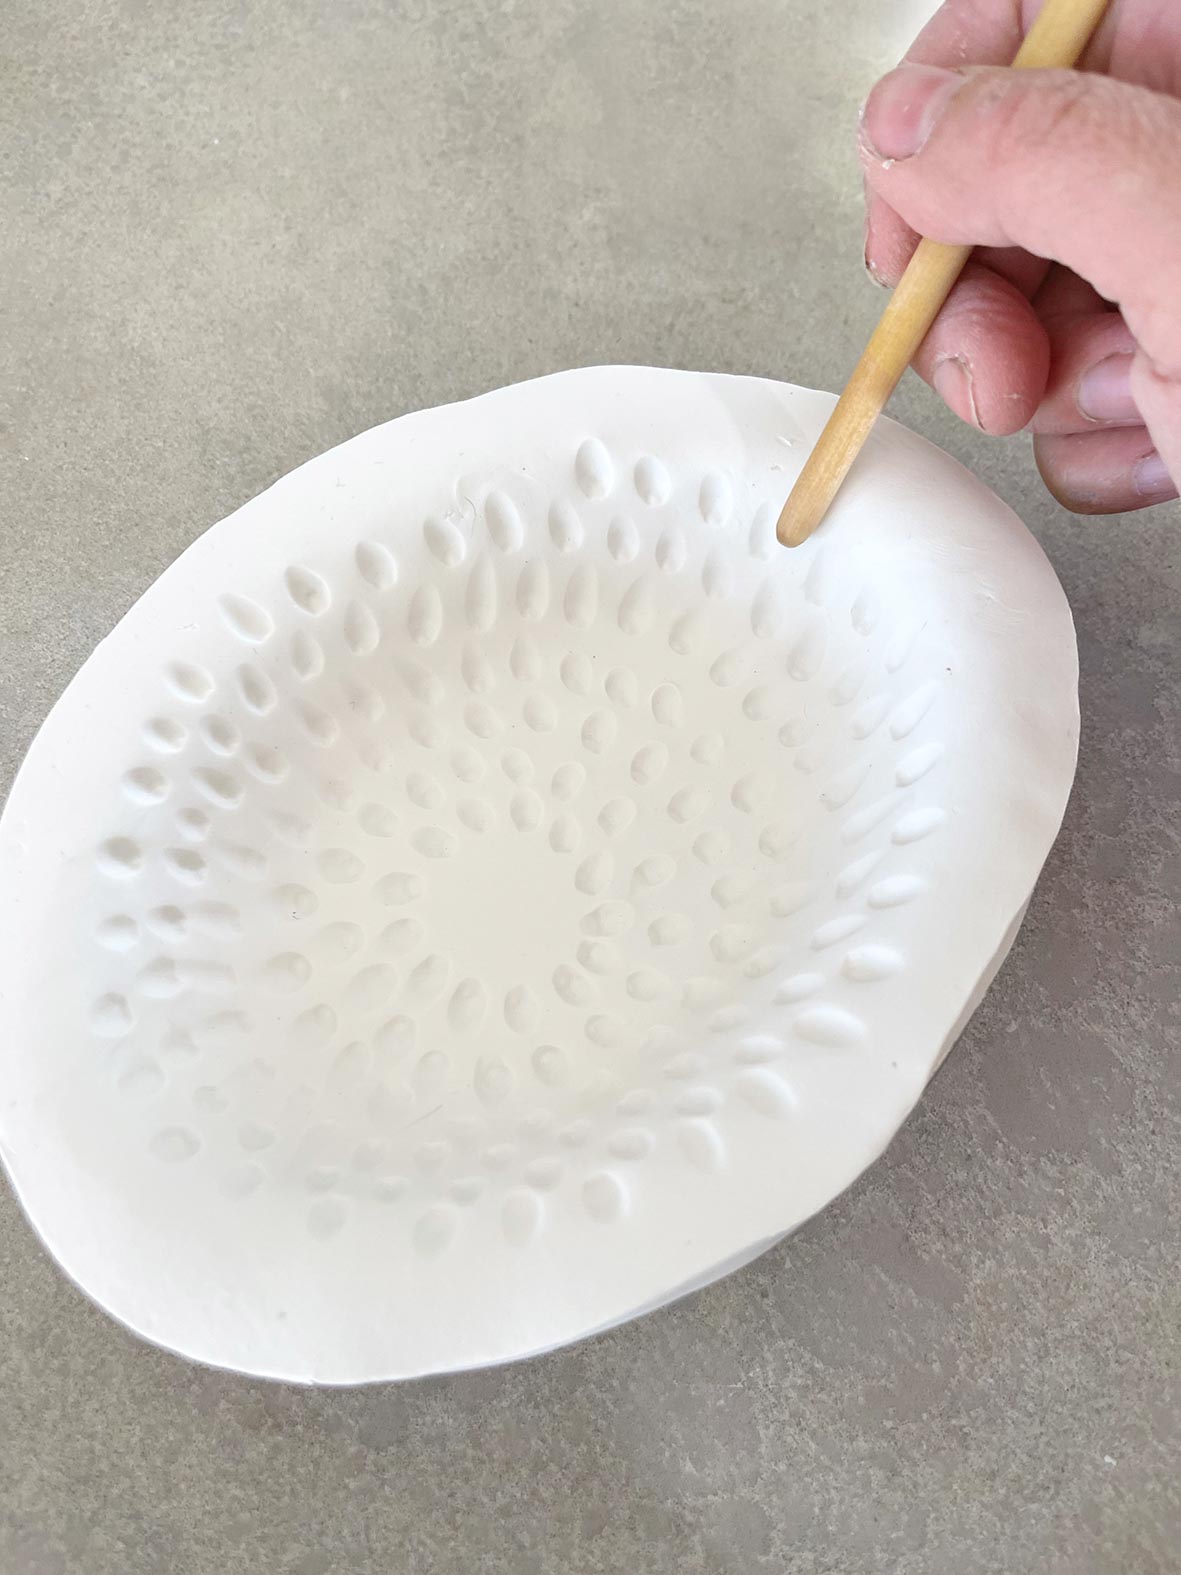
Dimpled bowl
1. Roll out the clay, then lay in a small oval baking dish. Use the end of your Resene art brush to make indentations. Start from the centre and work your way out in a circular pattern (K). Bake as instructed above or as directed on the clay packet instructions.
2. Once it’s cool and hardened, paint the entire vessel in Resene Conch. Once it’s dry, use the rag-rubbing technique to push Resene Thor into the indentations, wiping enough away to show the lighter Resene shade. It’s that simple!
Related article: How to turn old drawers into a pet’s palace with Resene Paint