Add some mid-century glamour to your home with this ingenious DIY drinks trolley.
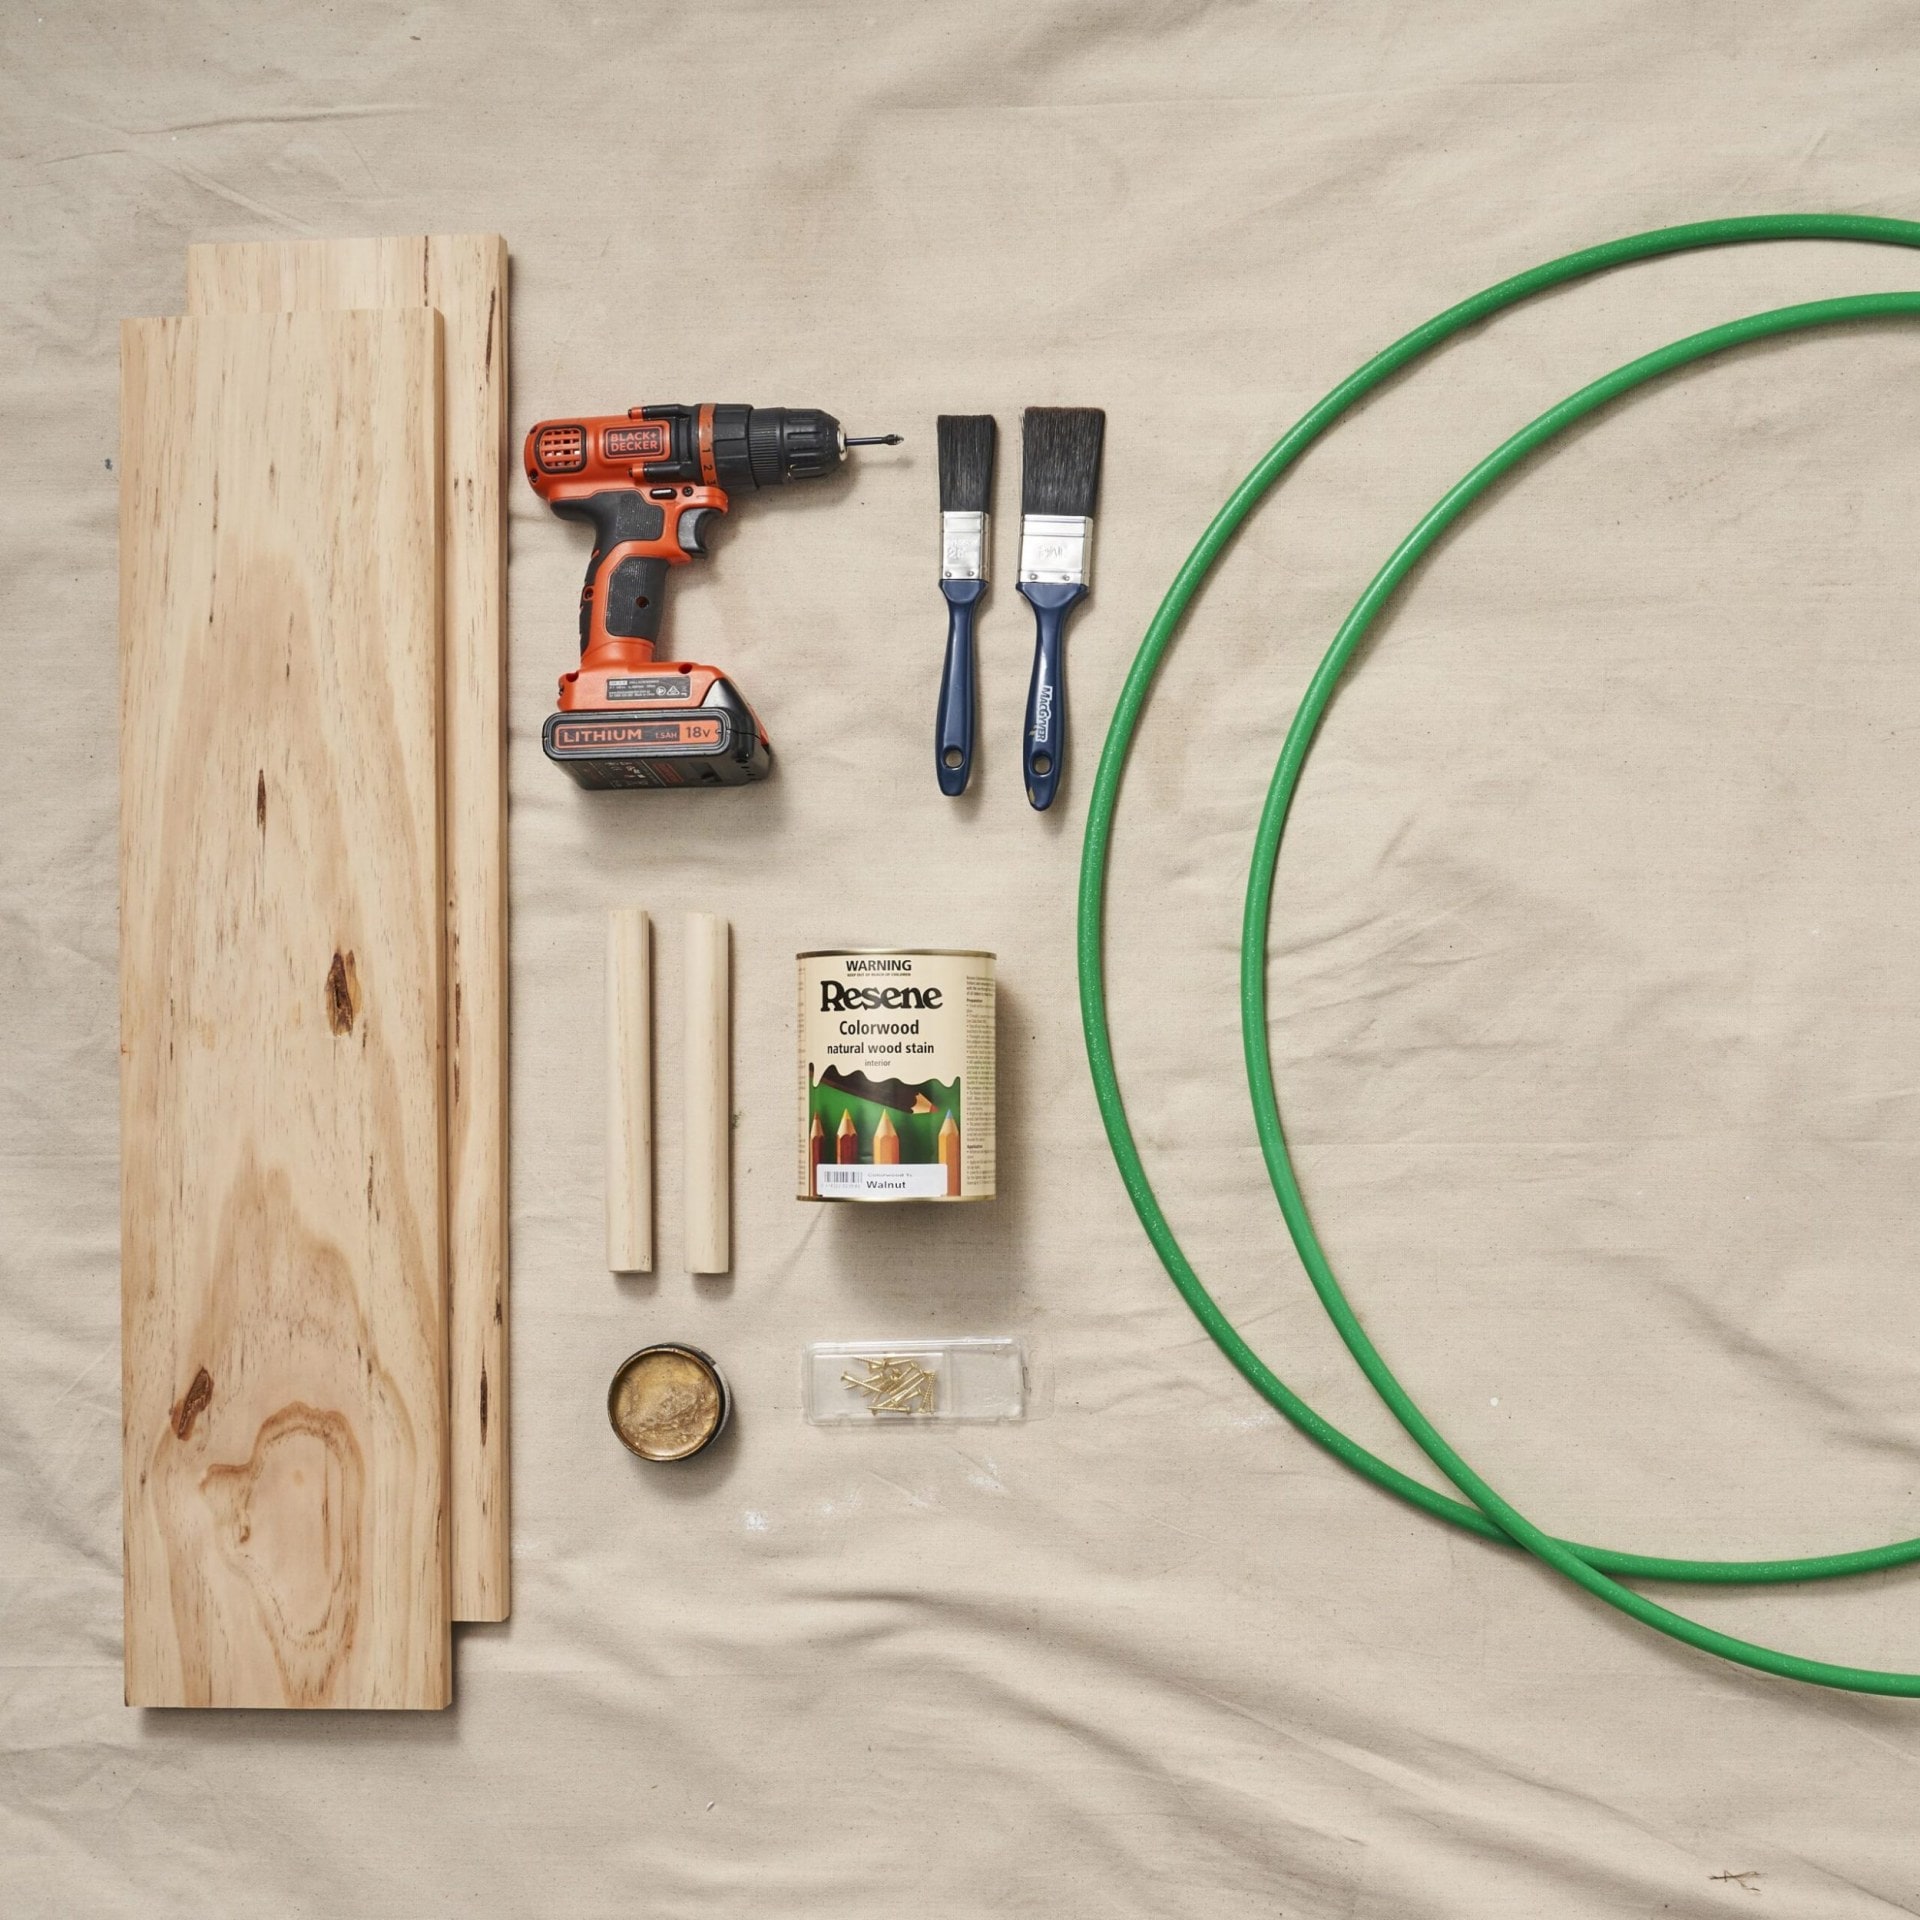
You will need:
- 2 hula hoops
- 2 lengths of pine cut to fit (in our case, 800mm long x 180mm wide x 19mm thick)
- 2 lengths of wooden dowel cut to fit (in our case, 180mm long)
- Sandpaper
- Resene testpots for hoops (we used Resene Gold Dust and a testpot of the basecoat colour)
- Paintbrushes
- 3 clean, damp cloths
- Resene Colorwood wood stain (we used Resene Walnut) and Resene Aquaclear urethane Pencil
- Drill Screws
Instructions
1 Measure the diameter of your hula hoops and have your timber and dowel cut to size at your local timber supplier.
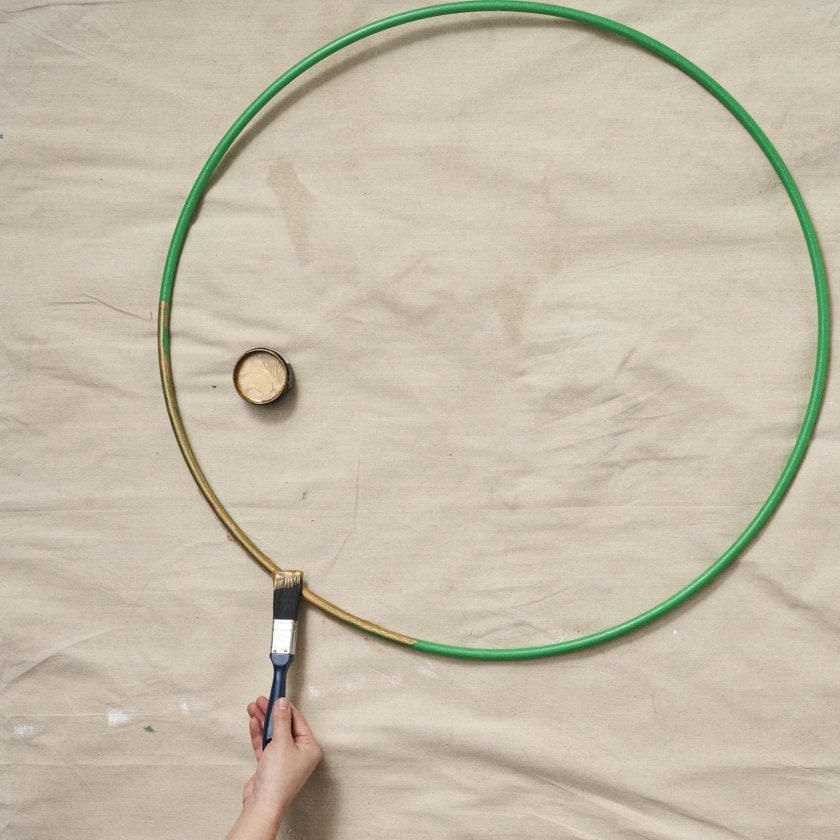
2 Sand the hoops before applying the Resene basecoat colour (this will help your metallic finish to look more even). Leave to dry, then apply two coats of Resene Gold Dust.
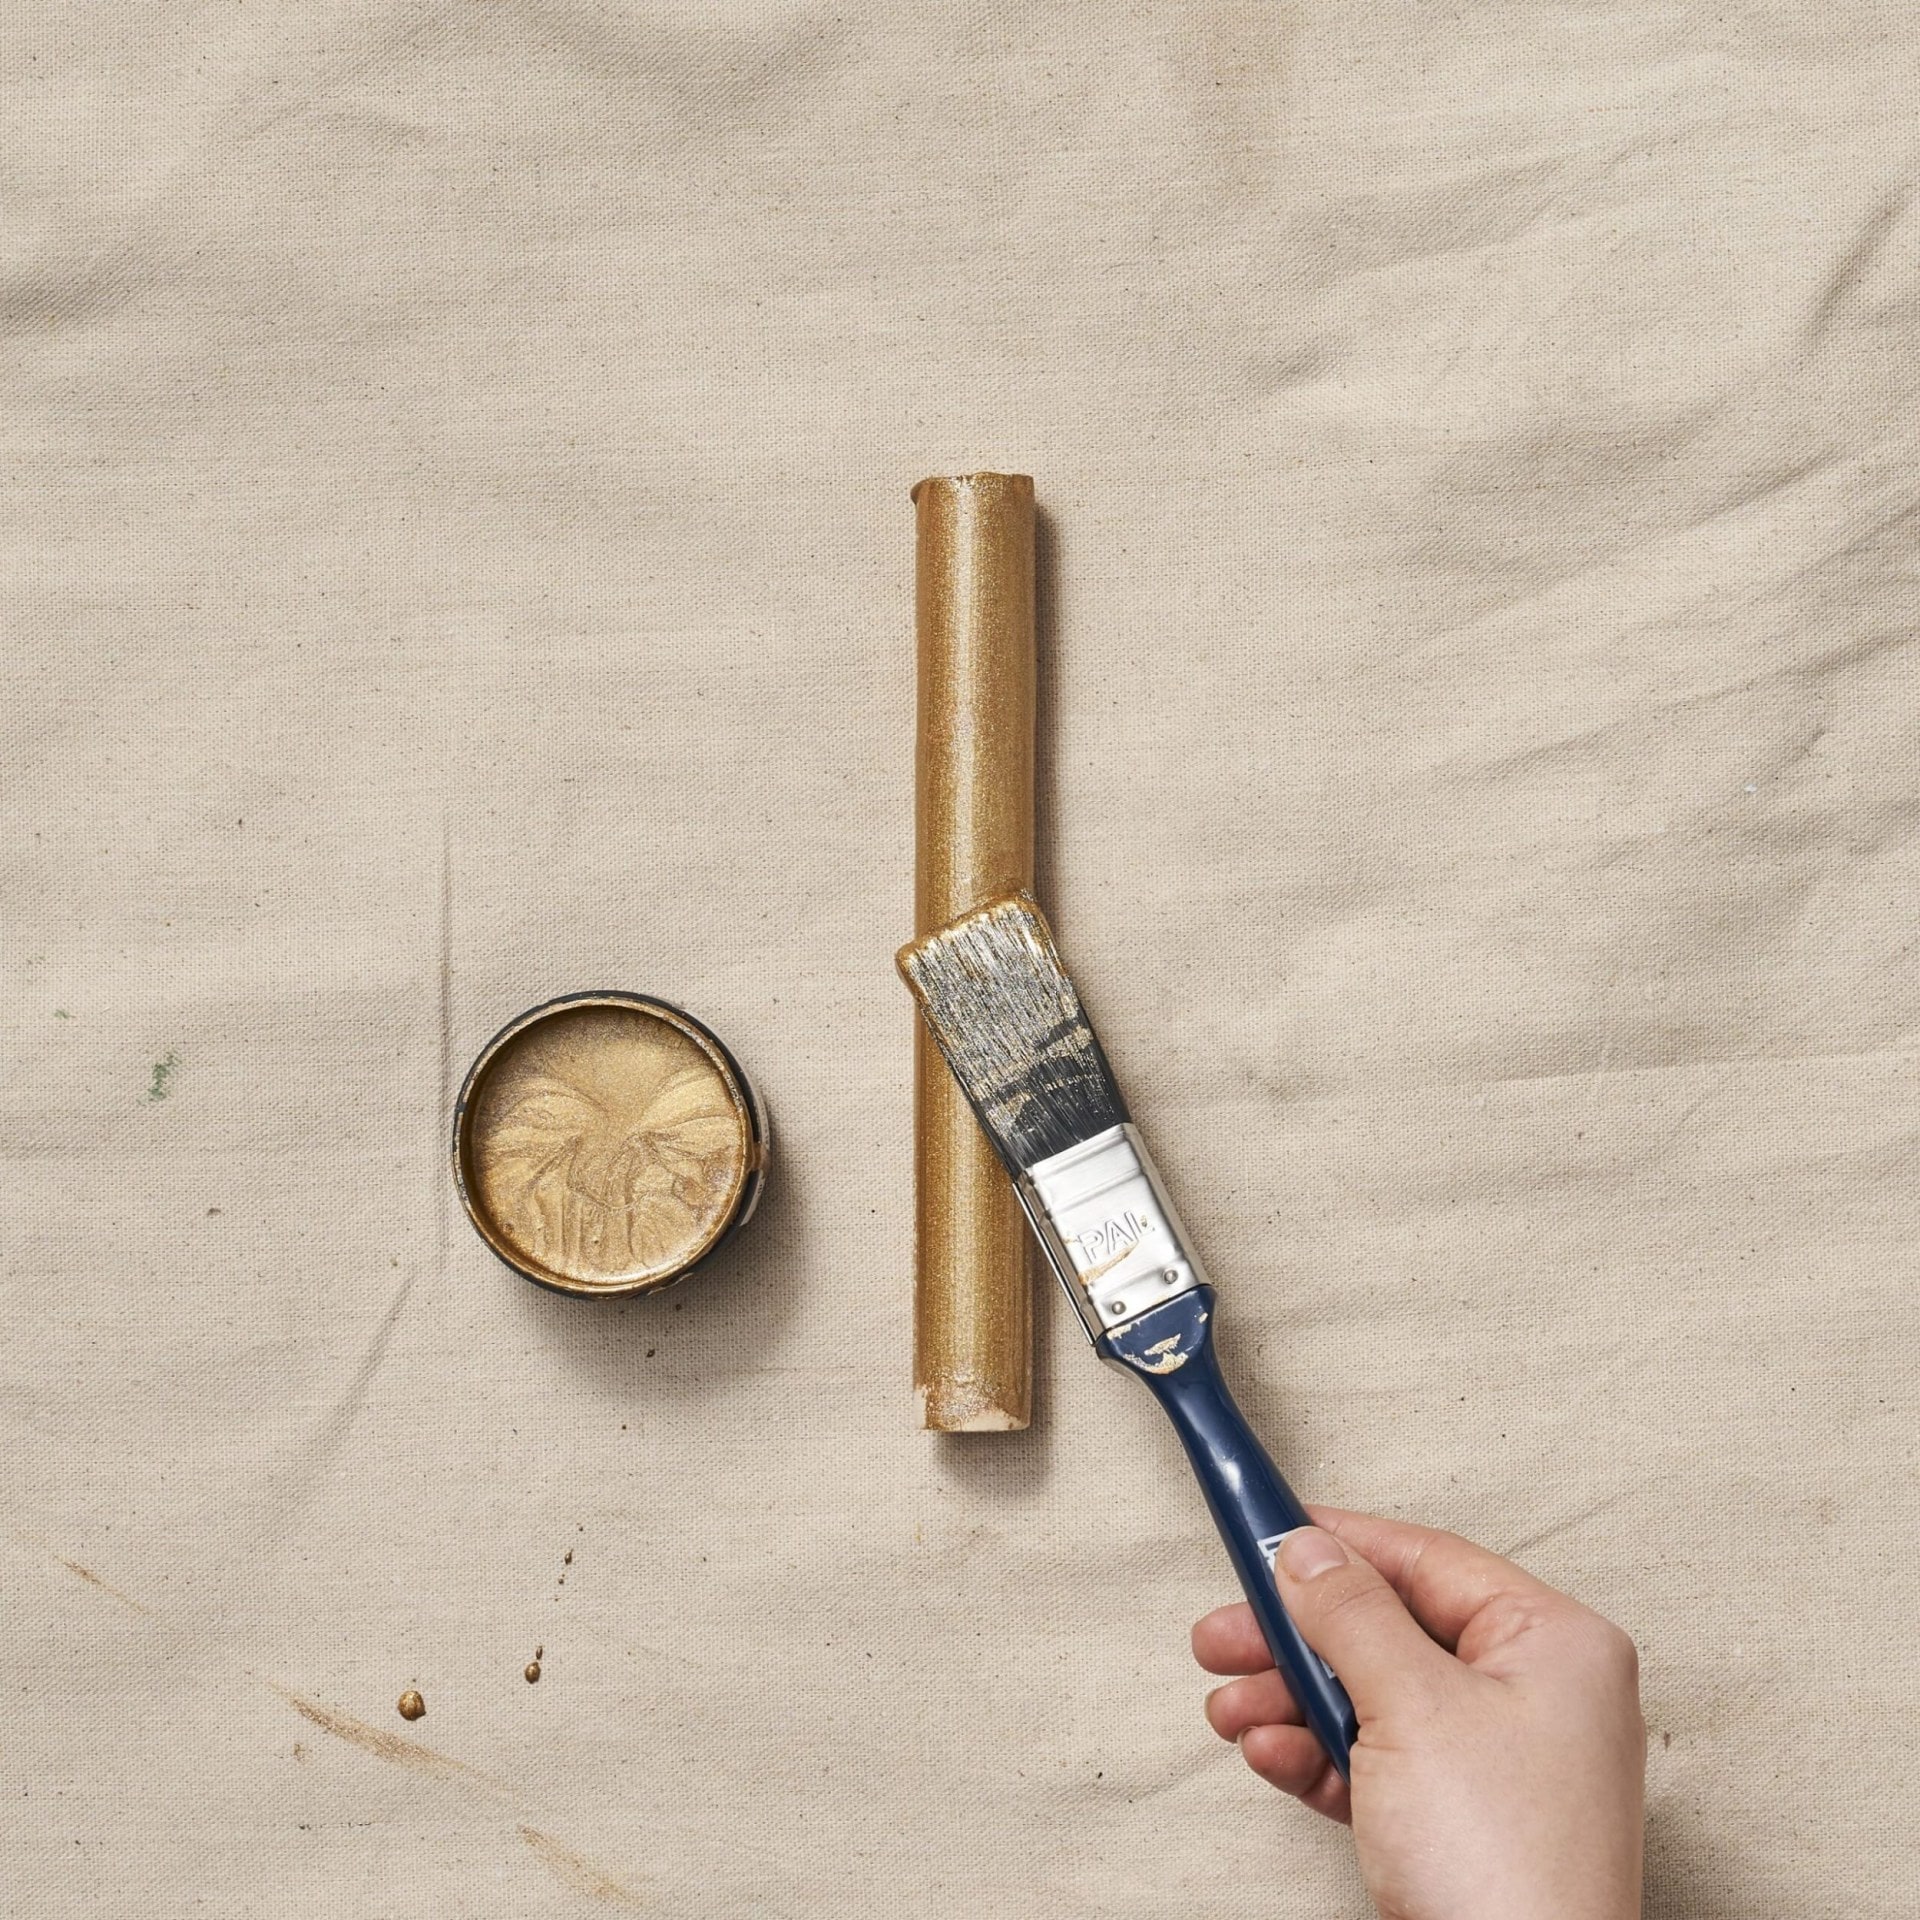
3 Paint the two pieces of dowel the same colour as the hoops.
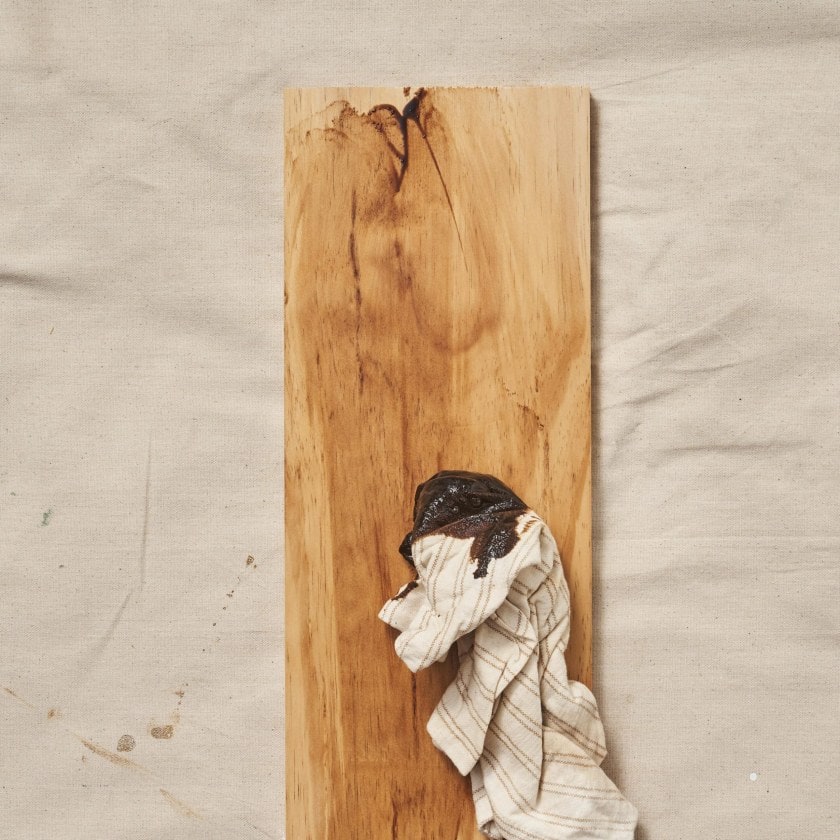
4 Prep your shelves by rubbing the wood with a cloth. Dip another cloth into the Resene Colorwood stain and spread it evenly over your wood. Wipe off any excess with another cloth and leave to dry (roughly 20 minutes). Once dry, repeat this process (we did two coats). Finish with Resene Aquaclear urethane.
5 Lay the shelves on their side, and mark where you’d like them to be placed on the hoops. Position a hoop in place on top of one shelf, and drill a hole through the hoop and into the wood, then screw together. Repeat for the other end of the shelf.
6 Repeat the above step for the second shelf.
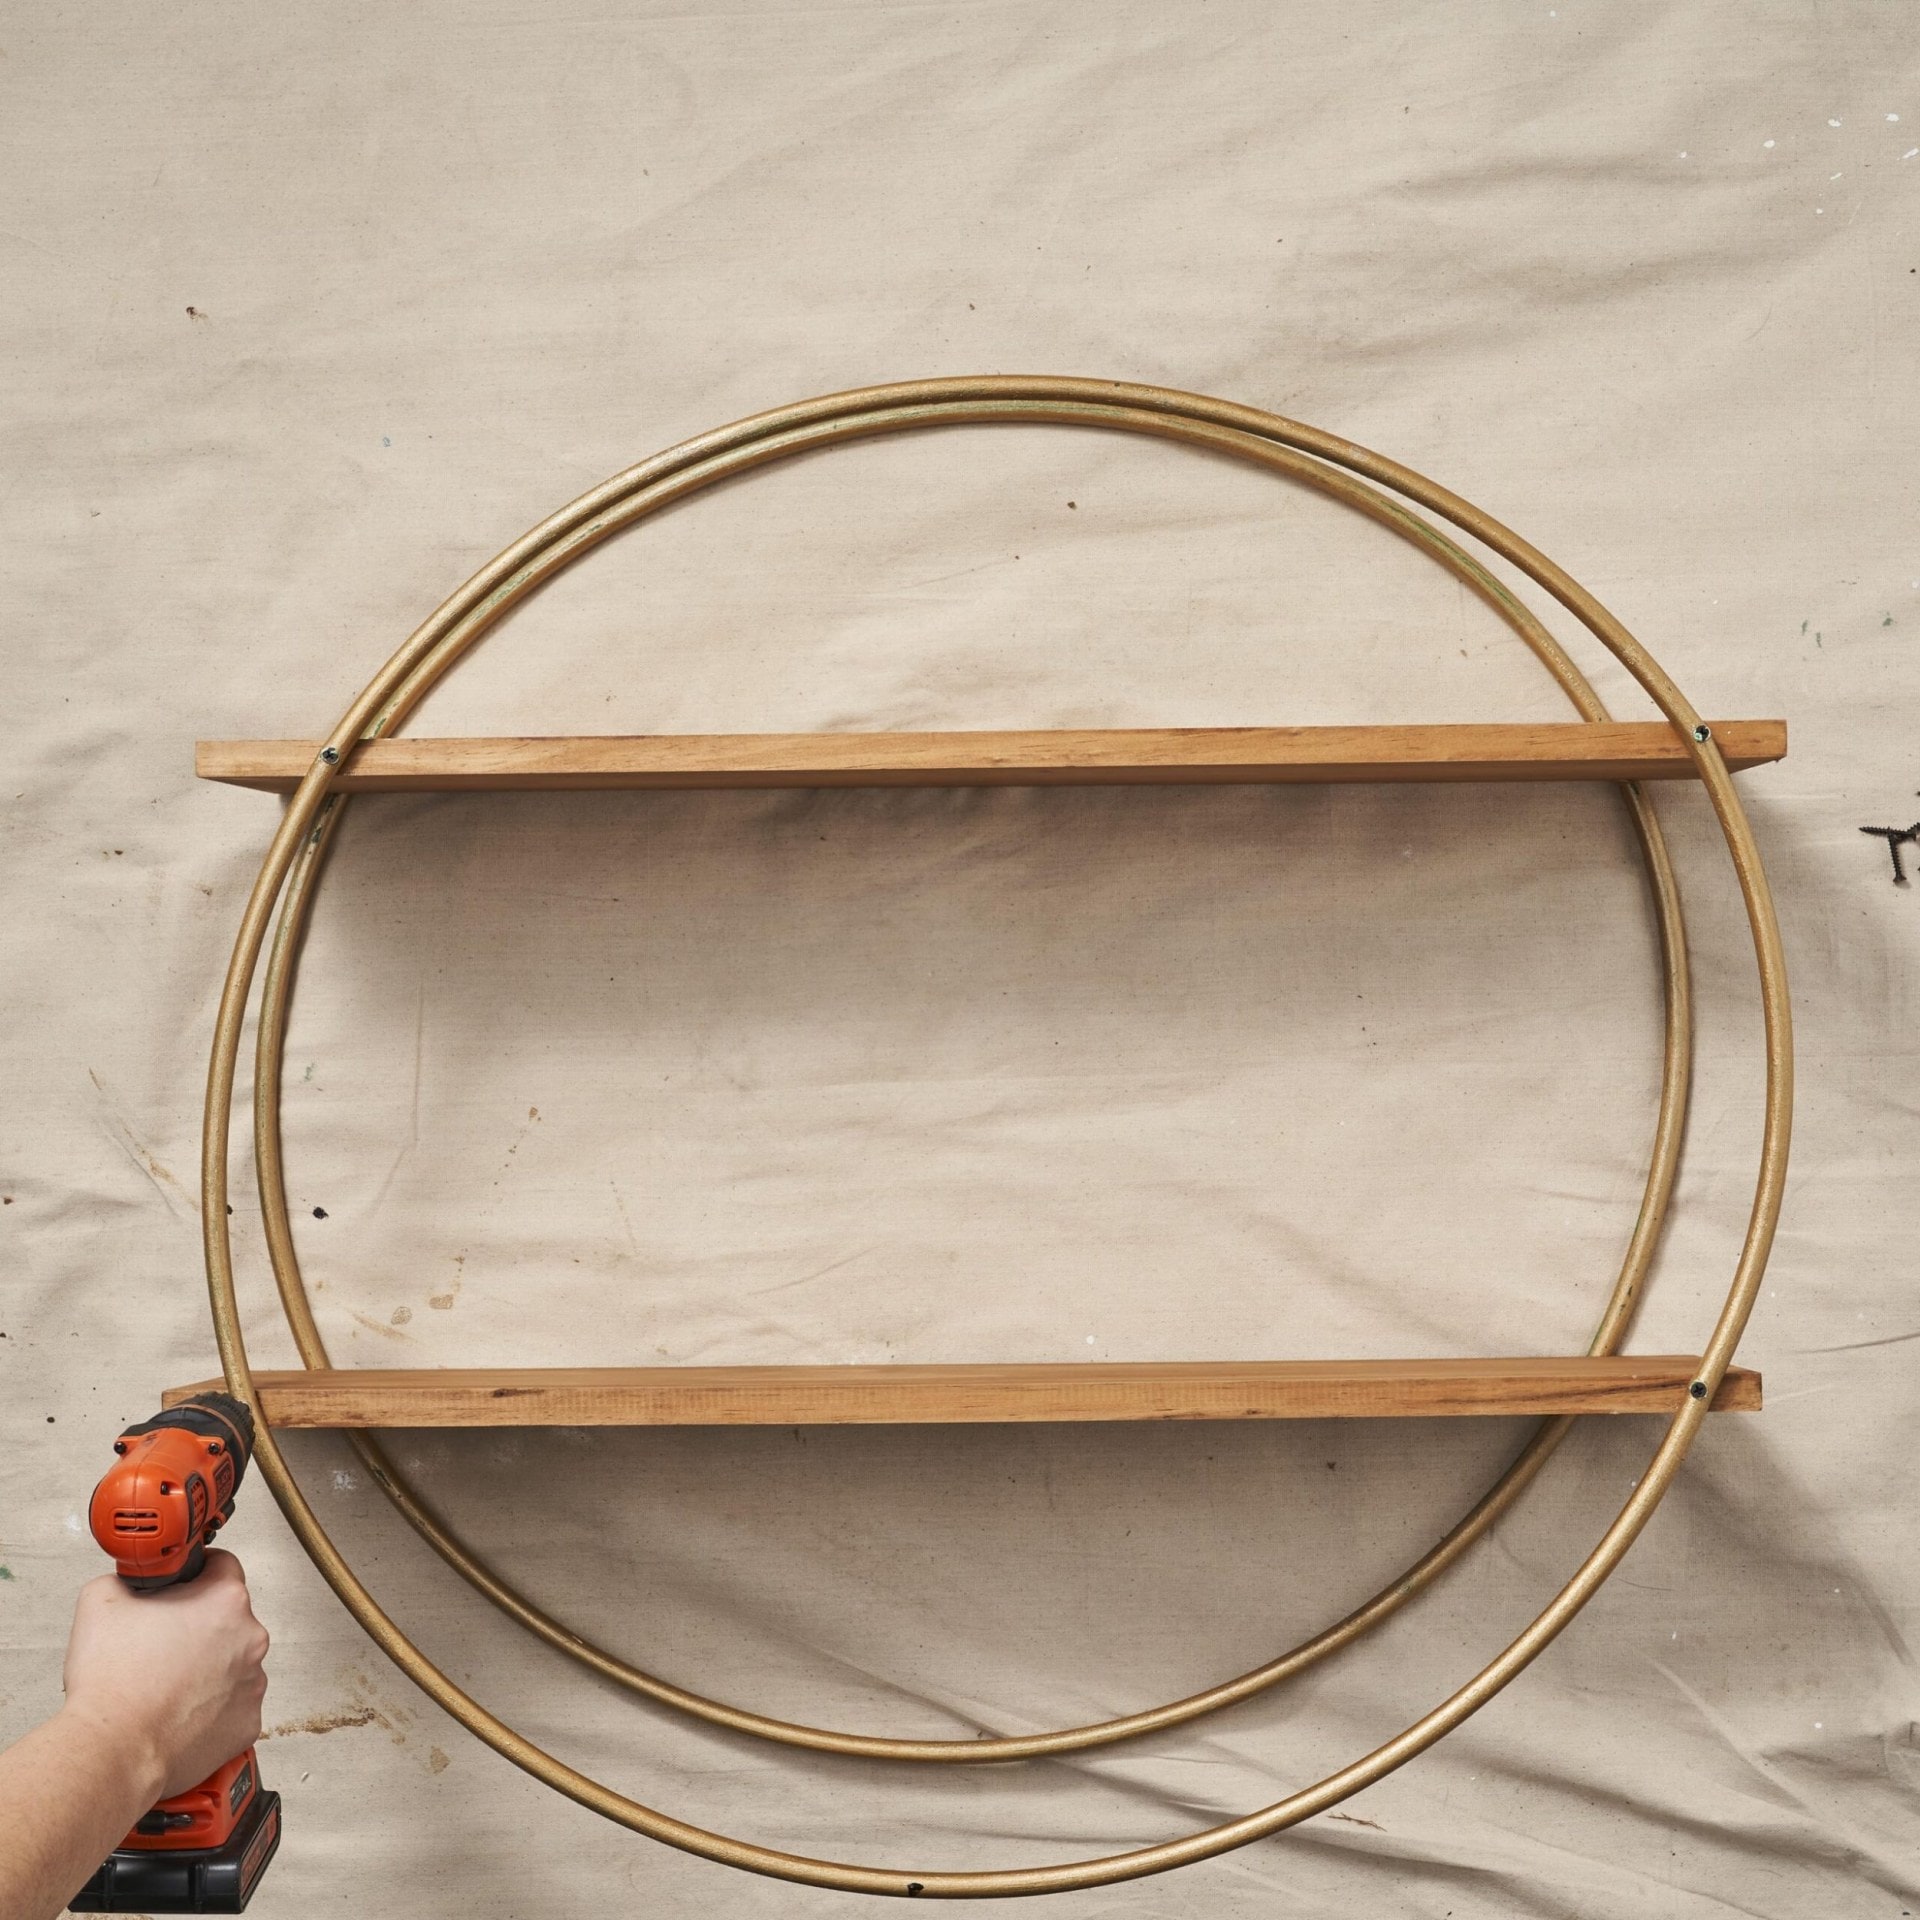
7 Flip the hoop with the shelf attached over and repeat steps 5 and 6 with the second painted hoop.
8 Place the dowel under your cart to see where it is best balanced (it’s a good idea to use a level for this step). Mark on the hoops where the rods will sit.
9 Drill holes through the dowels and the hoops and screw together.
10 Check that the shelves are level and adjust if necessary.