DIY yourself a merry little Christmas with this colourful and easy-to-make Christmas tree with movable branches.

You will need:
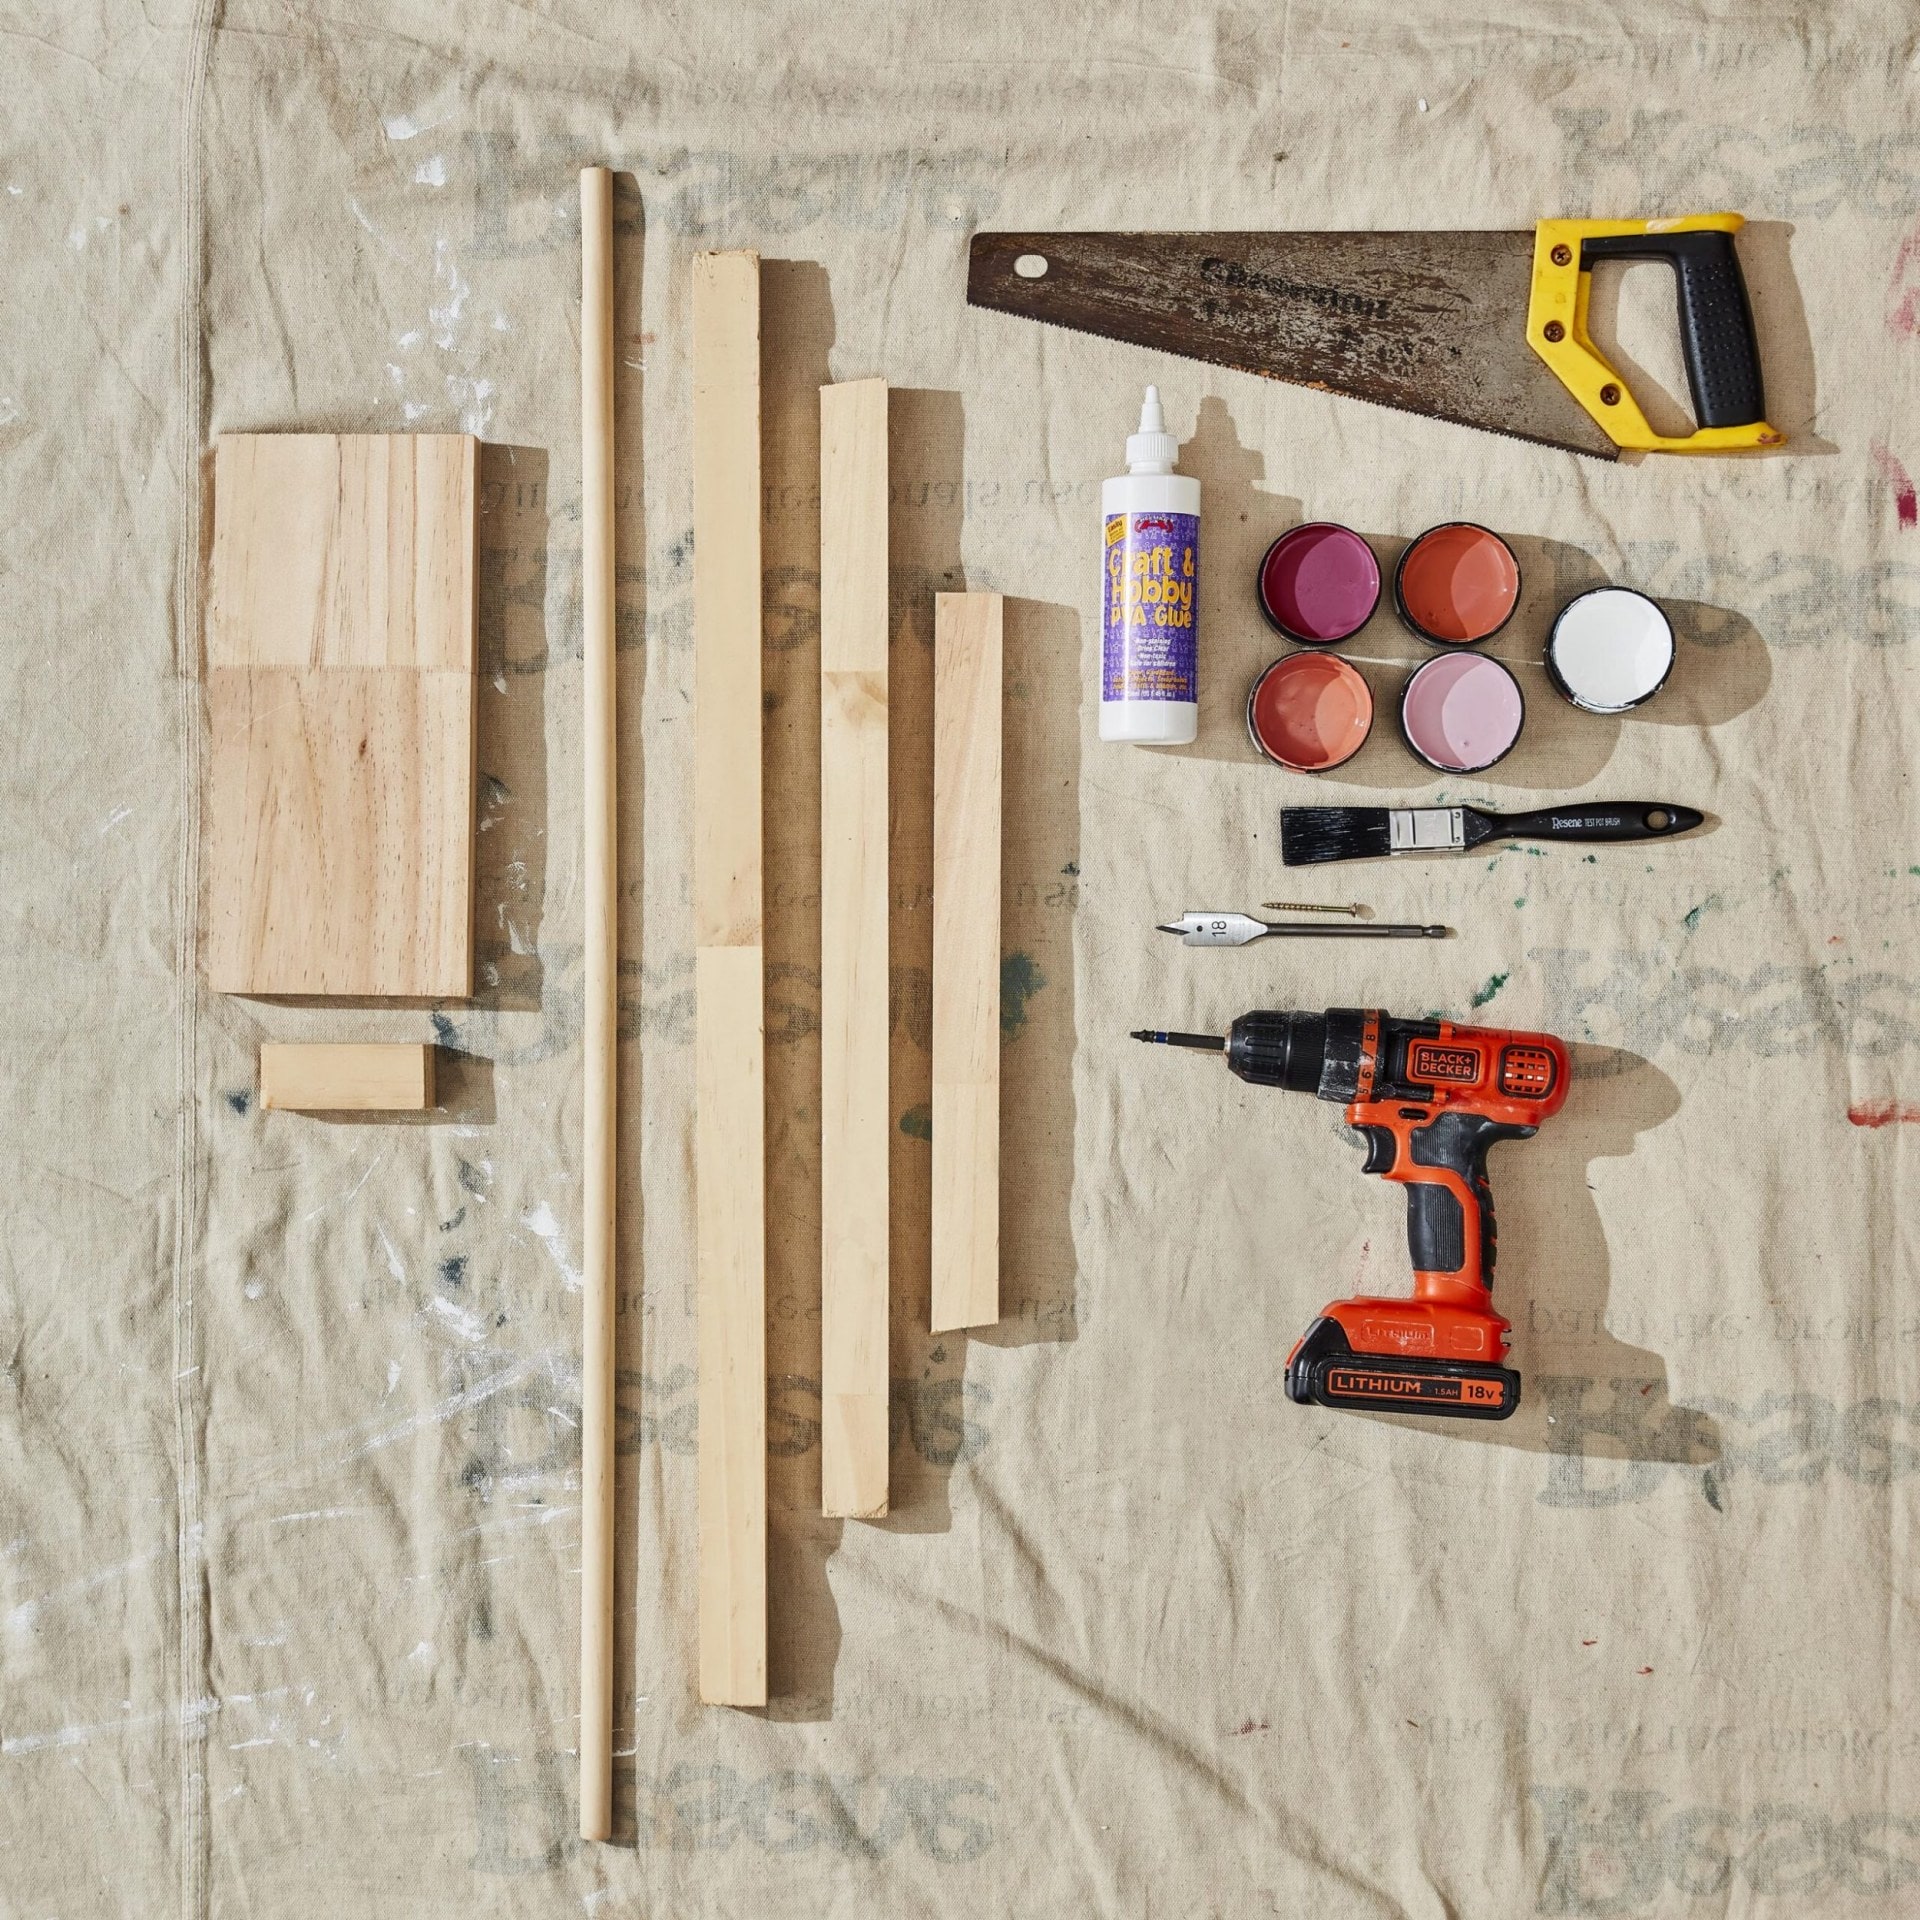
- Base: 4 lengths of square or rectangular untreated clear timber (in our case, 200mm x 300mm)
- 1 x 18mm-thick length of dowel cut to 800mm long Branches: 19 lengths of untreated clear finger-jointed timber cut to different lengths, starting at 1000mm, then decreasing by 50mm per piece (eg 1000mm, 950mm, 900mm, etc)
- Spacers: 24 lengths of untreated clear timber cut into 20mm x 20mm squares
- Hand saw
- Wood glue
- 18mm-hole drill bit
- Drill
- 1 x long screw
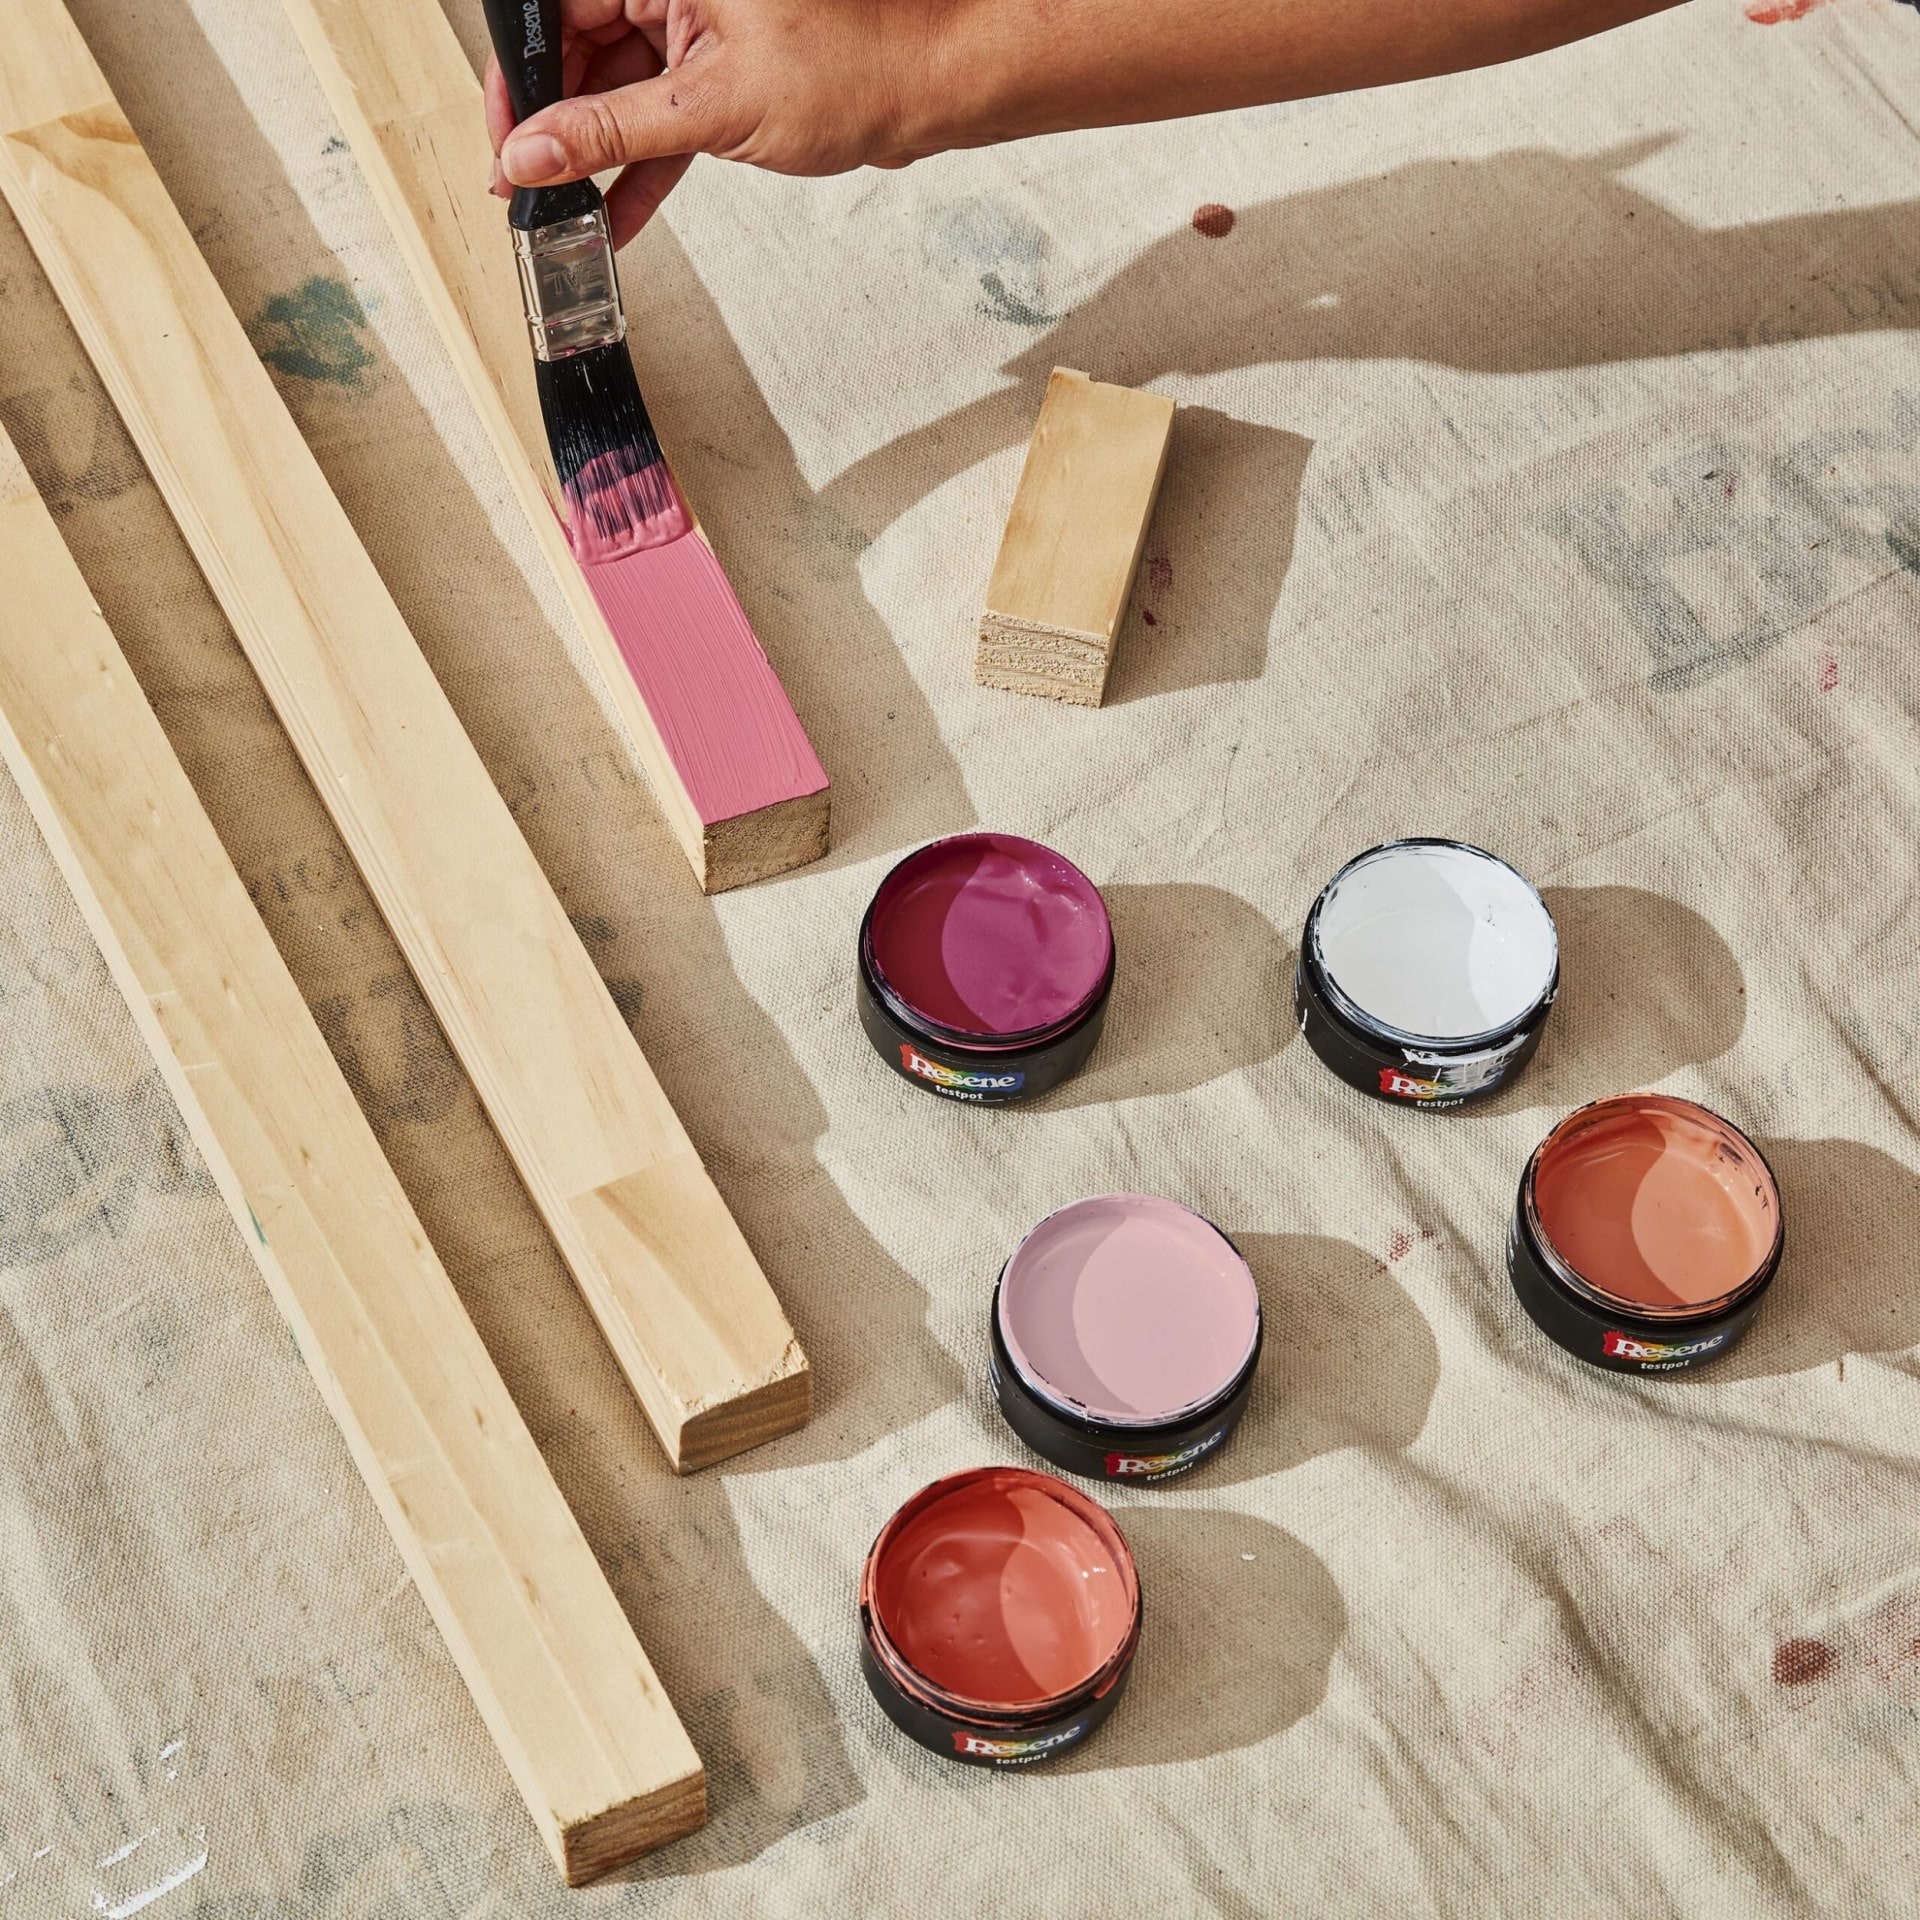
- 2 Resene testpots of each colour you wish to use (we used Resene White, Resene Gelato, Resene Sunglo, Resene Japonica and Resene Rouge)
Note: Your local timber supplier should be able to cut the base, dowel, branches and spacer pieces to size for you.
Instructions
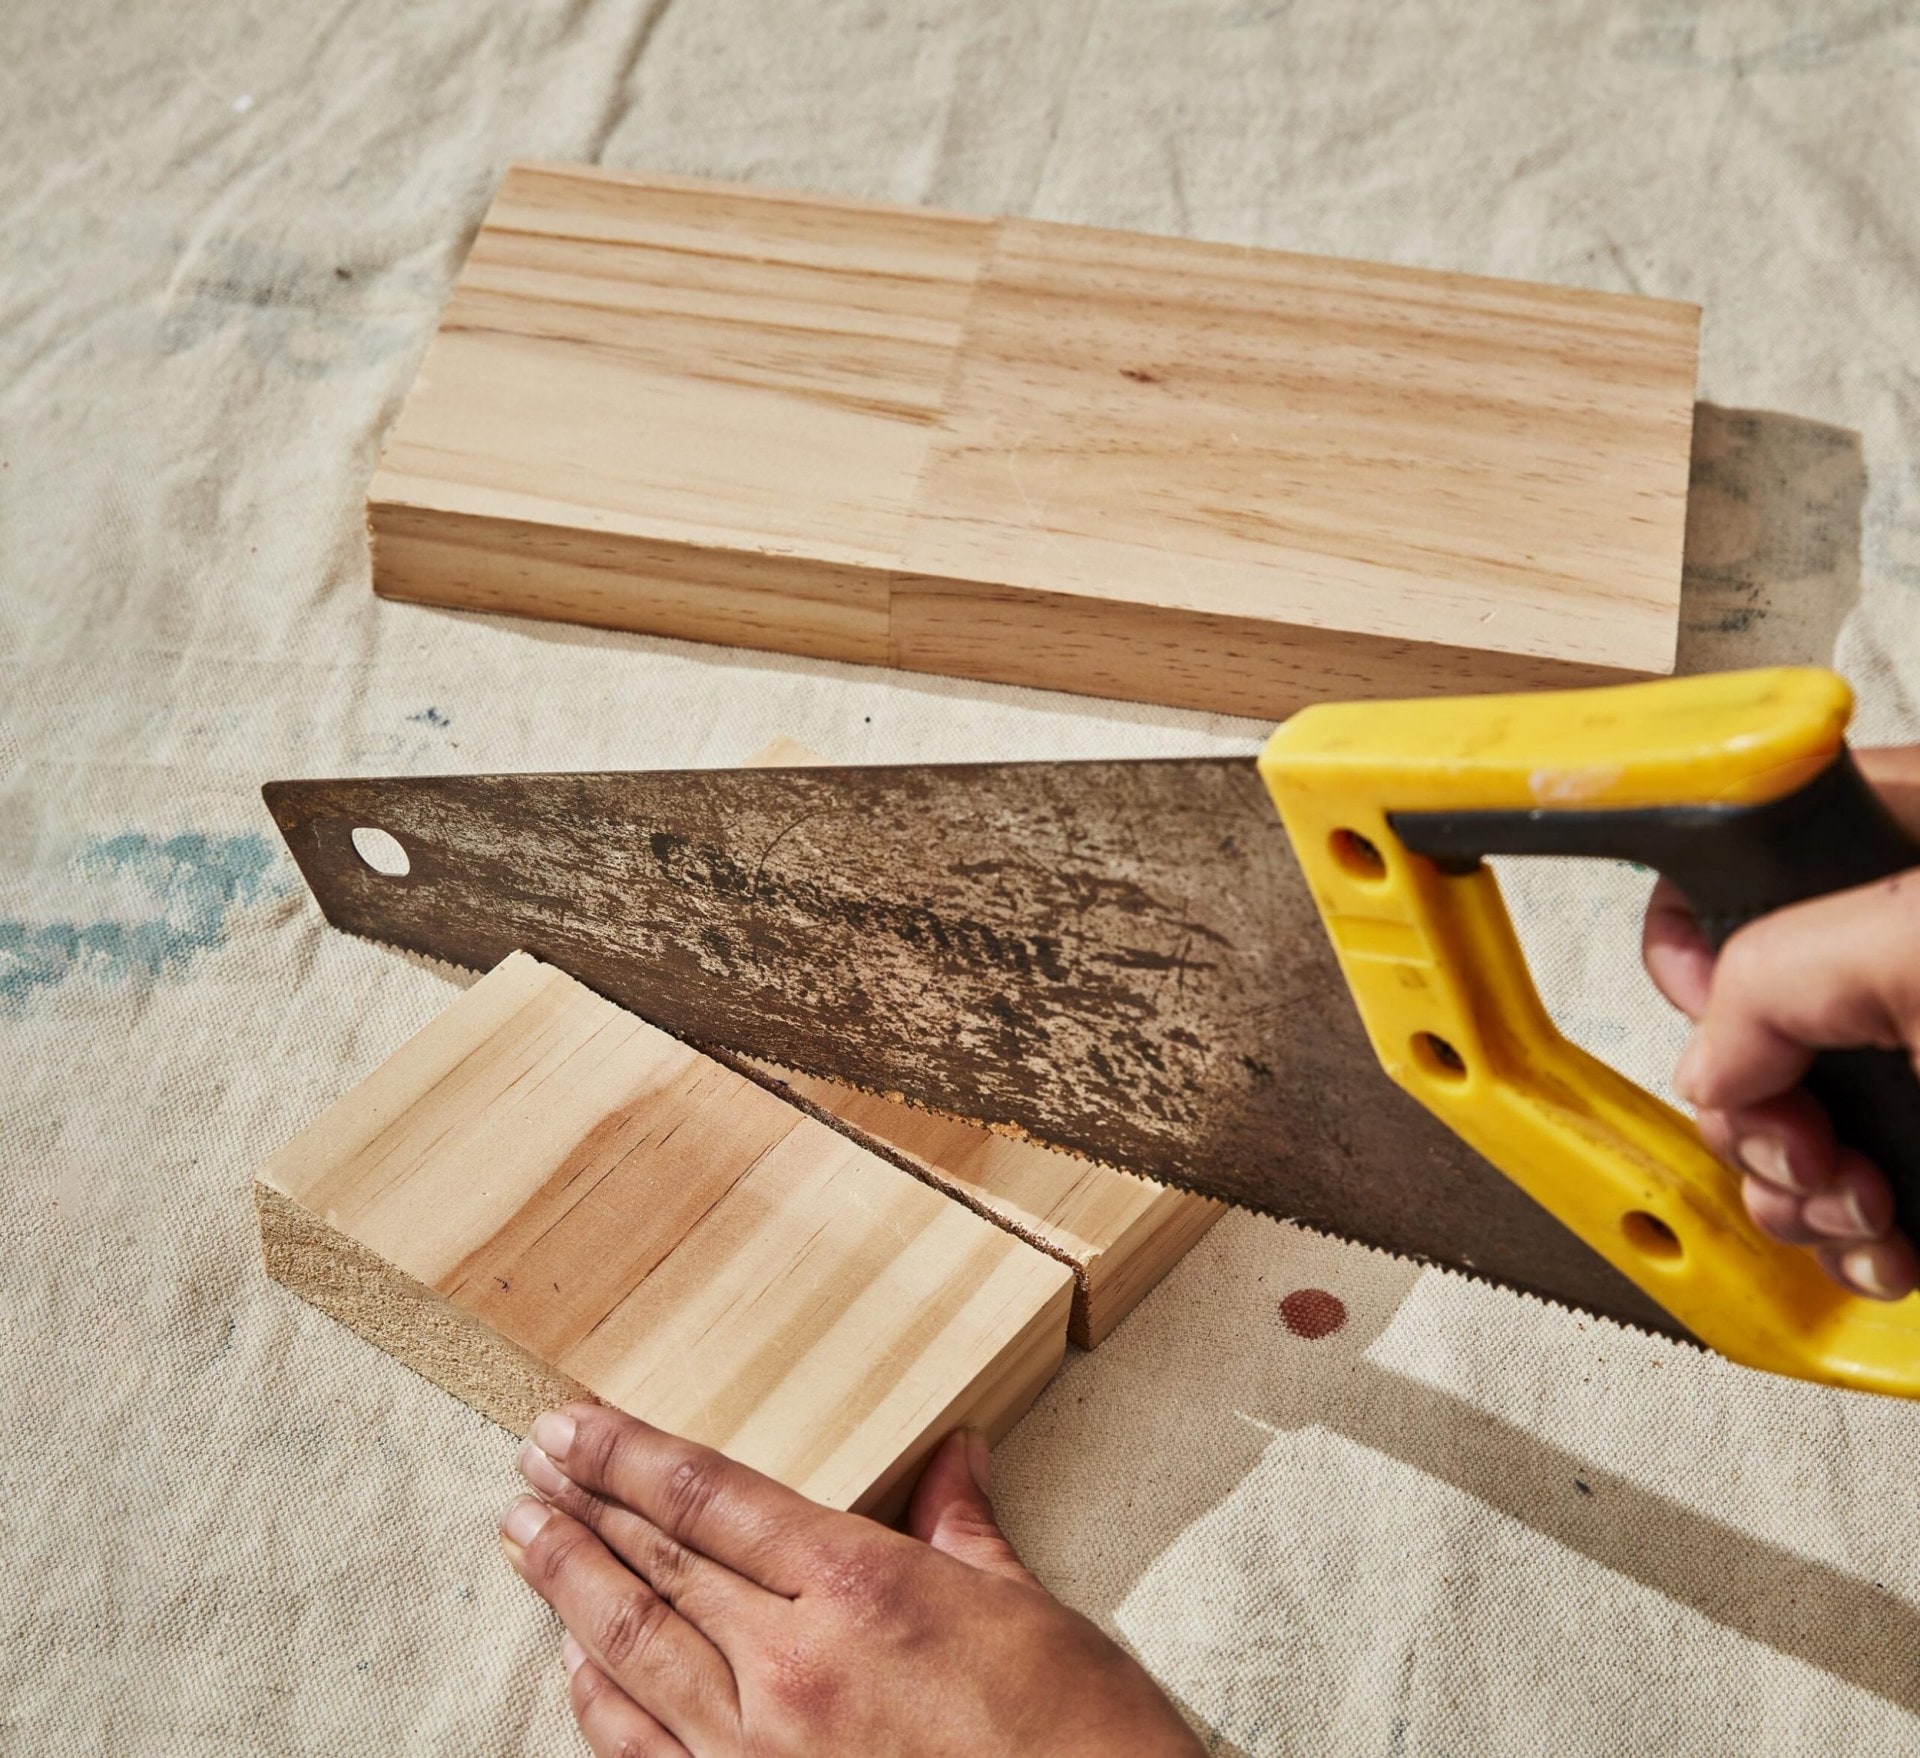
1 To build the base, start by sawing one of the rectangular pieces of timber in half.
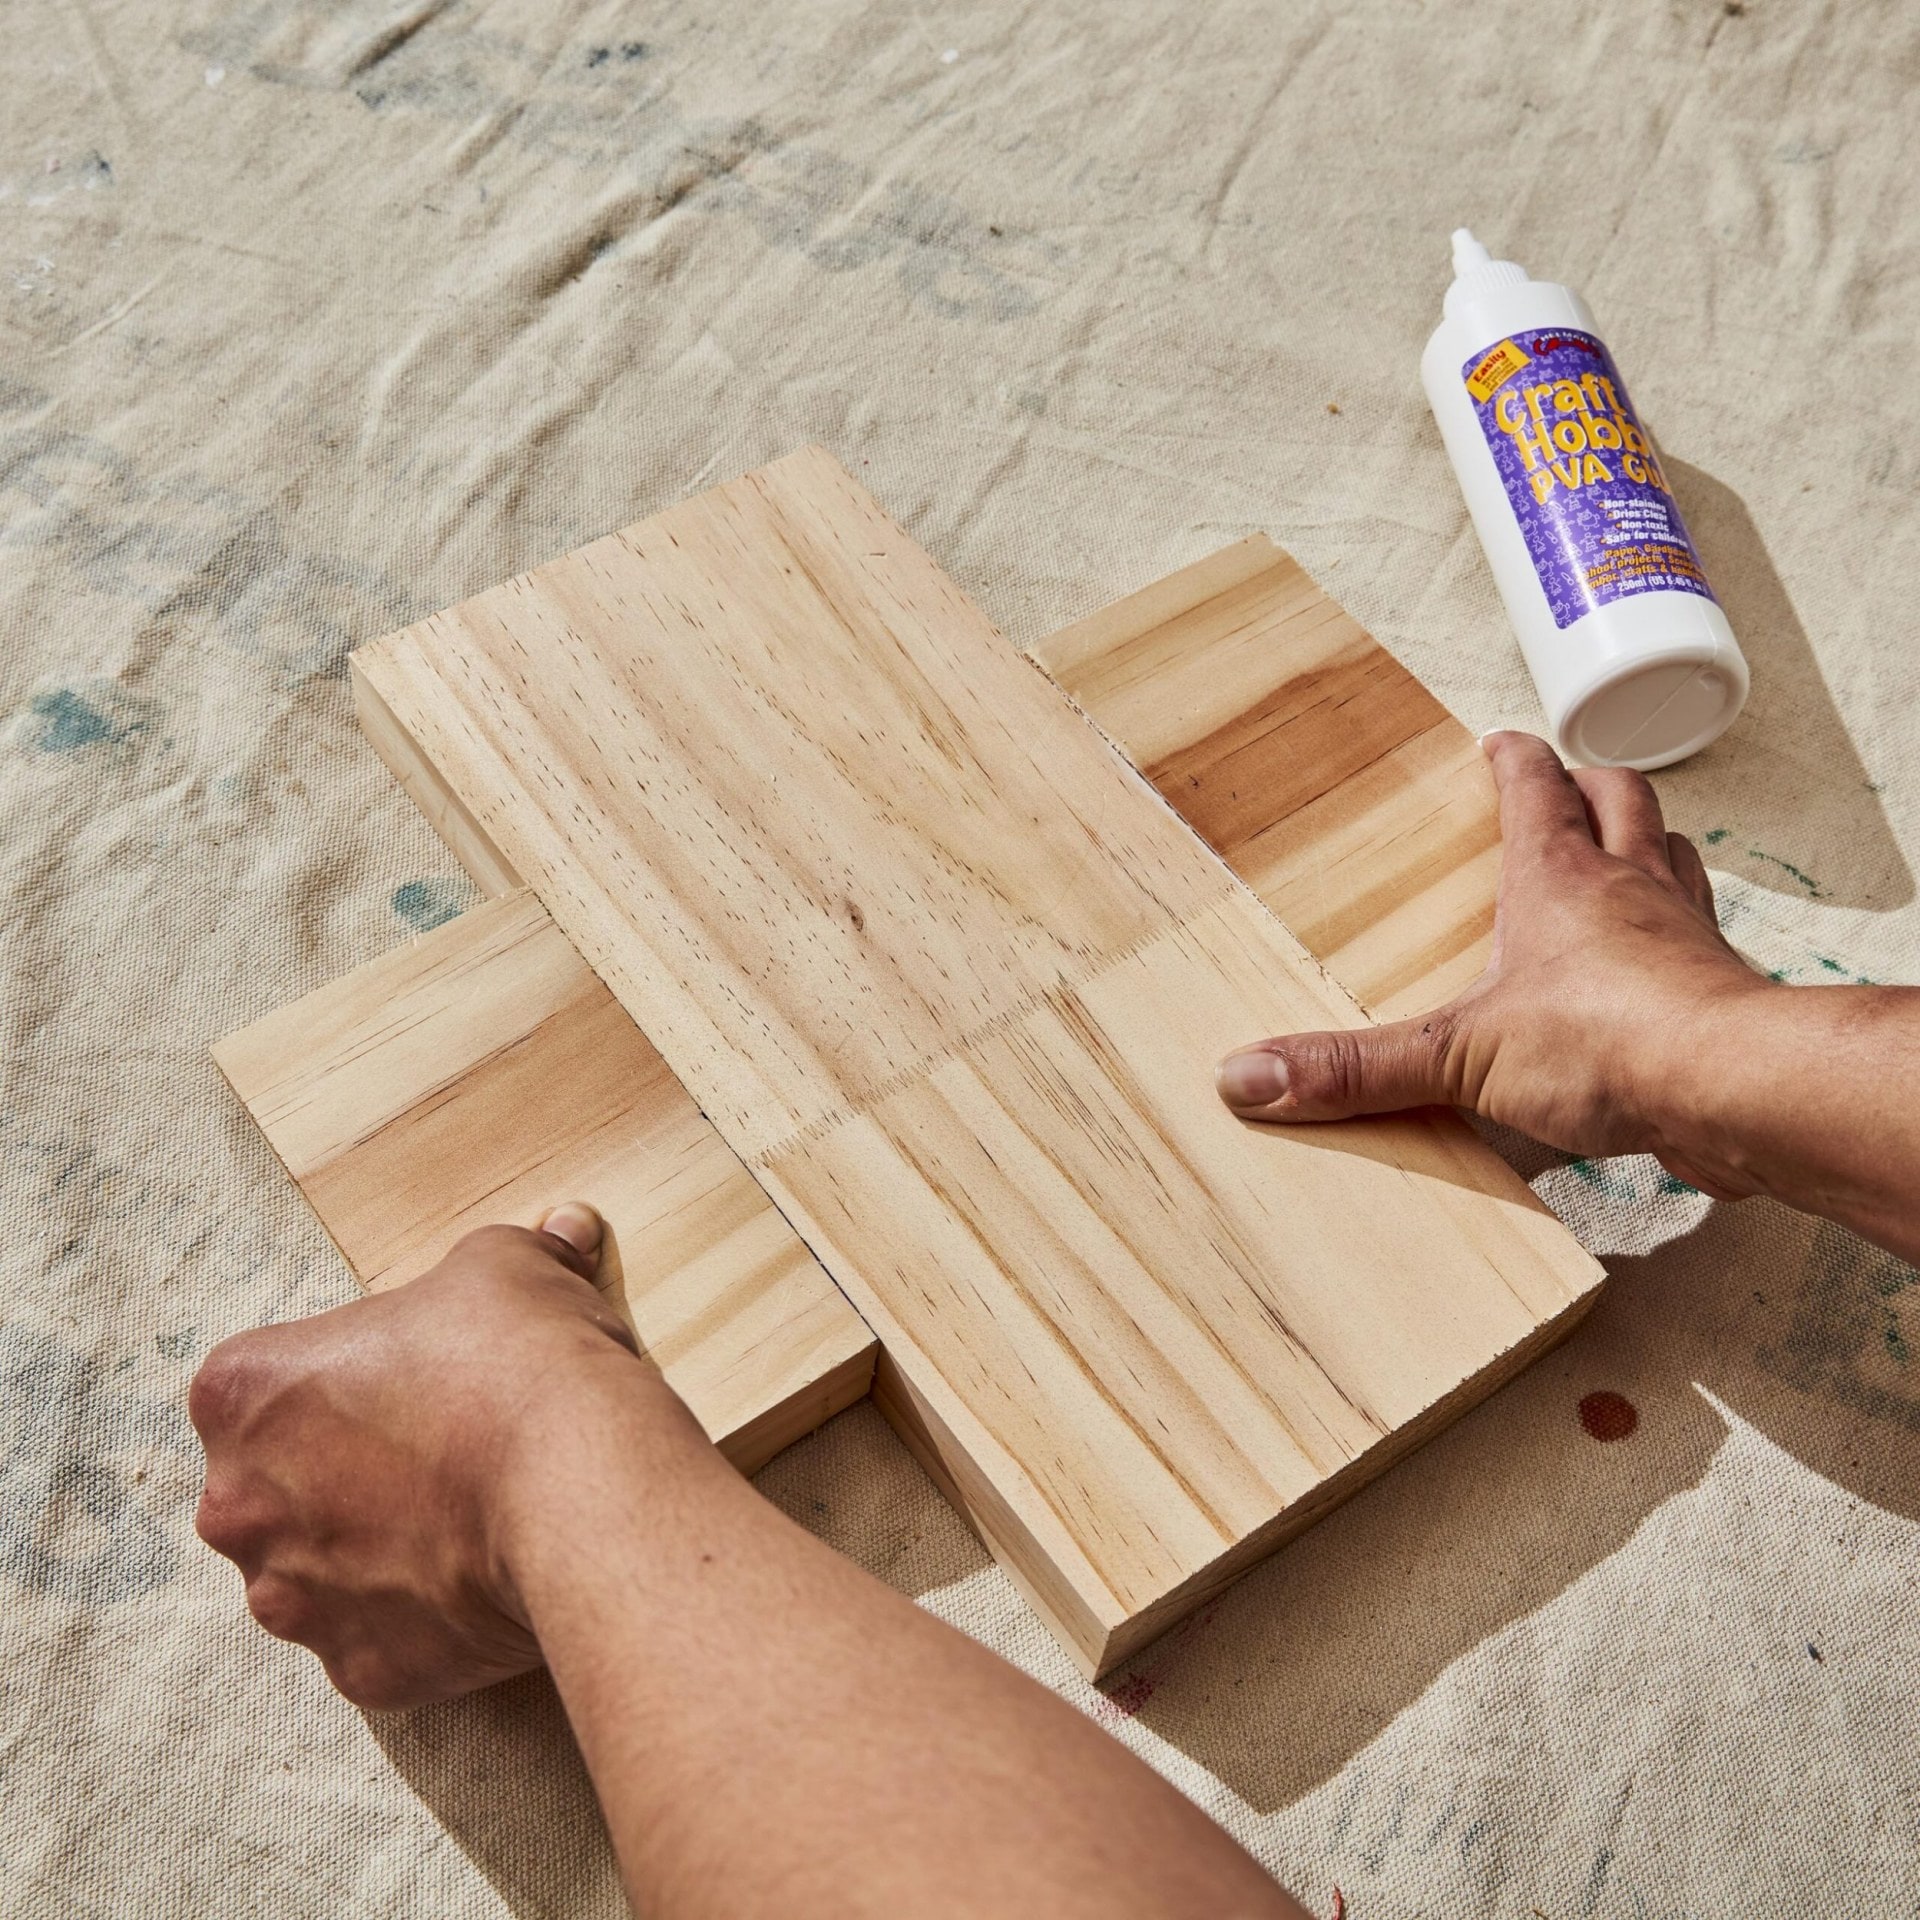
2 Glue the two short sides on the edges of an additional piece of timber to create a cross shape.
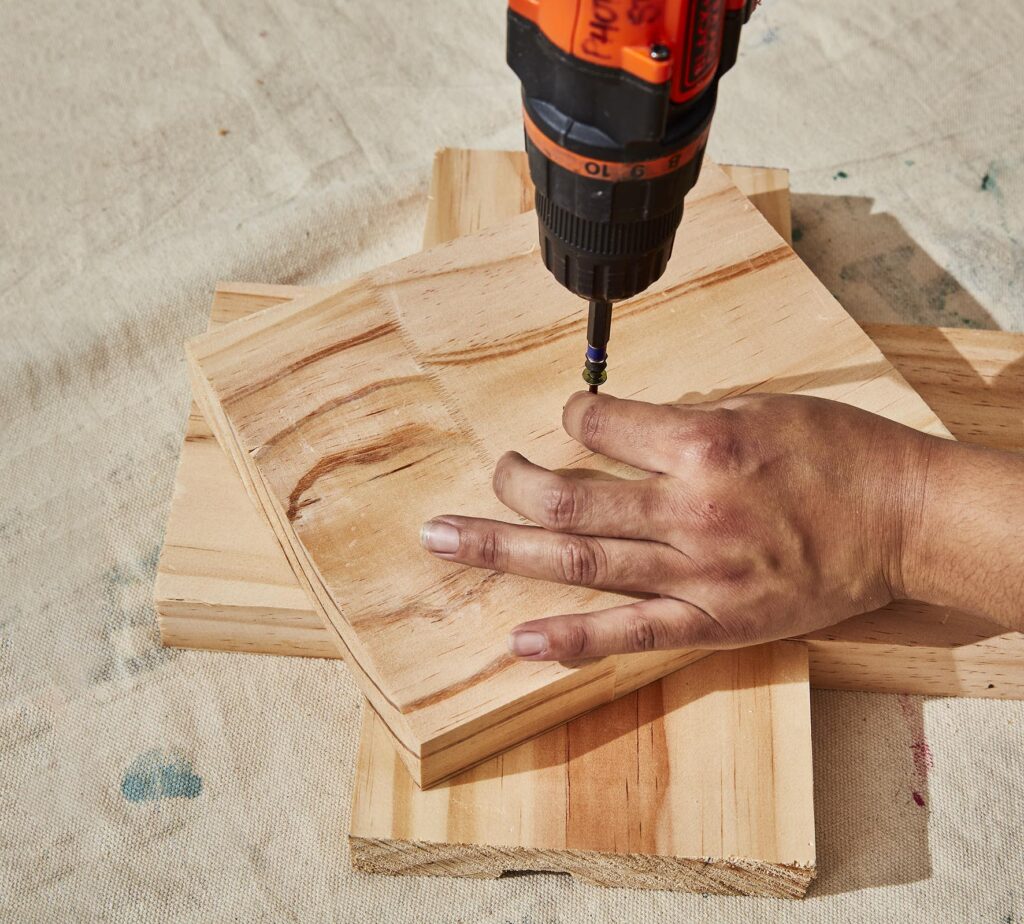
3 Using the 18mm drill bit, drill a hole halfway through one of the remaining uncut base pieces and all the way through the last uncut one.
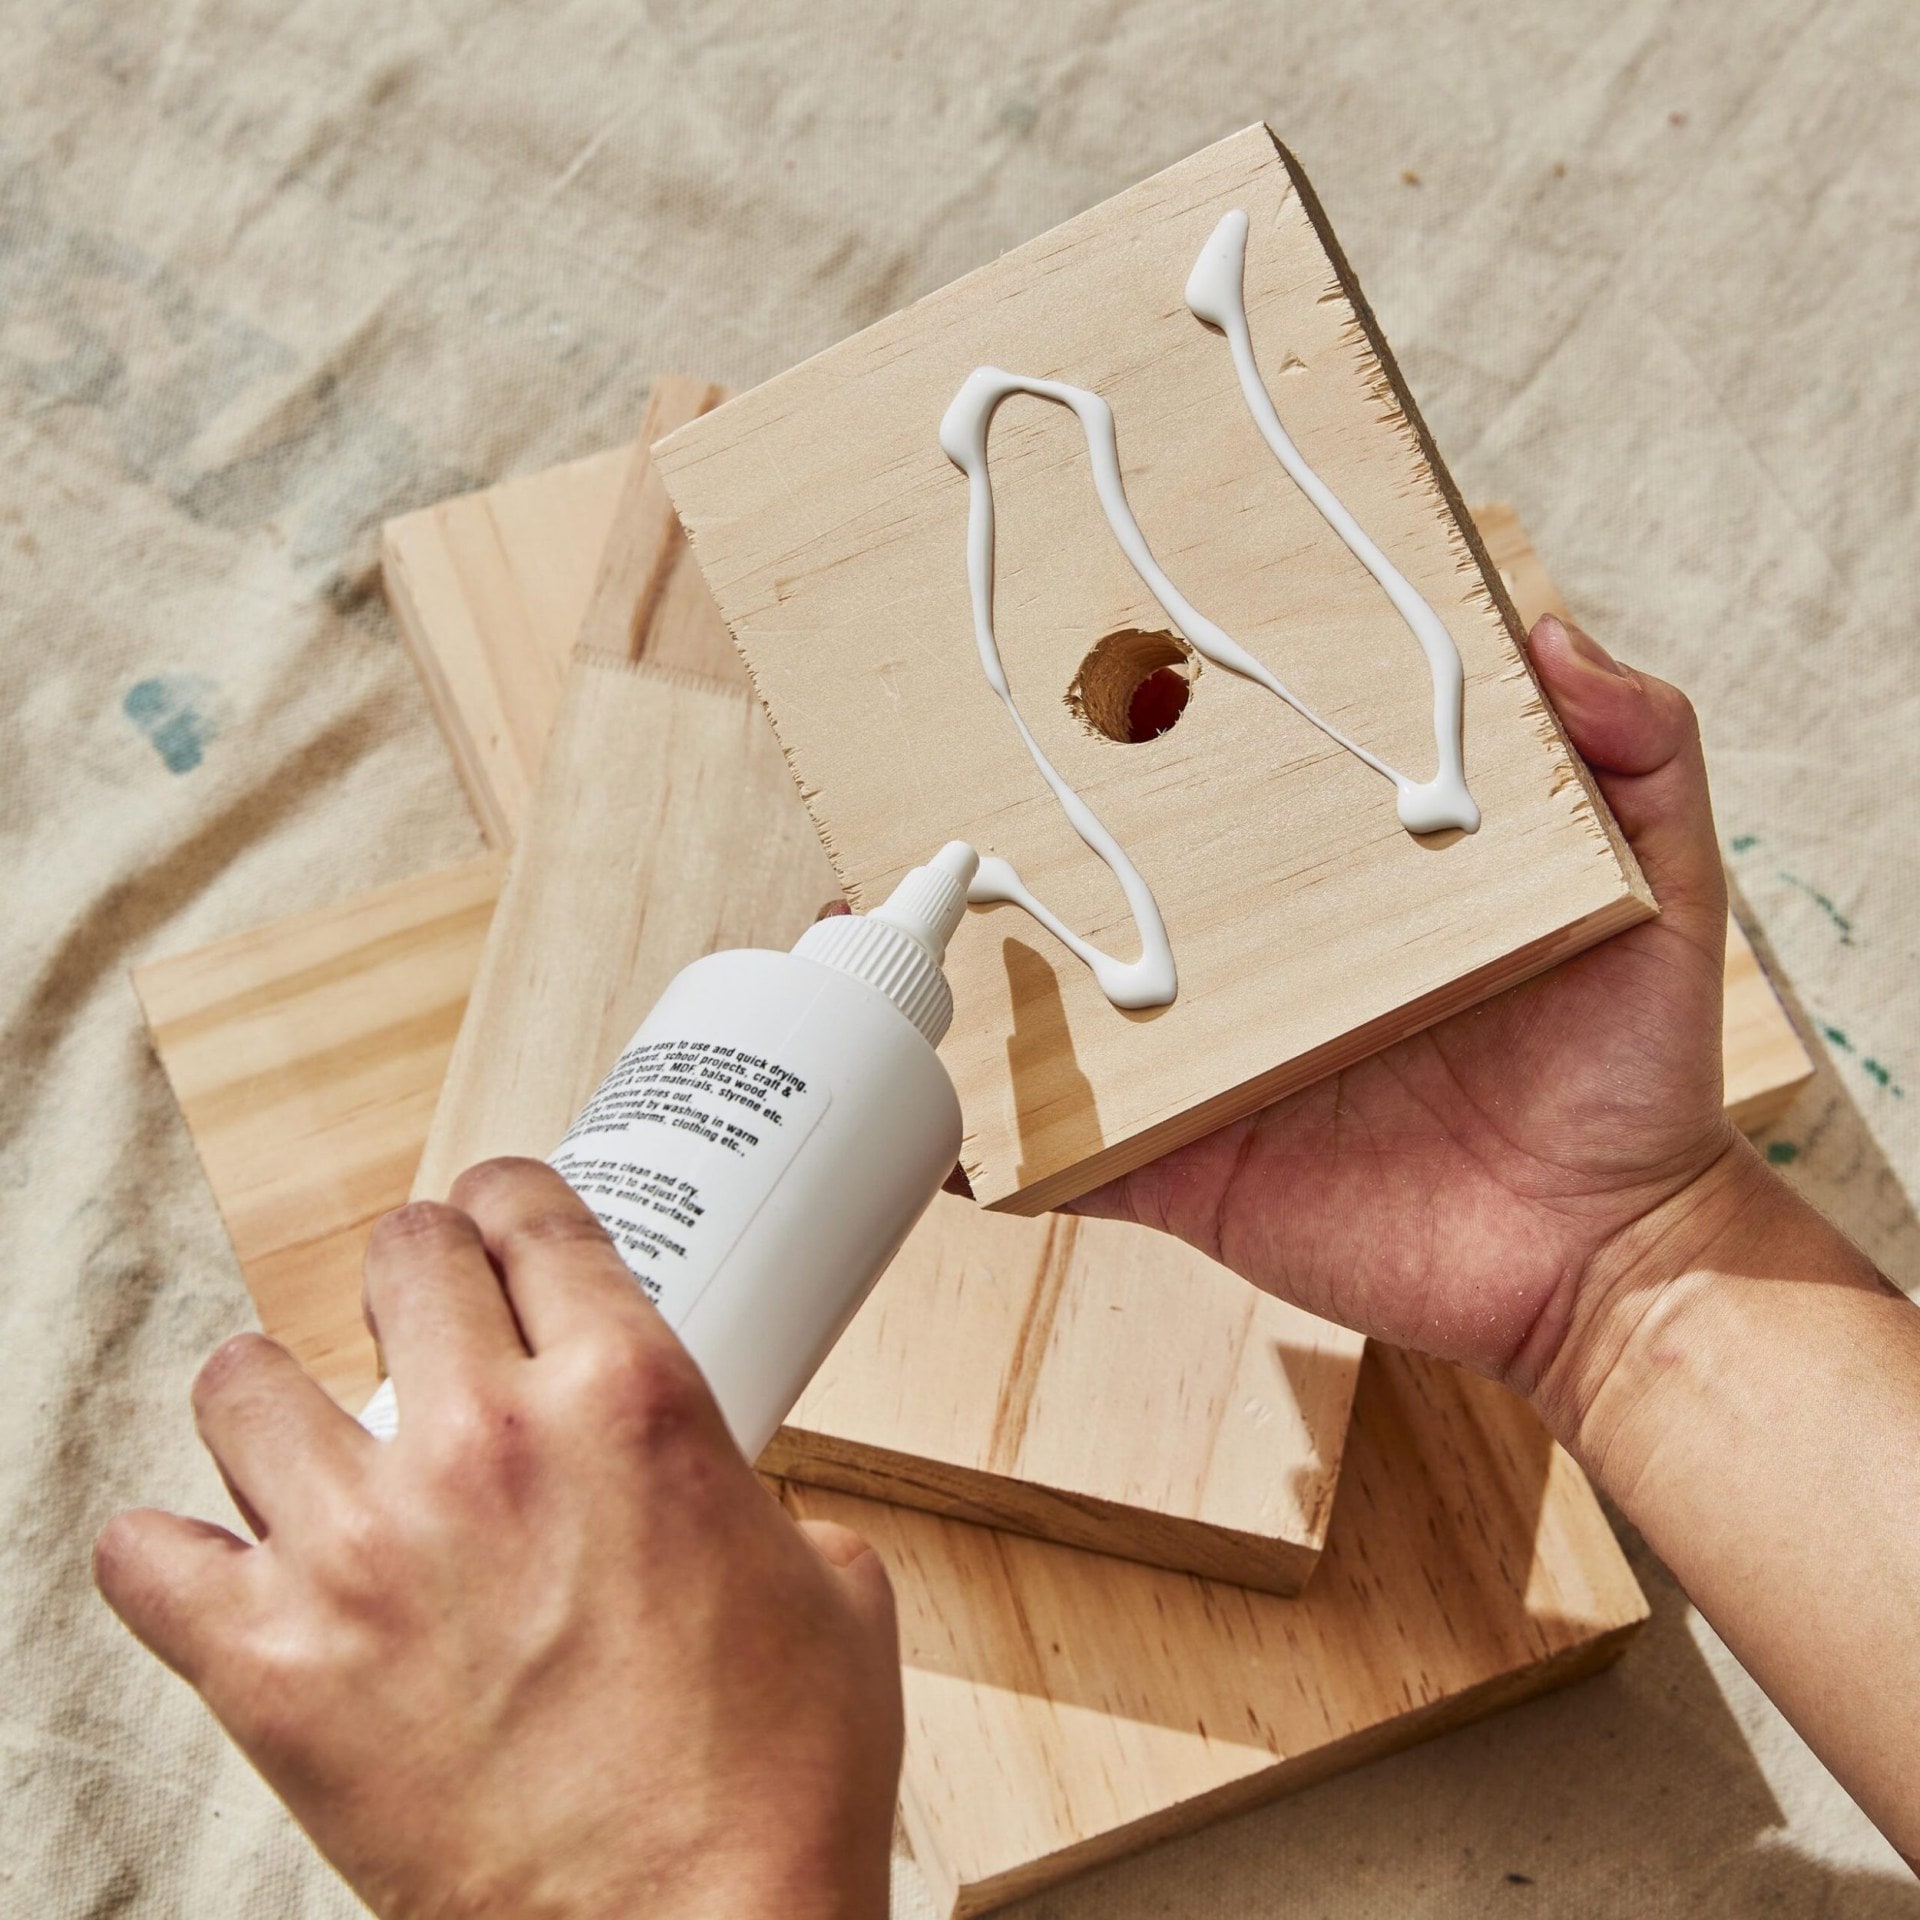
4 Glue the drilled base pieces on top of the cross, creating a stack. Begin with the piece you drilled halfway through, then add the piece with the hole. This will hold your length of dowel in place.
5 Flip the stack over and drill the screw straight through the centre.
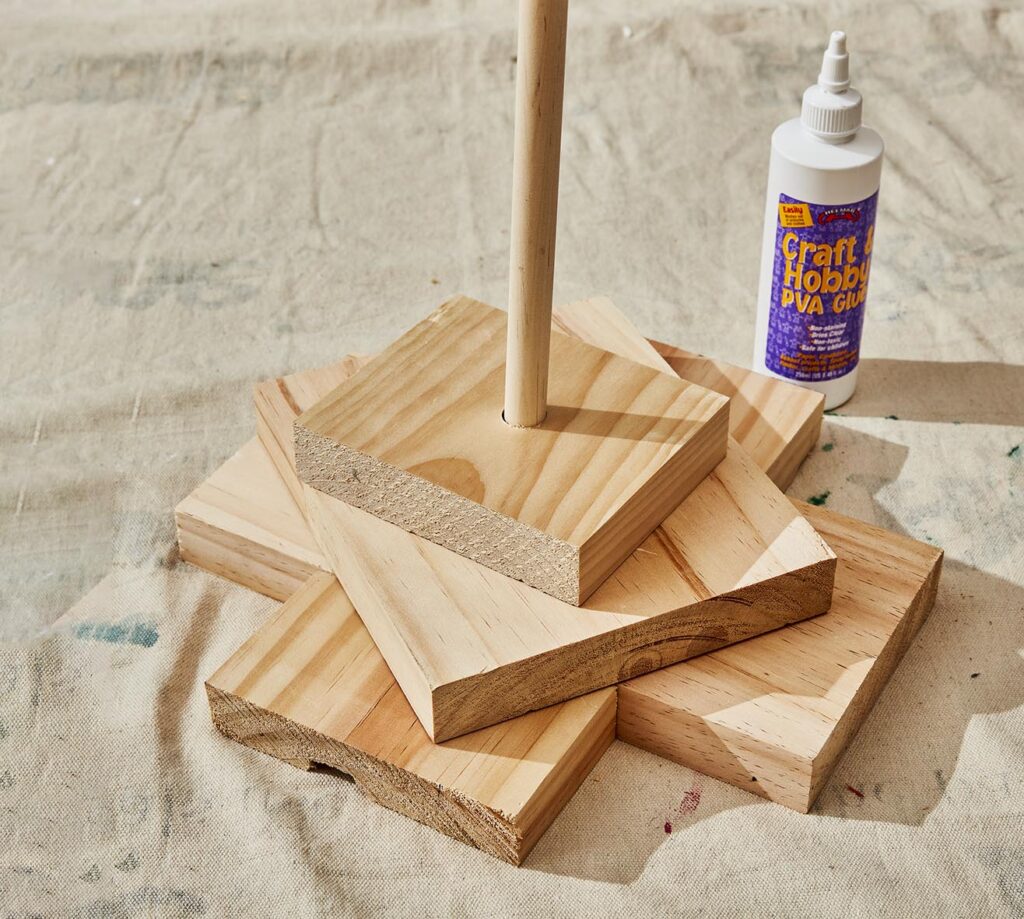
6 Glue in the length of dowel.
7 Using the 18mm drill bit, drill a hole through the centre of each branch and spacer.
8 Paint the branches and spacers in your chosen Resene testpot colours. Paint the base but not the dowel as you do not want to alter the central measurement. You may want to leave some of the bottom spacers unpainted or stain them with Resene Colorwood wood stain to create more of a “trunk” effect.
9 Once the paint is dry, stack your tree, placing four spacers over the base. Next, add the longest branch, then alternate between a spacer and a shorter branch until you reach the top!


Grow a tree
• For a taller tree, increase the dowel height, and the amount of spacers at the base of the tree rather than the number of branches.

• For a fuller-looking tree, double up the number of branches and use a thinner finger-jointed timber.
This content was made in partnership with Resene.