This simple step-by-step by Resene will make it easy to take on the terracotta trend and sculpt your own DIY floral vases.
Step by step
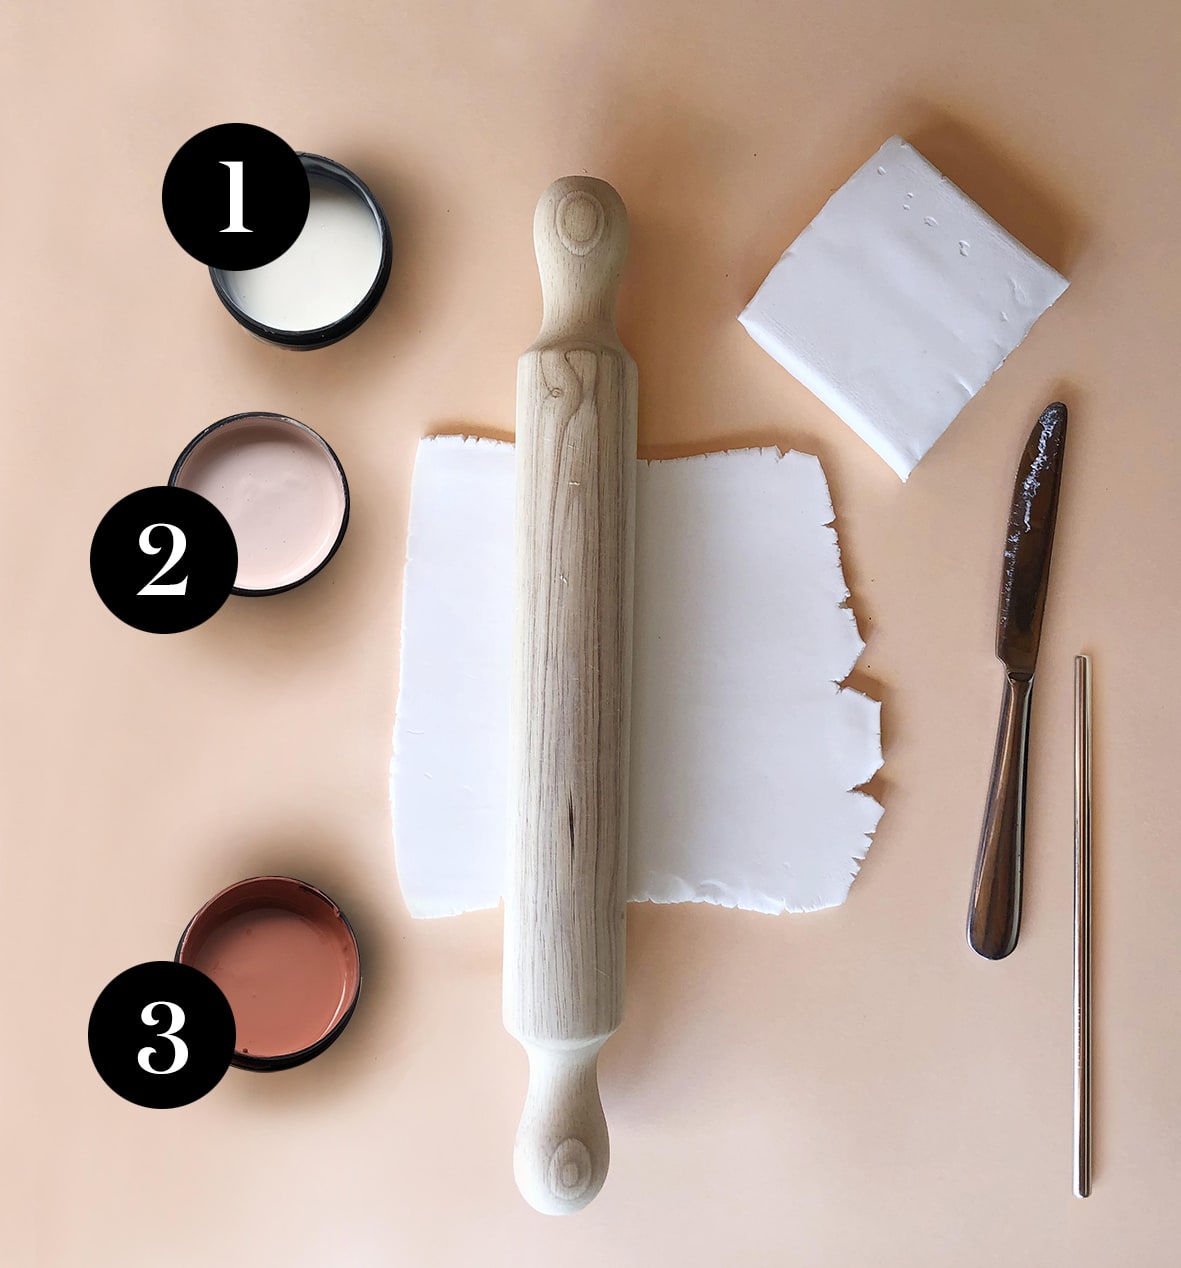
You will need:
Modelling clay (air-drying or baking)
Rolling pin
Knife
Straw
Fine sandpaper
Resene testpot brush
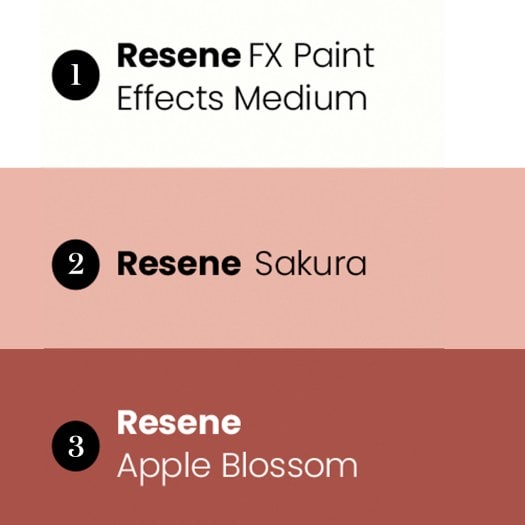
Resene testpots (see colours listed)
Resene FX Paint Effects Medium Small sponge
Cord to hang
Step 1
Start by rolling out your clay about 7mm thick (A). It’s important to work on a clean, non-stick surface.
Step 2
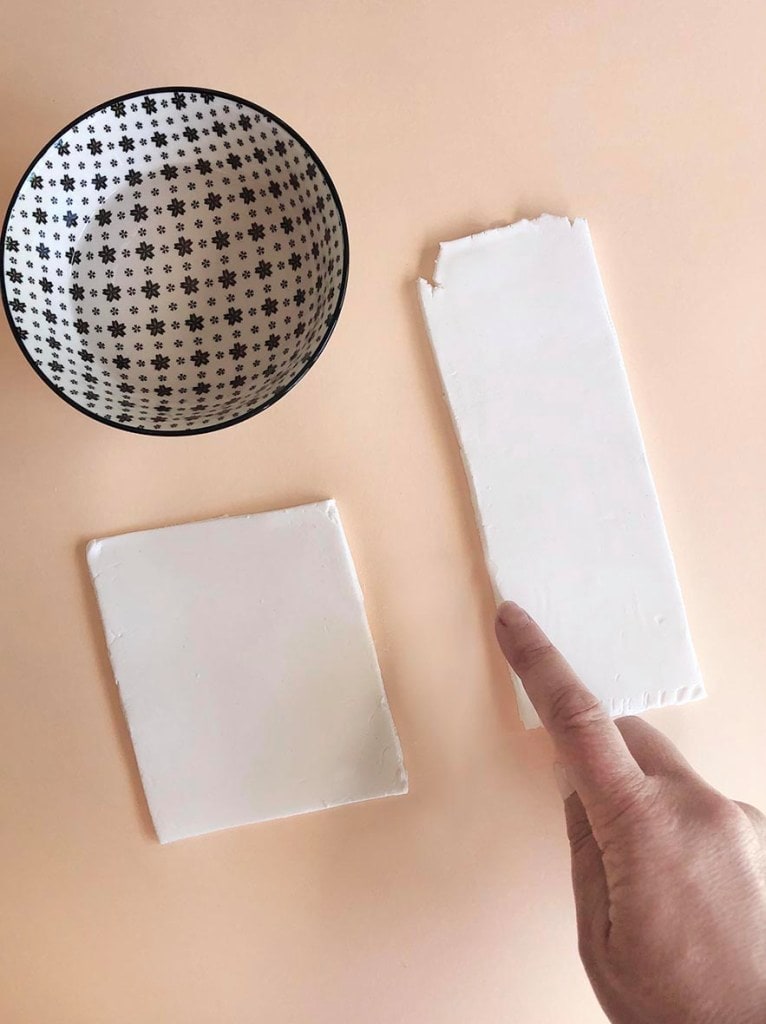
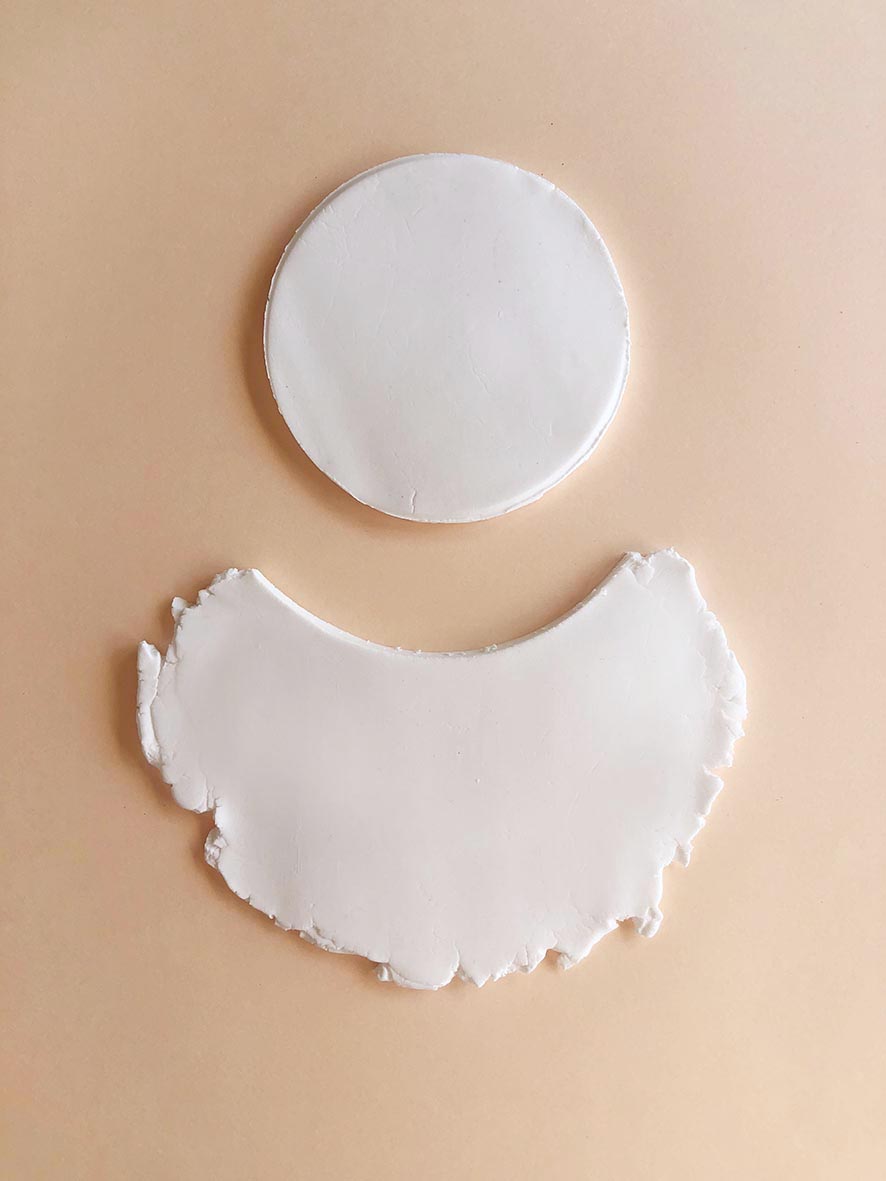
Use a knife to cut a rectangle as long as you want the main shape to be, then cut a square roughly twice the width of the rectangle and two-thirds the height (B).
No matter what shape you’re making, the top piece must be wider to form a dome or pocket. The backing piece always needs to be taller and have enough height to support your flora and allow for a hole.
Step 3
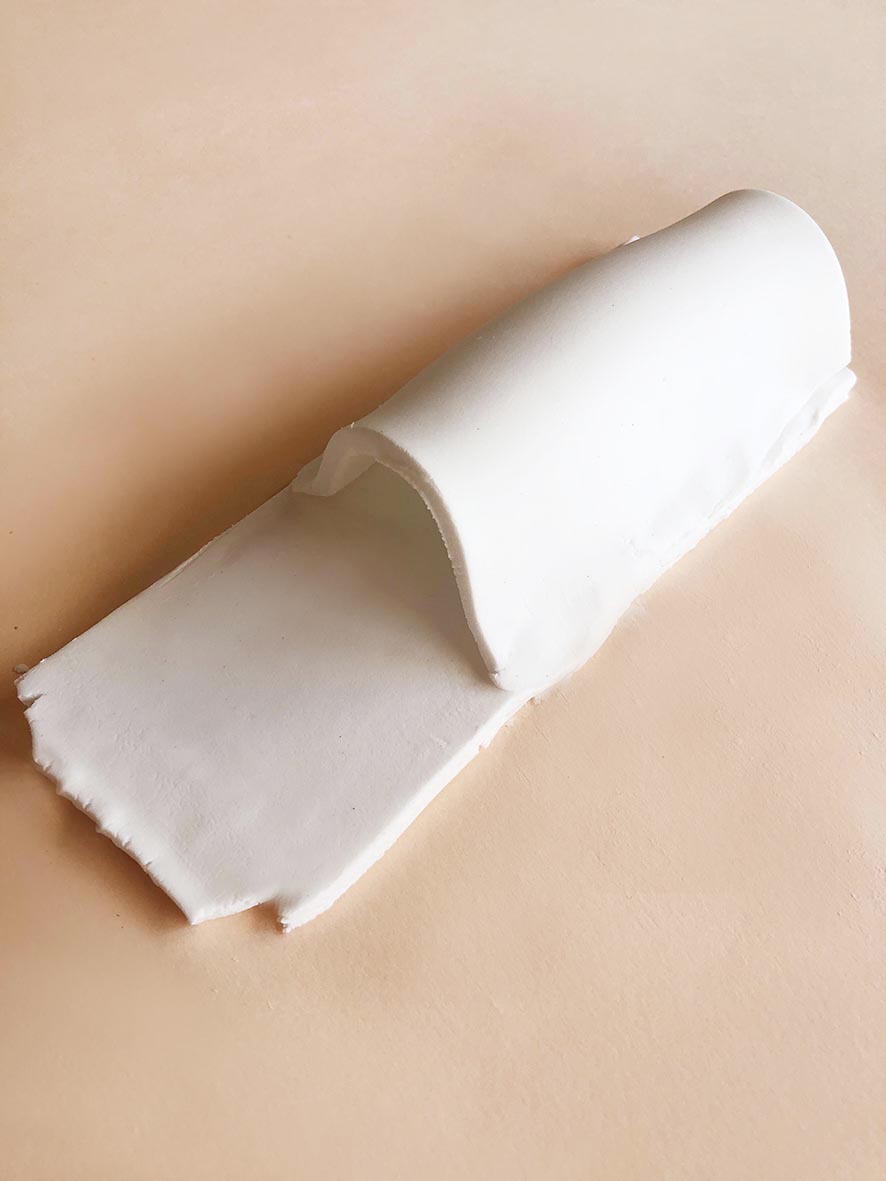
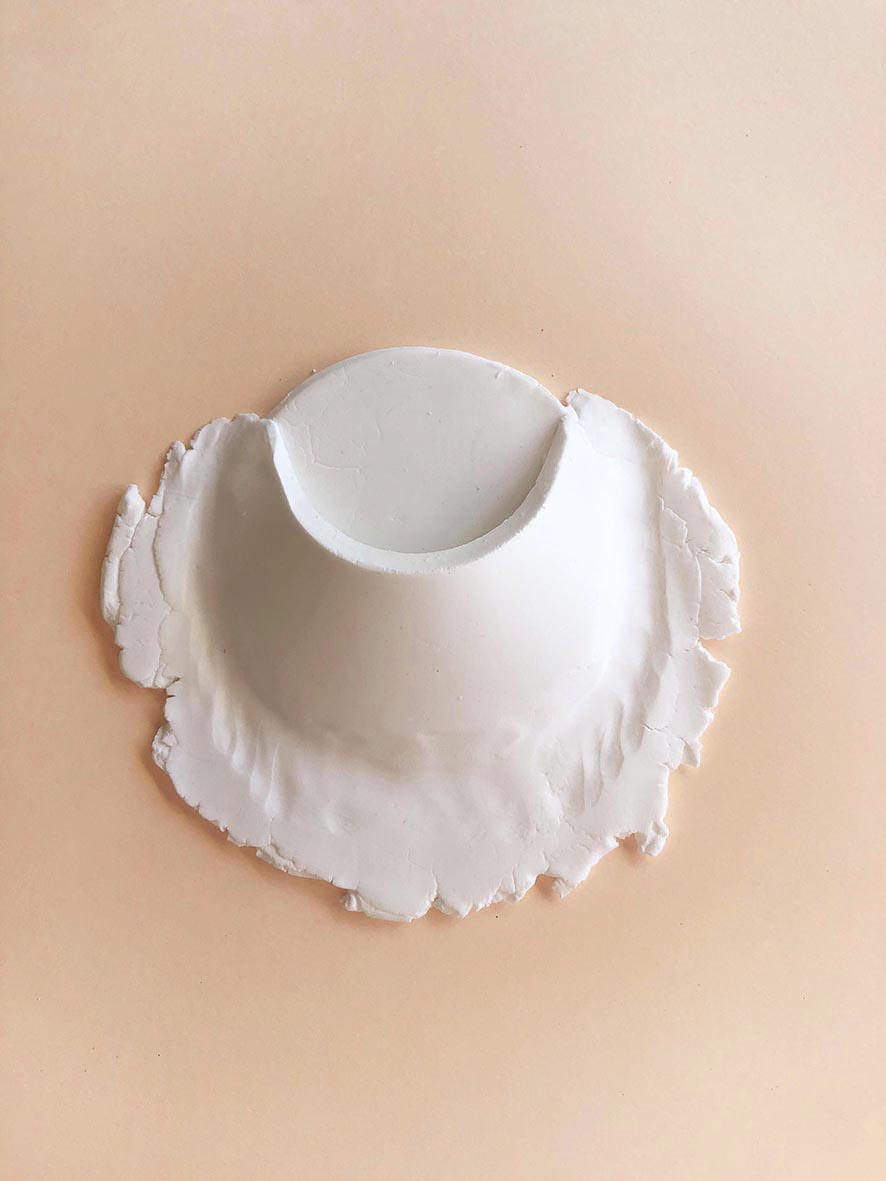
If using air-drying clay, dip your fingers in water and wet the edges of the clay slightly – baking clay does not require any water to seal together. Take the smaller, wider square piece and make an arc over the backing piece, bringing the sides together (C).
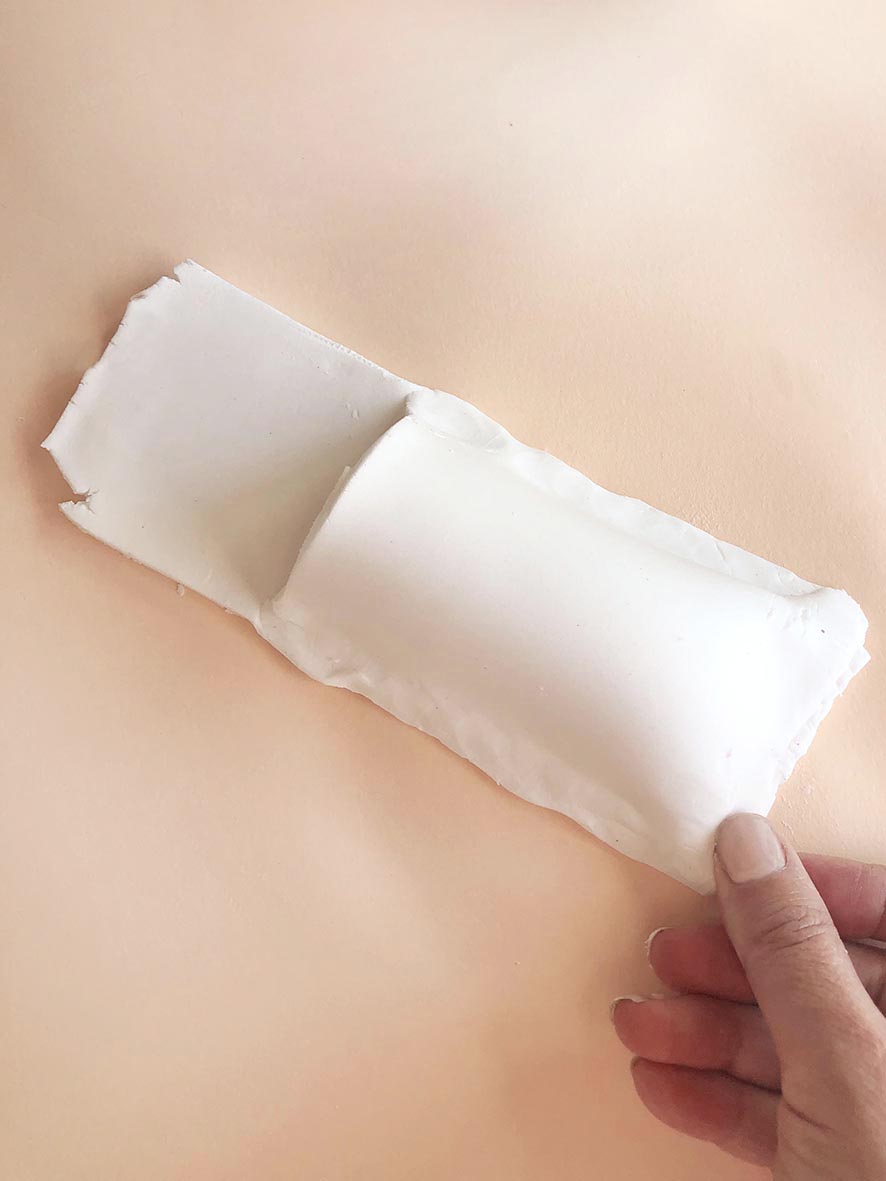
Press the sides down so the clay bonds together, then do the same along the bottom (D), making sure you still have a curved opening at the top.
Step 4
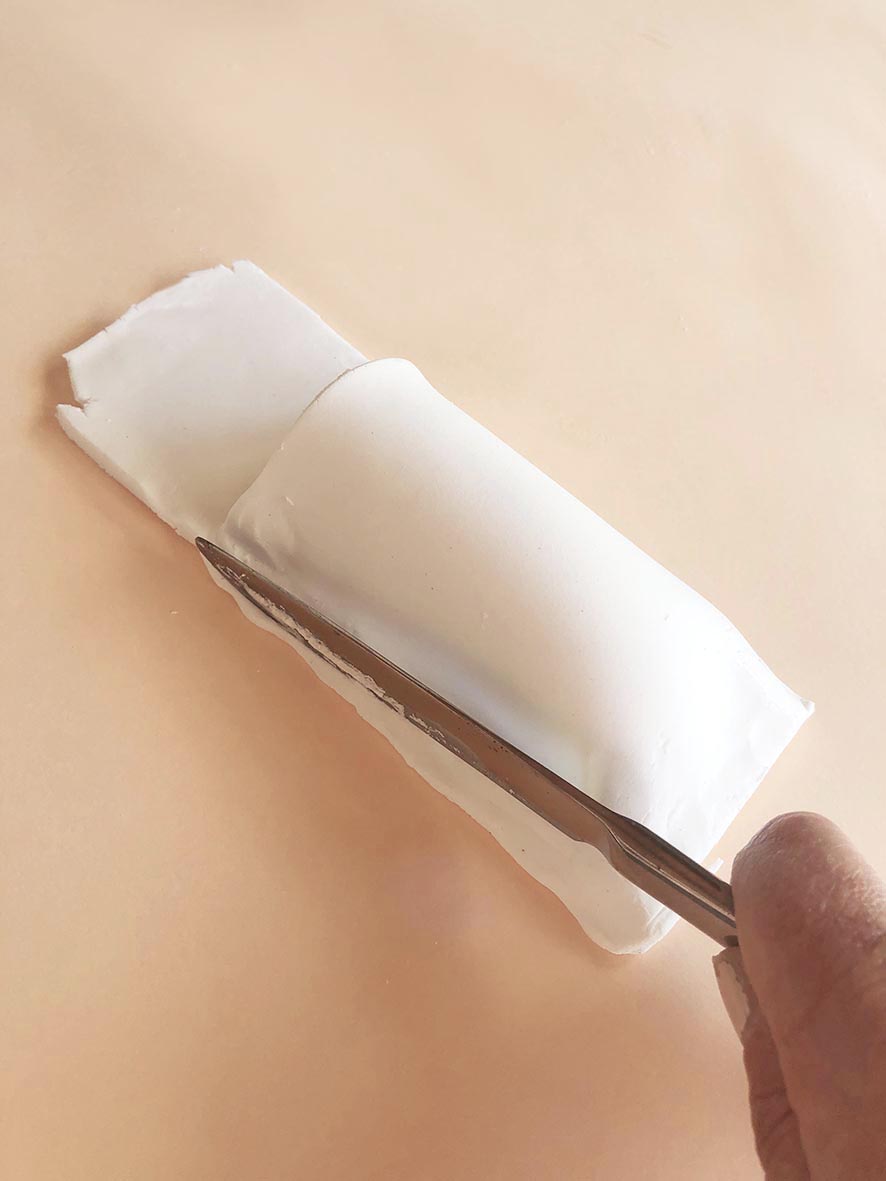
Trim edges to remove excess clay and create a tidy shape (E).
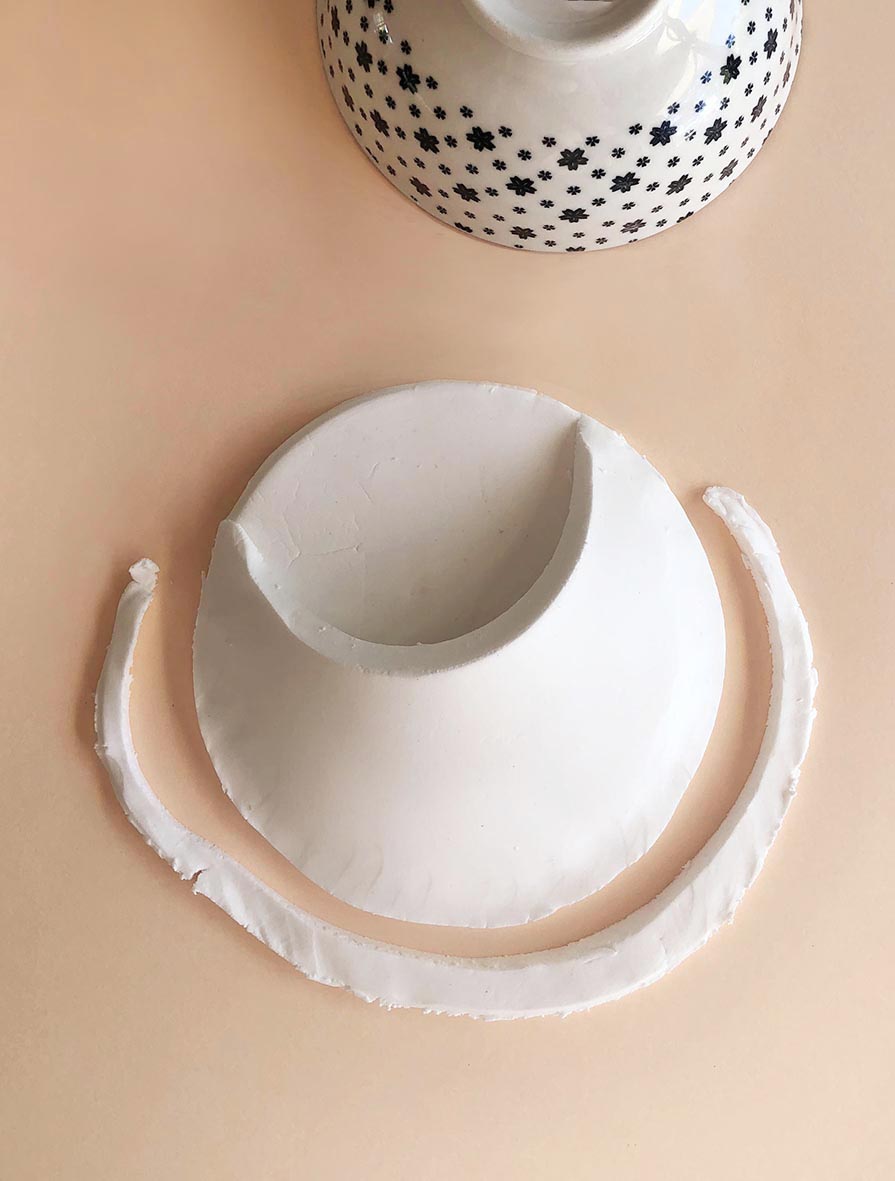
NOTE: If making a circular bud vase, use a small bowl to cut around for the base, then make a larger circle and cut an arc for the top pocket (F).
Seal the edges (G) and cut off excess clay (H).
Step 5
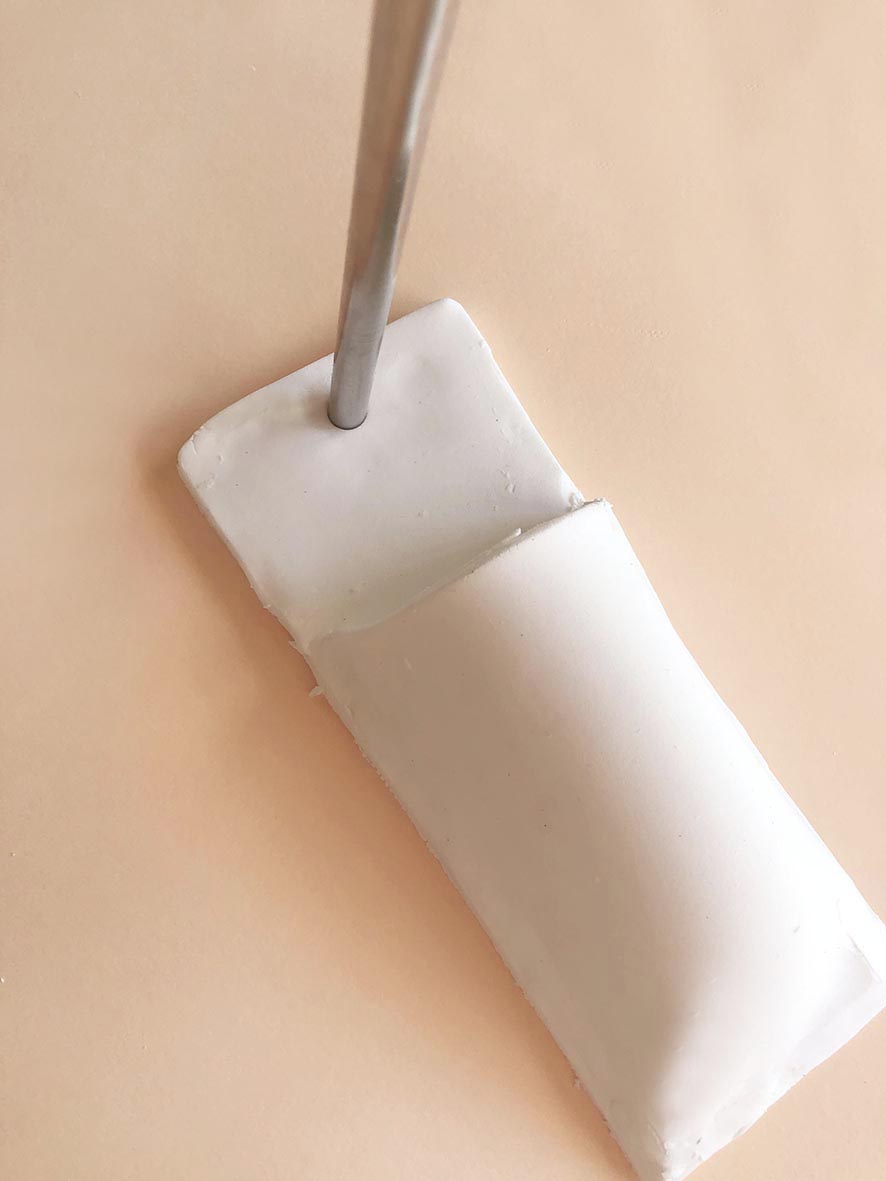
Using a straw, make a centred hole about 1cm down from the top edge (I). Leave air-drying clay to set for at least 48 hours, or place baking clay in the oven for 15 minutes at 130°C.
Step 6
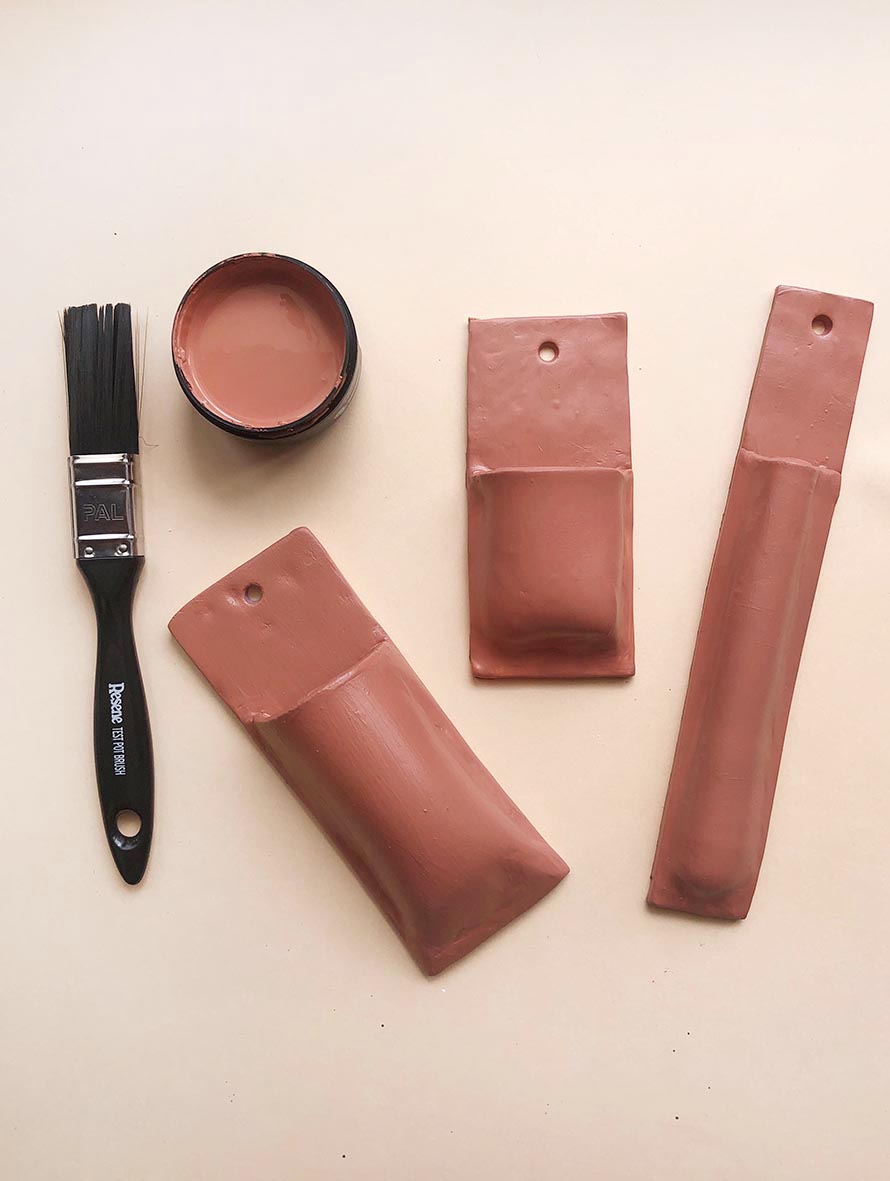
When all vases are dry, sand them lightly to remove any lumps , wipe clean and then apply two coats of Resene Apple Blossom (J).
Step 7
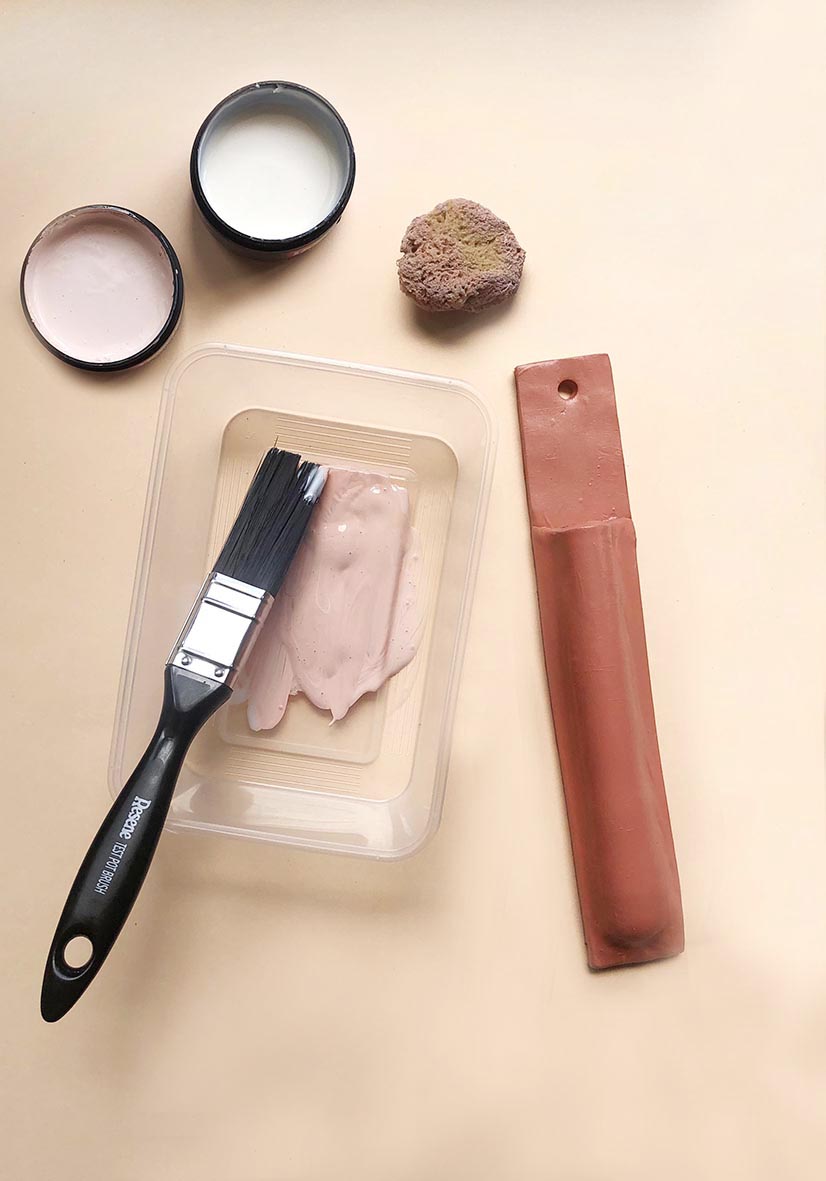
Mix two parts Resene FX Paint Effects Medium with one part Resene Sakura (K).
NOTE: The more medium you add, the more transparent the colour will become.
Step 8
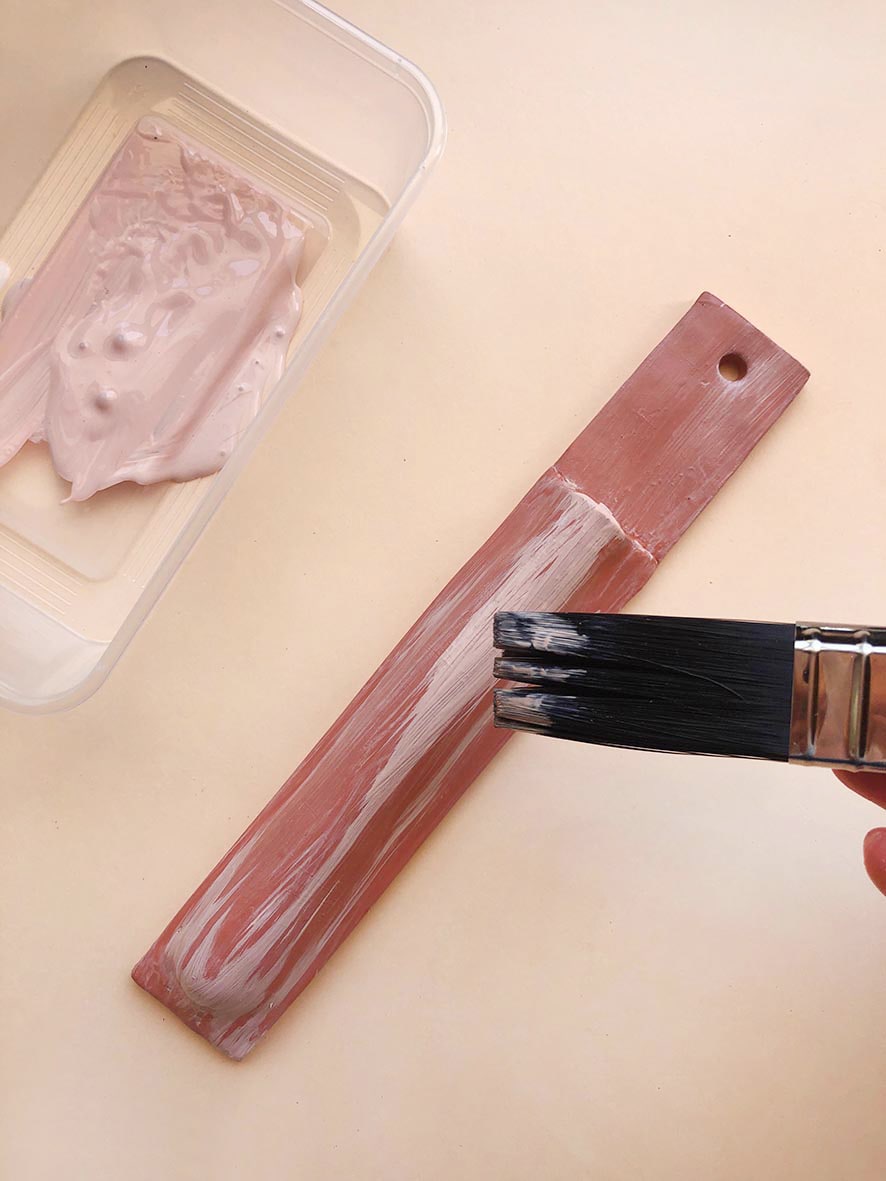
Use a clean, dry Resene testpot brush to apply long strokes of the lighter shade onto your vase (L). Don’t overload your brush with paint, just lightly dip the end in the colour and apply.
Step 9
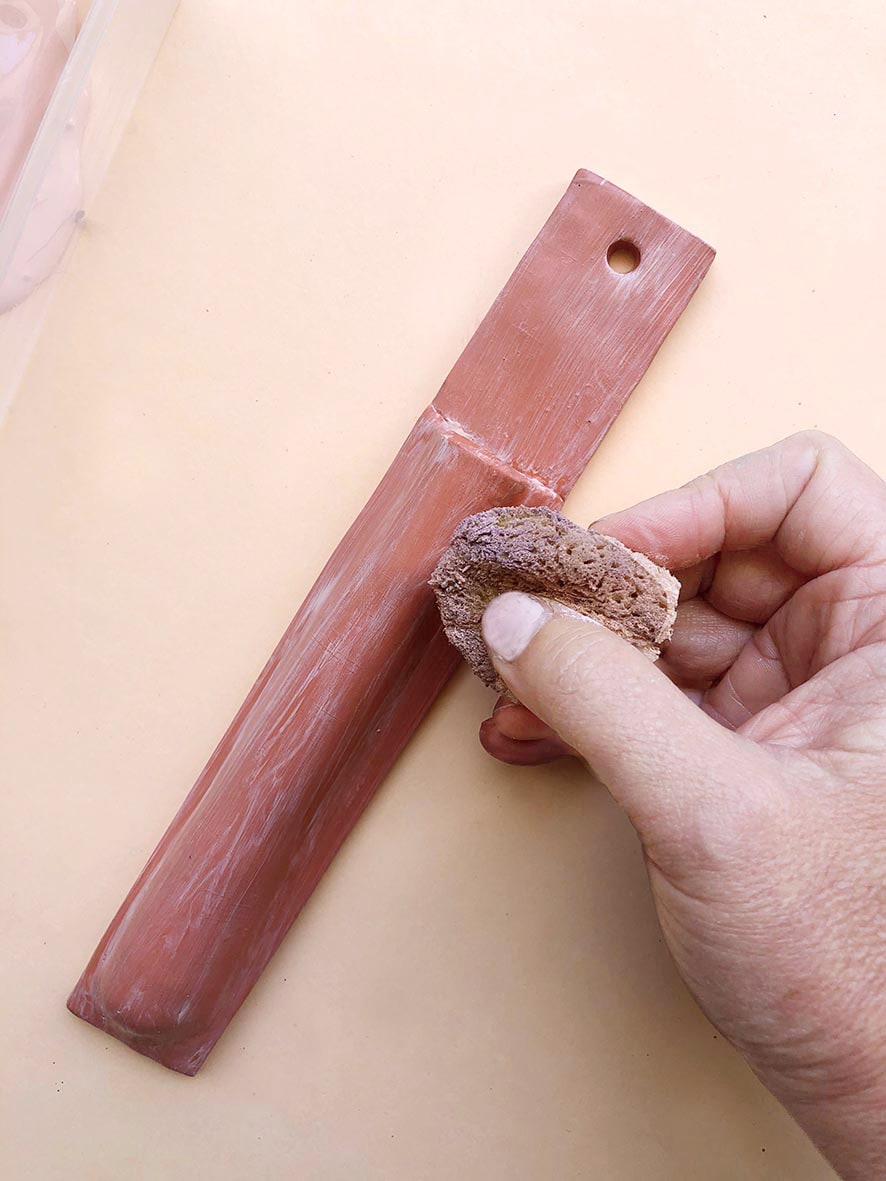
Rub the paint with a dry sponge (M), using long even strokes to create a streaking effect. Rub some areas more than others for a more realistic terracotta look. Don’t be afraid to experiment.
Step 10
Once completely dry, thread a piece of cord through the hole, fill with your chosen foliage and hang your masterpieces proudly.
Resene colour tip
By subtly adjusting your Resene basecoat colour, the ratios of Resene FX Paint Effects Medium and Resene topcoat colour, or your application technique, you can create a whole range of different effects.
NOTE: Both air-drying and baked clay can be used for this project, but remember they are not water tight, so use to display faux or dried foliage.