Keep your houseplants on trend with colourful pots and timber frames. Follow this easy step by step to give your interior an instant lift.
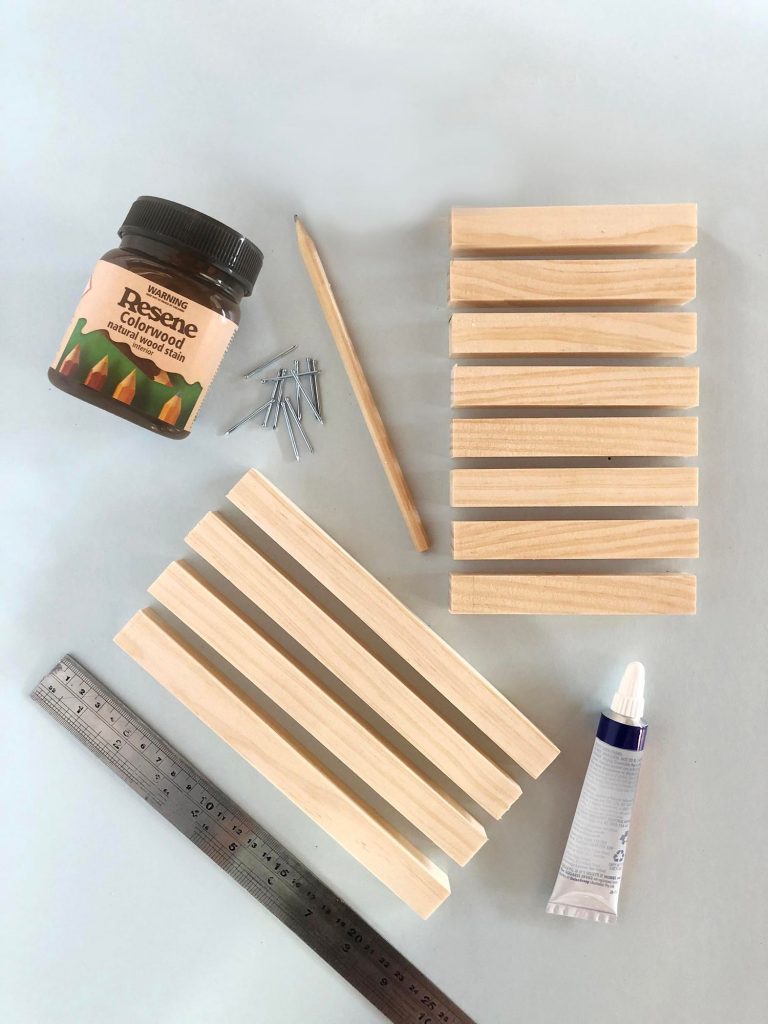
You will need
18x18mm knot-free pine – 4 x 20cm long, 8 x 12cm long
Mitre box and saw
Wood glue
Drill and 1.5mm drill bit
Hammer
30mm pin nails
Resene Colorwood Natural Wood Stain in Resene Ironbark and Resene Touch Wood
Resene testpot brushes
Resene Aquaclear
Terracotta plant pots
Resene Aquapel & Terracotta Sealer
Resene testpots (see colours listed)
Steps
1 To adjust the size of your plant stand, simply decide how high you would like it be (these will be the longer pieces of pine), then measure the width of your pot a third of the way down to get the measurement for the 8 short pieces. For accuracy, cut using a saw and mitre box (A).
2 Glue the joins (B) and make the sides of your plant stand with two long lengths and two short lengths.
Drill a small hole at each join (C).
Hammer in pin nails to secure (D).
3 Repeat again to make the another side – you will have 4 short pieces of timber left (E).
4 Glue and place the four shorter remaining pieces at each corner of one of the plant stand sides made in the previous steps (F).
Glue the other pre-made side on top (G).
Let glue set before drilling and nailing all joins in place to secure (H).
5 Use long even strokes to paint the entire plant stand with Resene Colorwood Natural Wood Stain (I).
Make sure all sides are coated, including the inner edges. Set aside to dry. For a darker effect, stain with a second coat. Apply Resene Aquaclear clear finish to protect the stained timber.
6 To create an abstract painted pot, first seal the entire pot, inside and out, with Resene Aquapel & Terracotta Sealer. Once dry, paint the entire pot, including the inside, in a light base colour. We used Resene Wax Flower for one and Resene Kandinsky for the other (J).
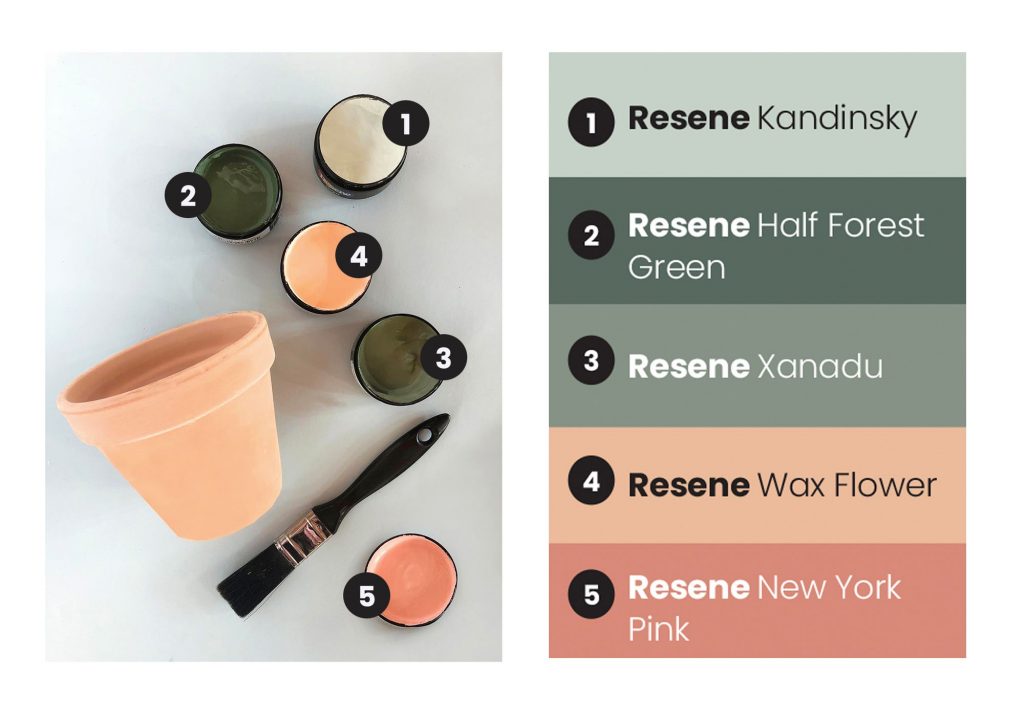
7 Once dry, use Resene Half Forest Green to paint some larger circular shapes, starting at either the base or the top edge of your pot. Once dry, do the same with the lighter green, Resene Xanadu, making sure you leave areas of your base colour showing – it’s nice to have areas of the two green shades overlapping, too (K).
8 Finally, using a smaller brush, make some dots and arc shapes with Resene New York Pink (L).
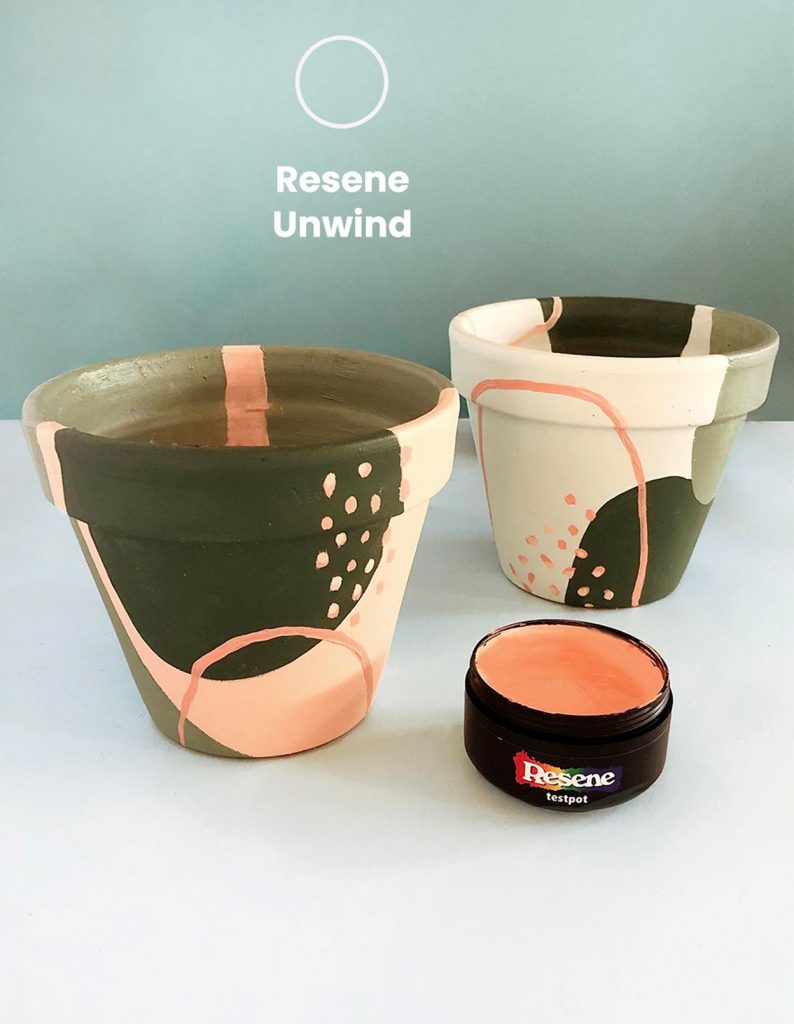
These should overlap the greens to give lots of dimension. Don’t be afraid to experiment with shapes and colours – you can always paint over the top with your base colour and start again!
Resene Colour Tip
When staining, test first with one or two coats on a small off-cut to see what depth of colour you like the most.
This article is sponsored by Resene