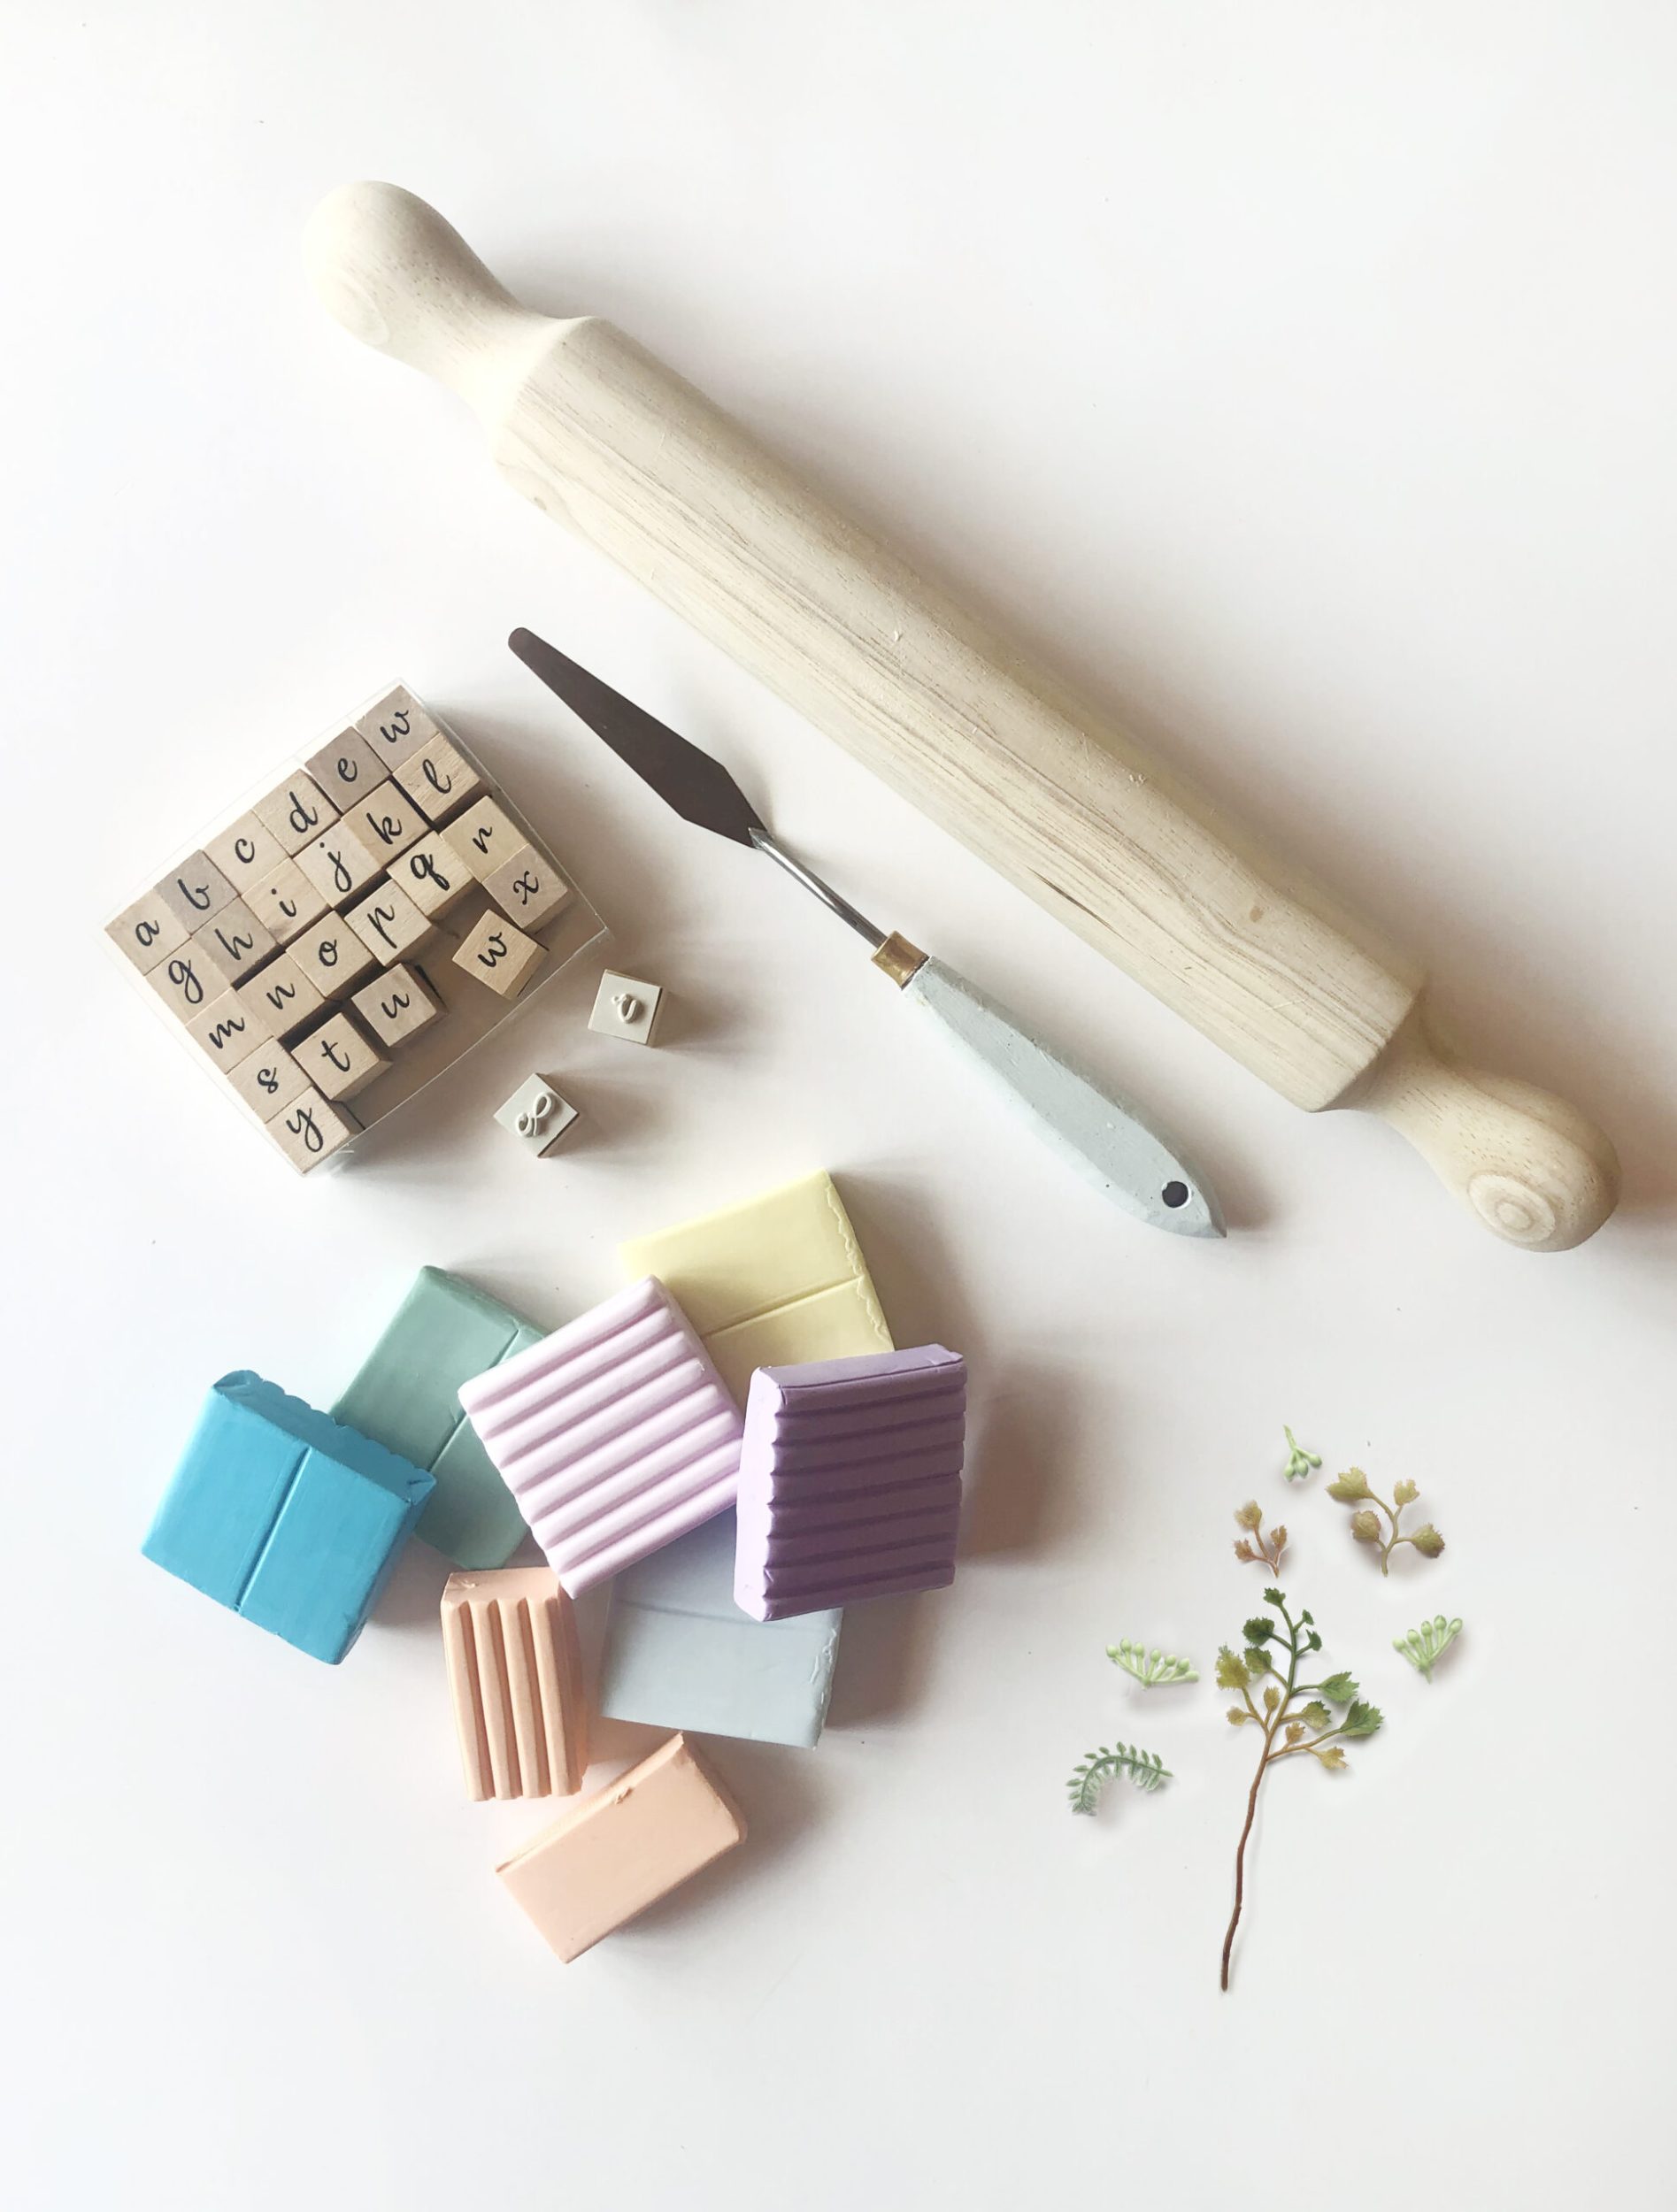
Cute, colourful and budget-friendly, Marsha Smith shares her simple step by step for DIY clay plant markers.
What you need
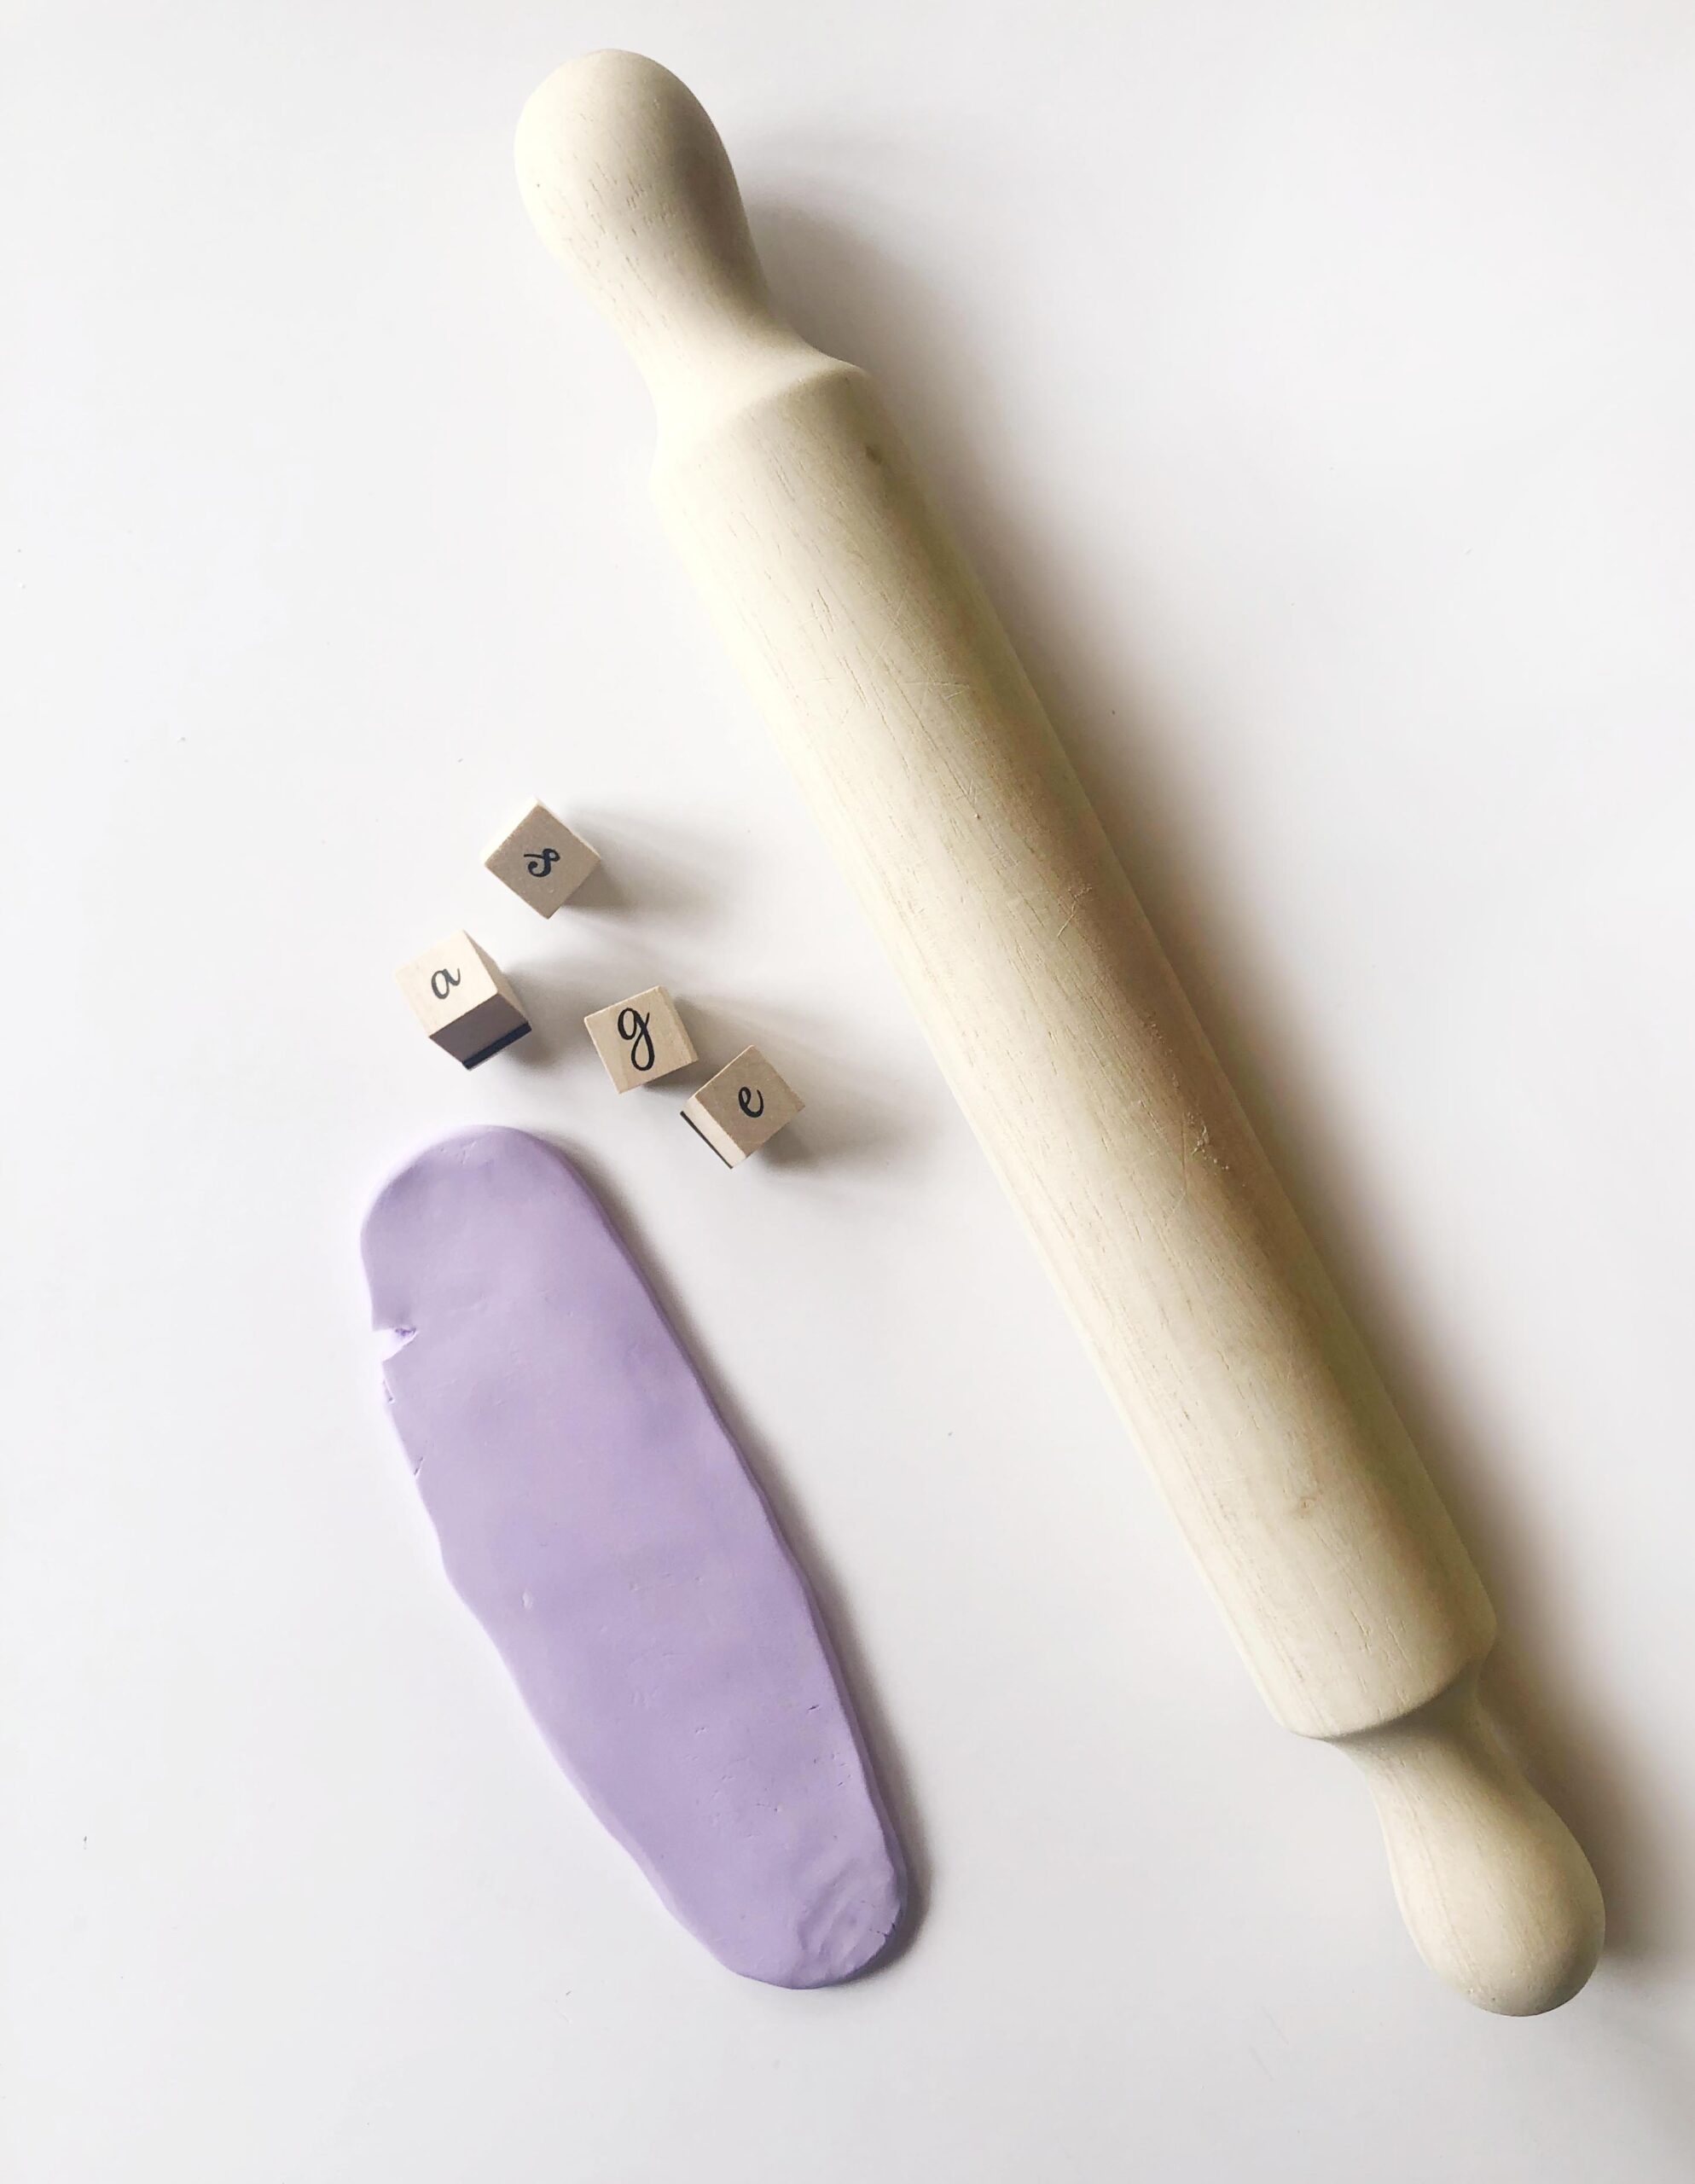
Rolling pin
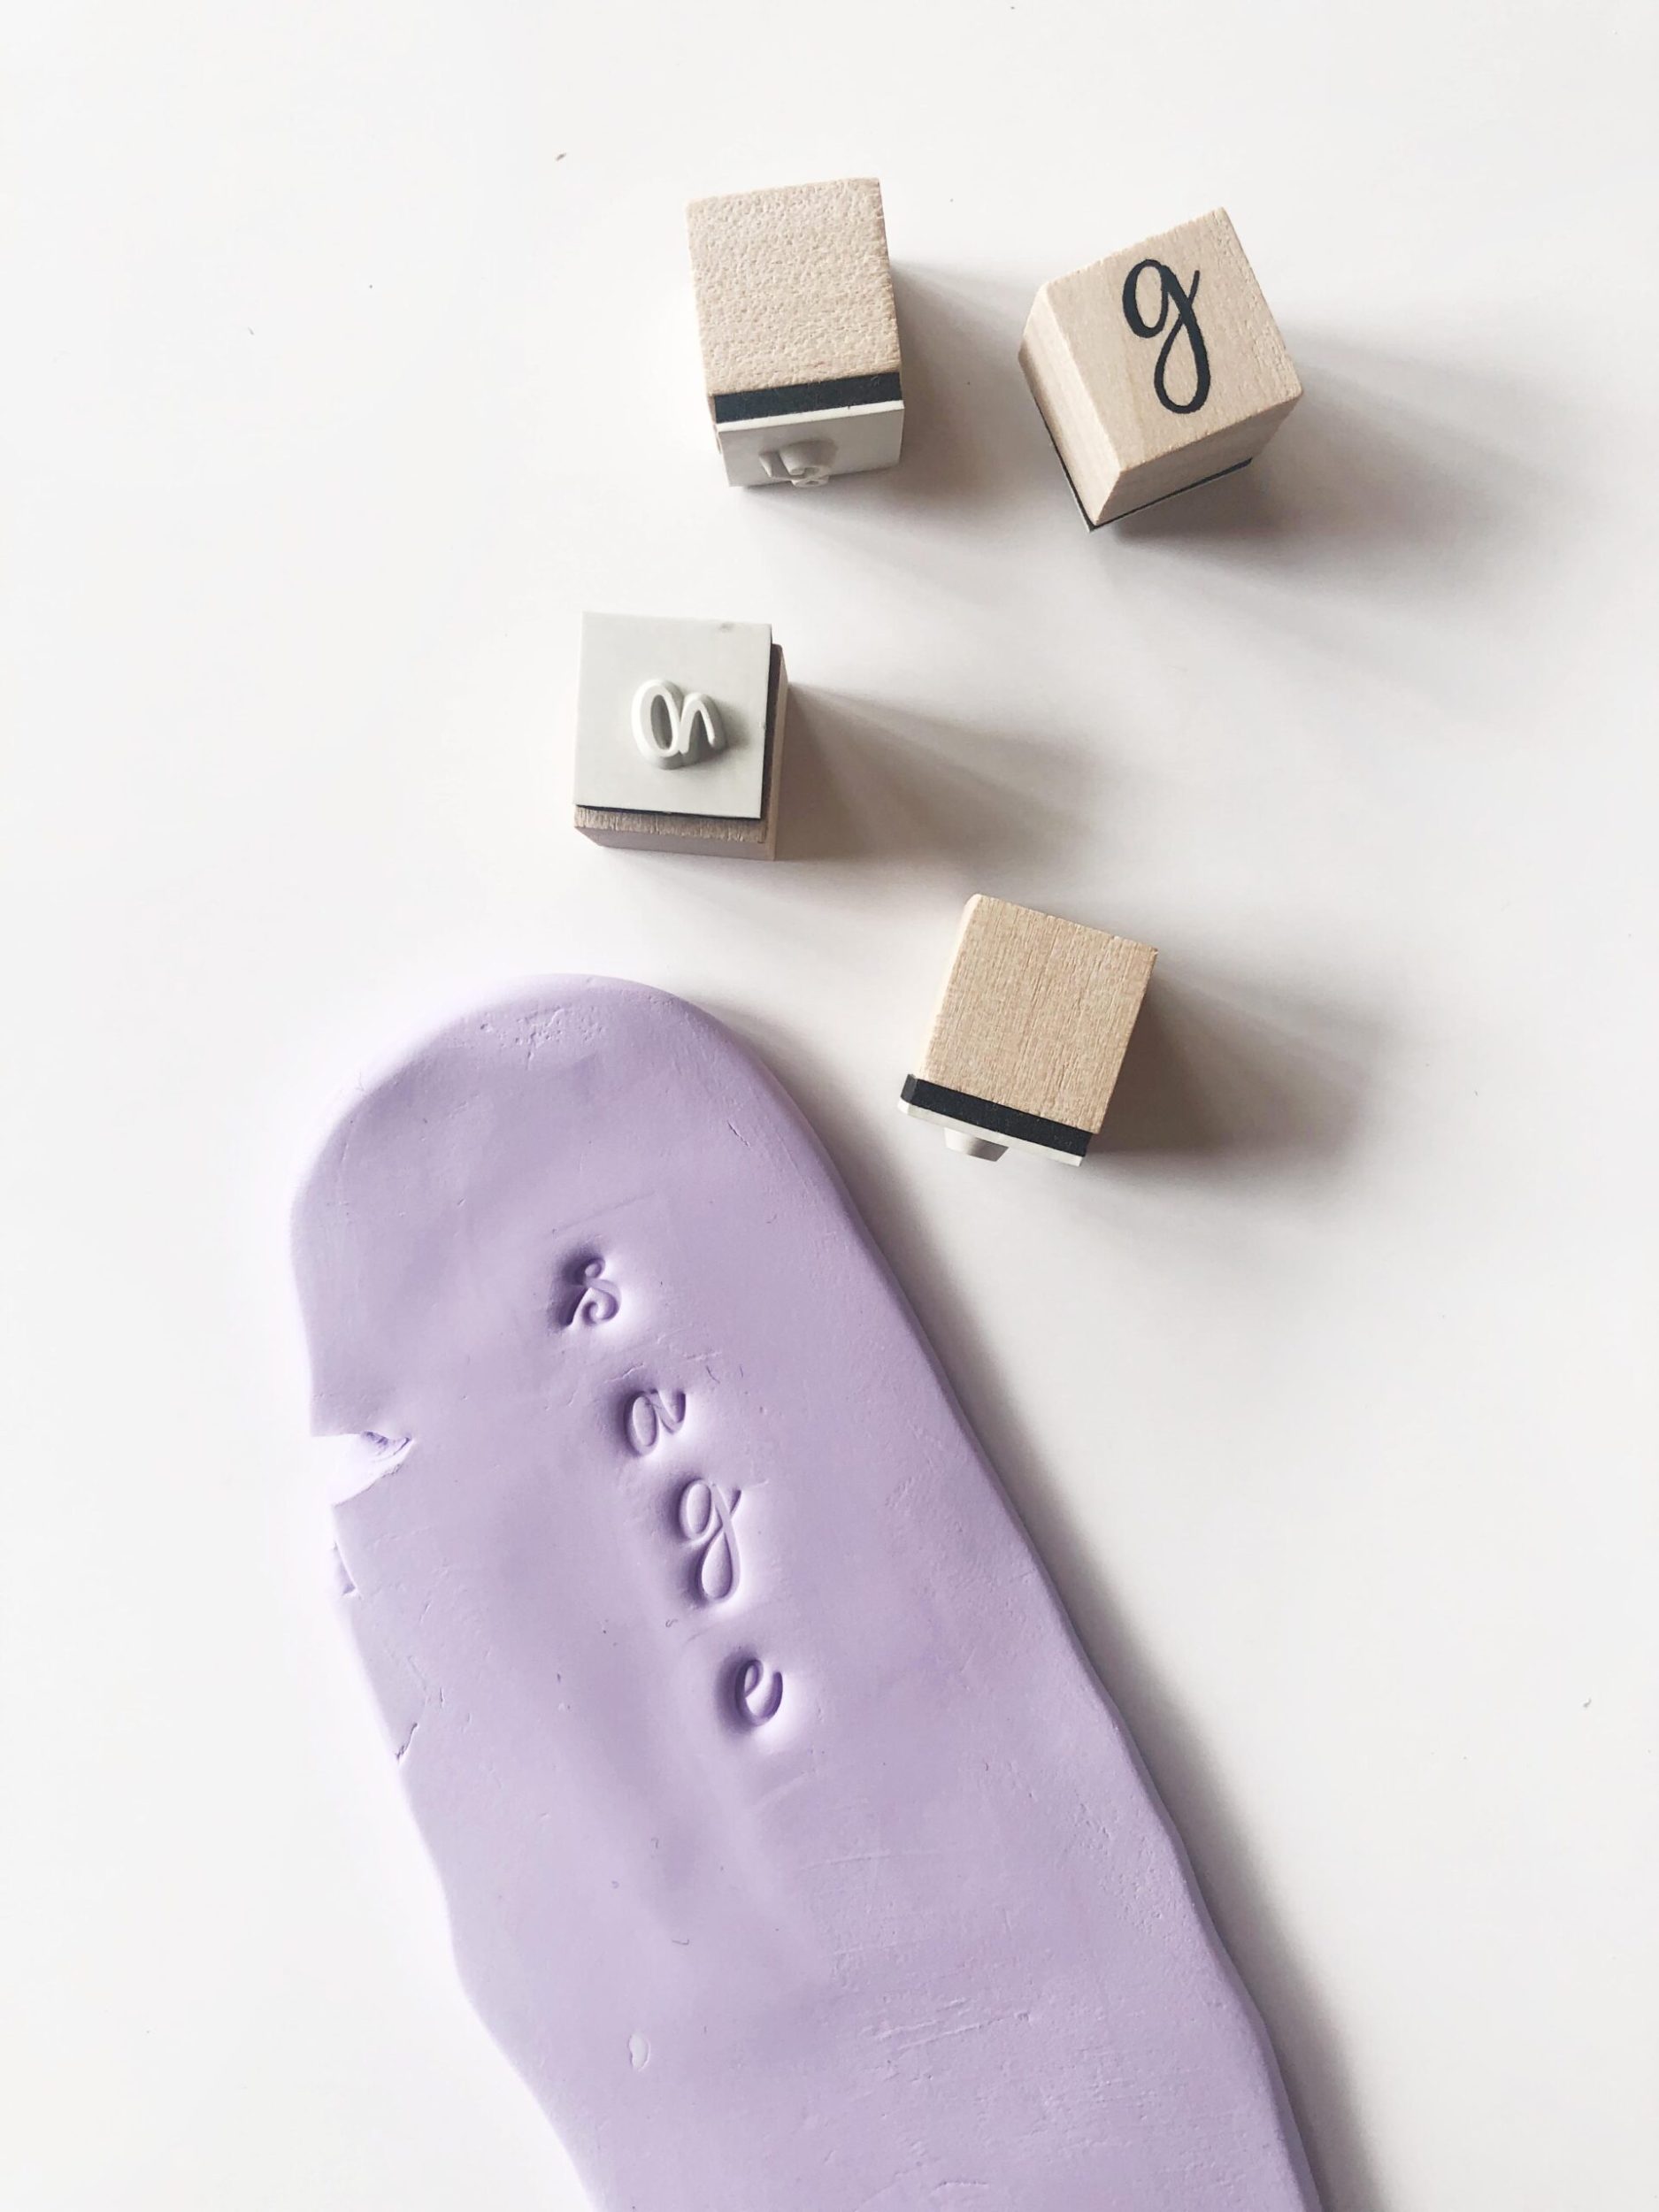
Alphabet stamps
Coloured baking clay (Fimo)
Faux foliage or similar
Palette knife
Ruler
Paint in darker shades of clay colours
Baking paper and oven tray
Wet wipes or old rag
Method
1 Knead the clay until soft and malleable. Roll out into a long oval shape approximately 7mm thick and 20cm in length (A). NOTE: It is important to work on a clean, non-stick surface to ensure you get the best results.
2 Starting a couple of centimetres from the top, spell out the herb name by firmly pressing the alphabet stamps into the clay (B).
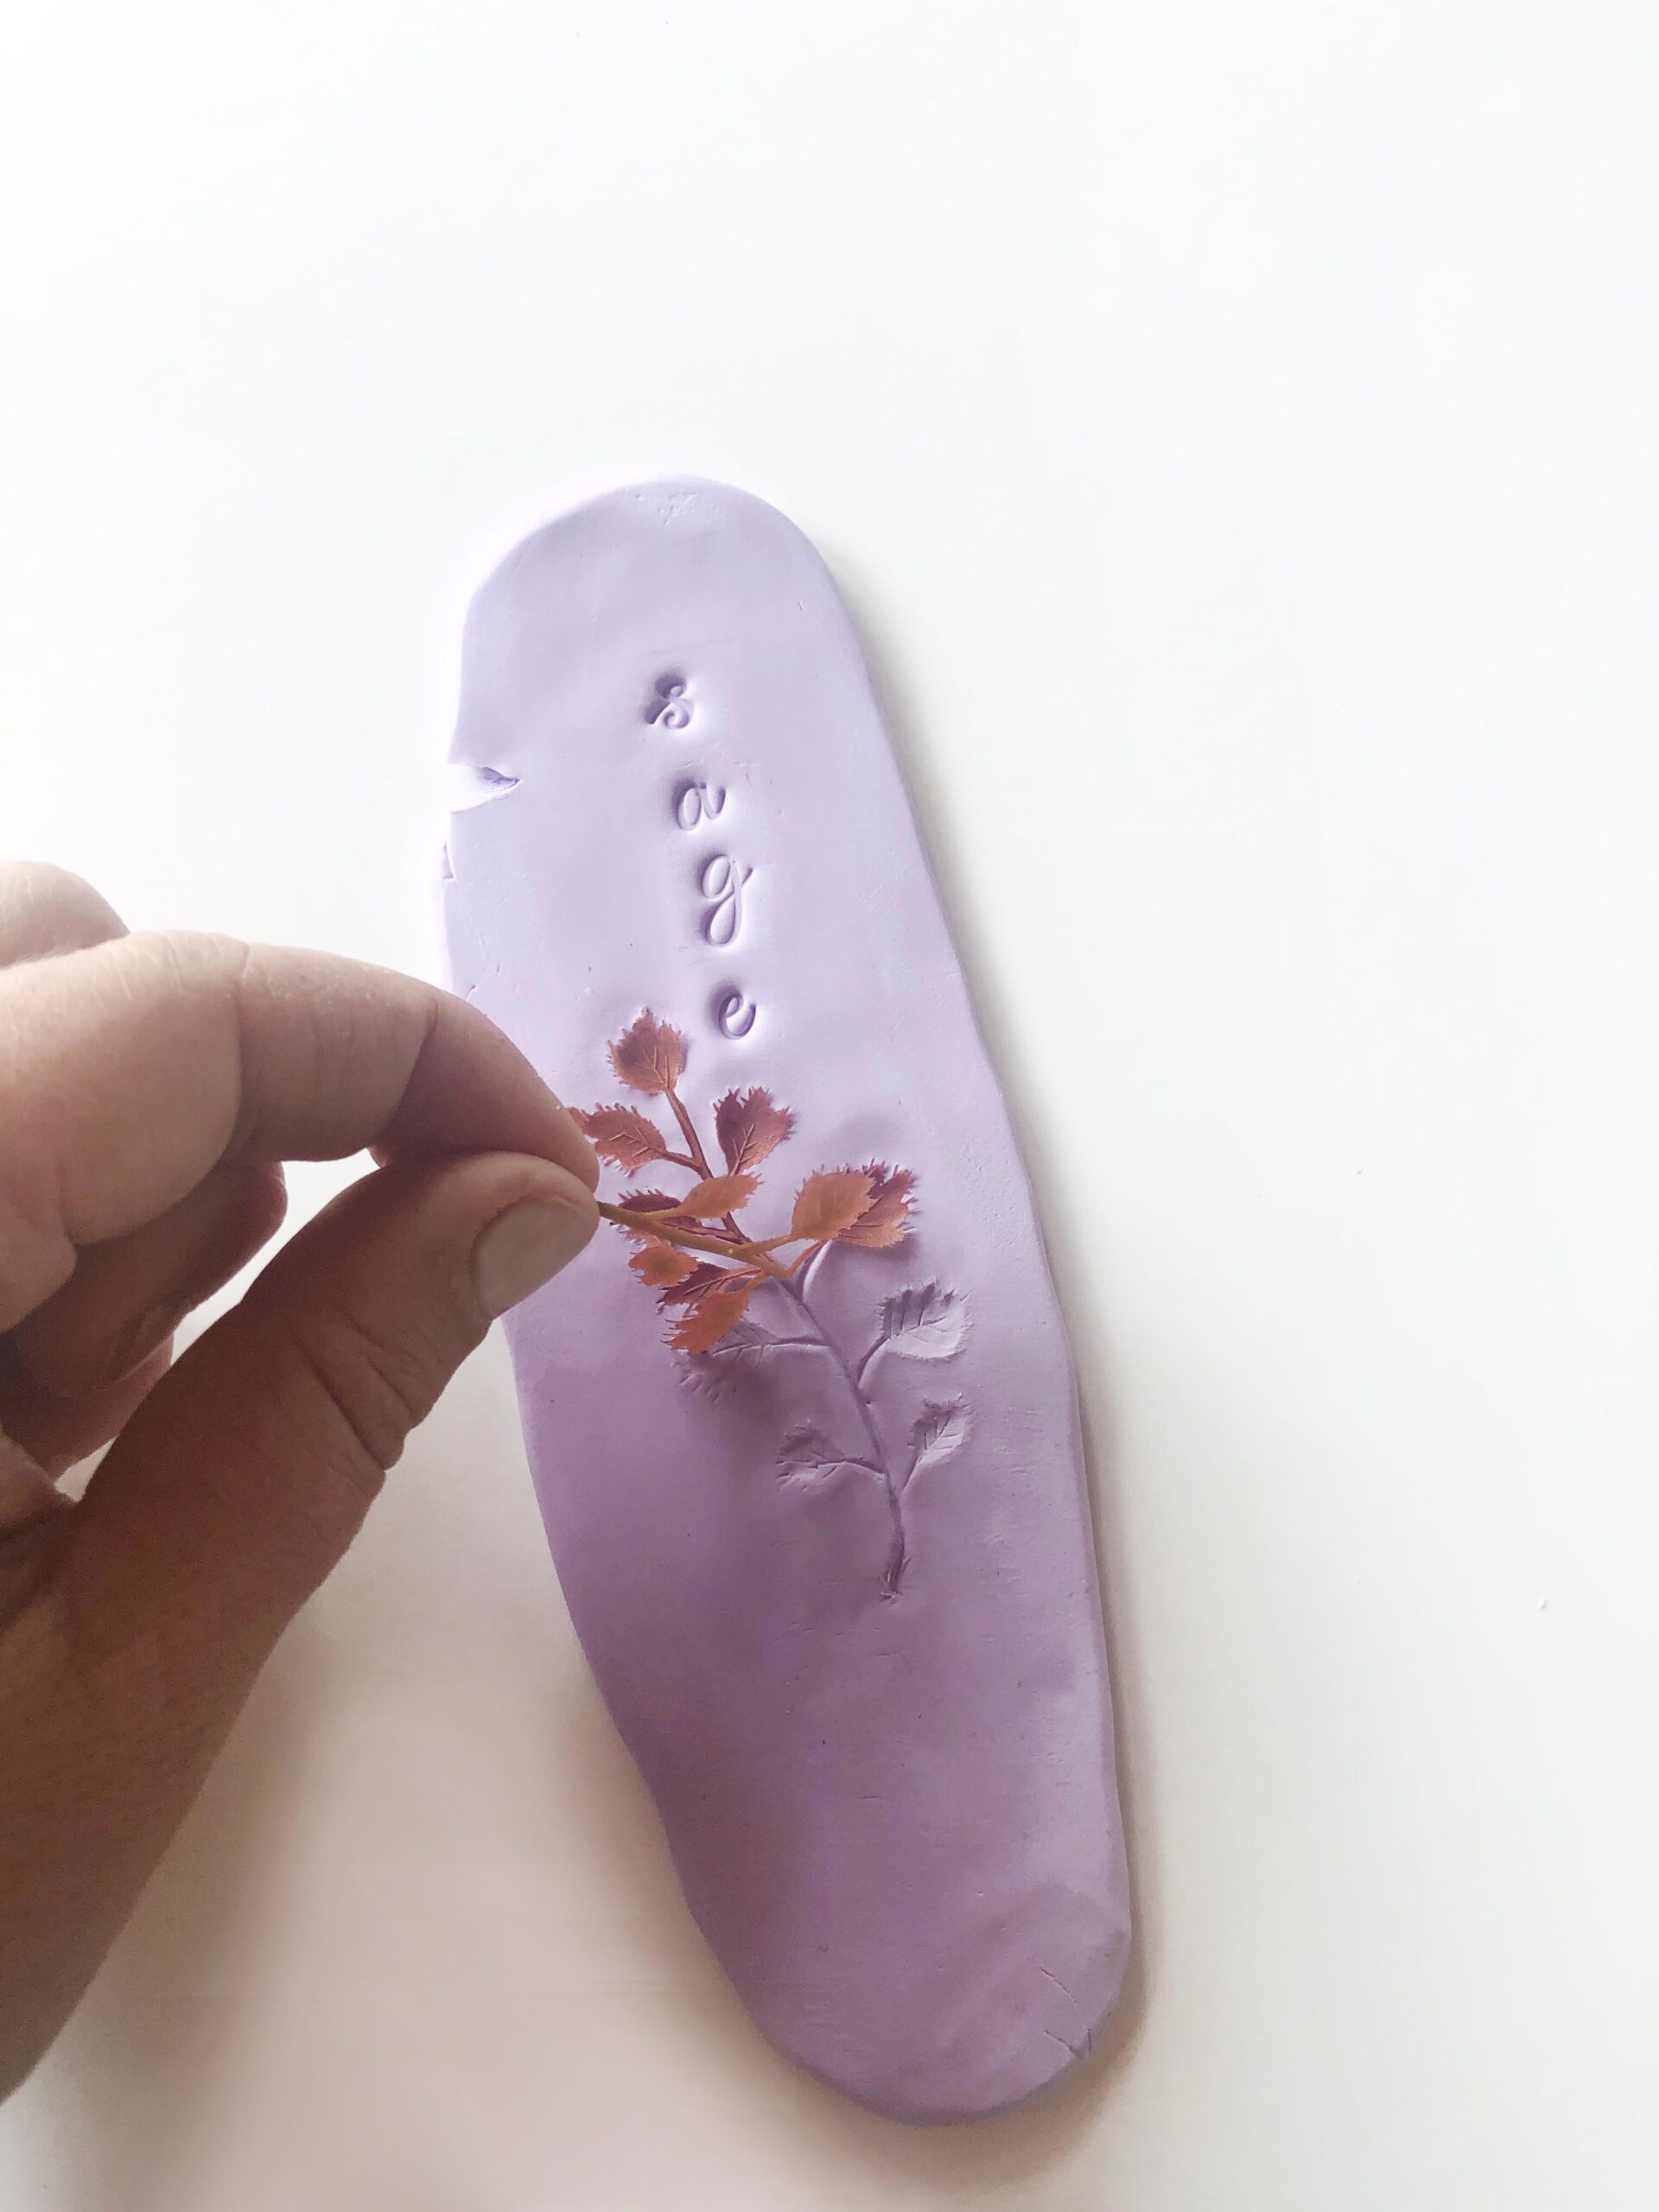
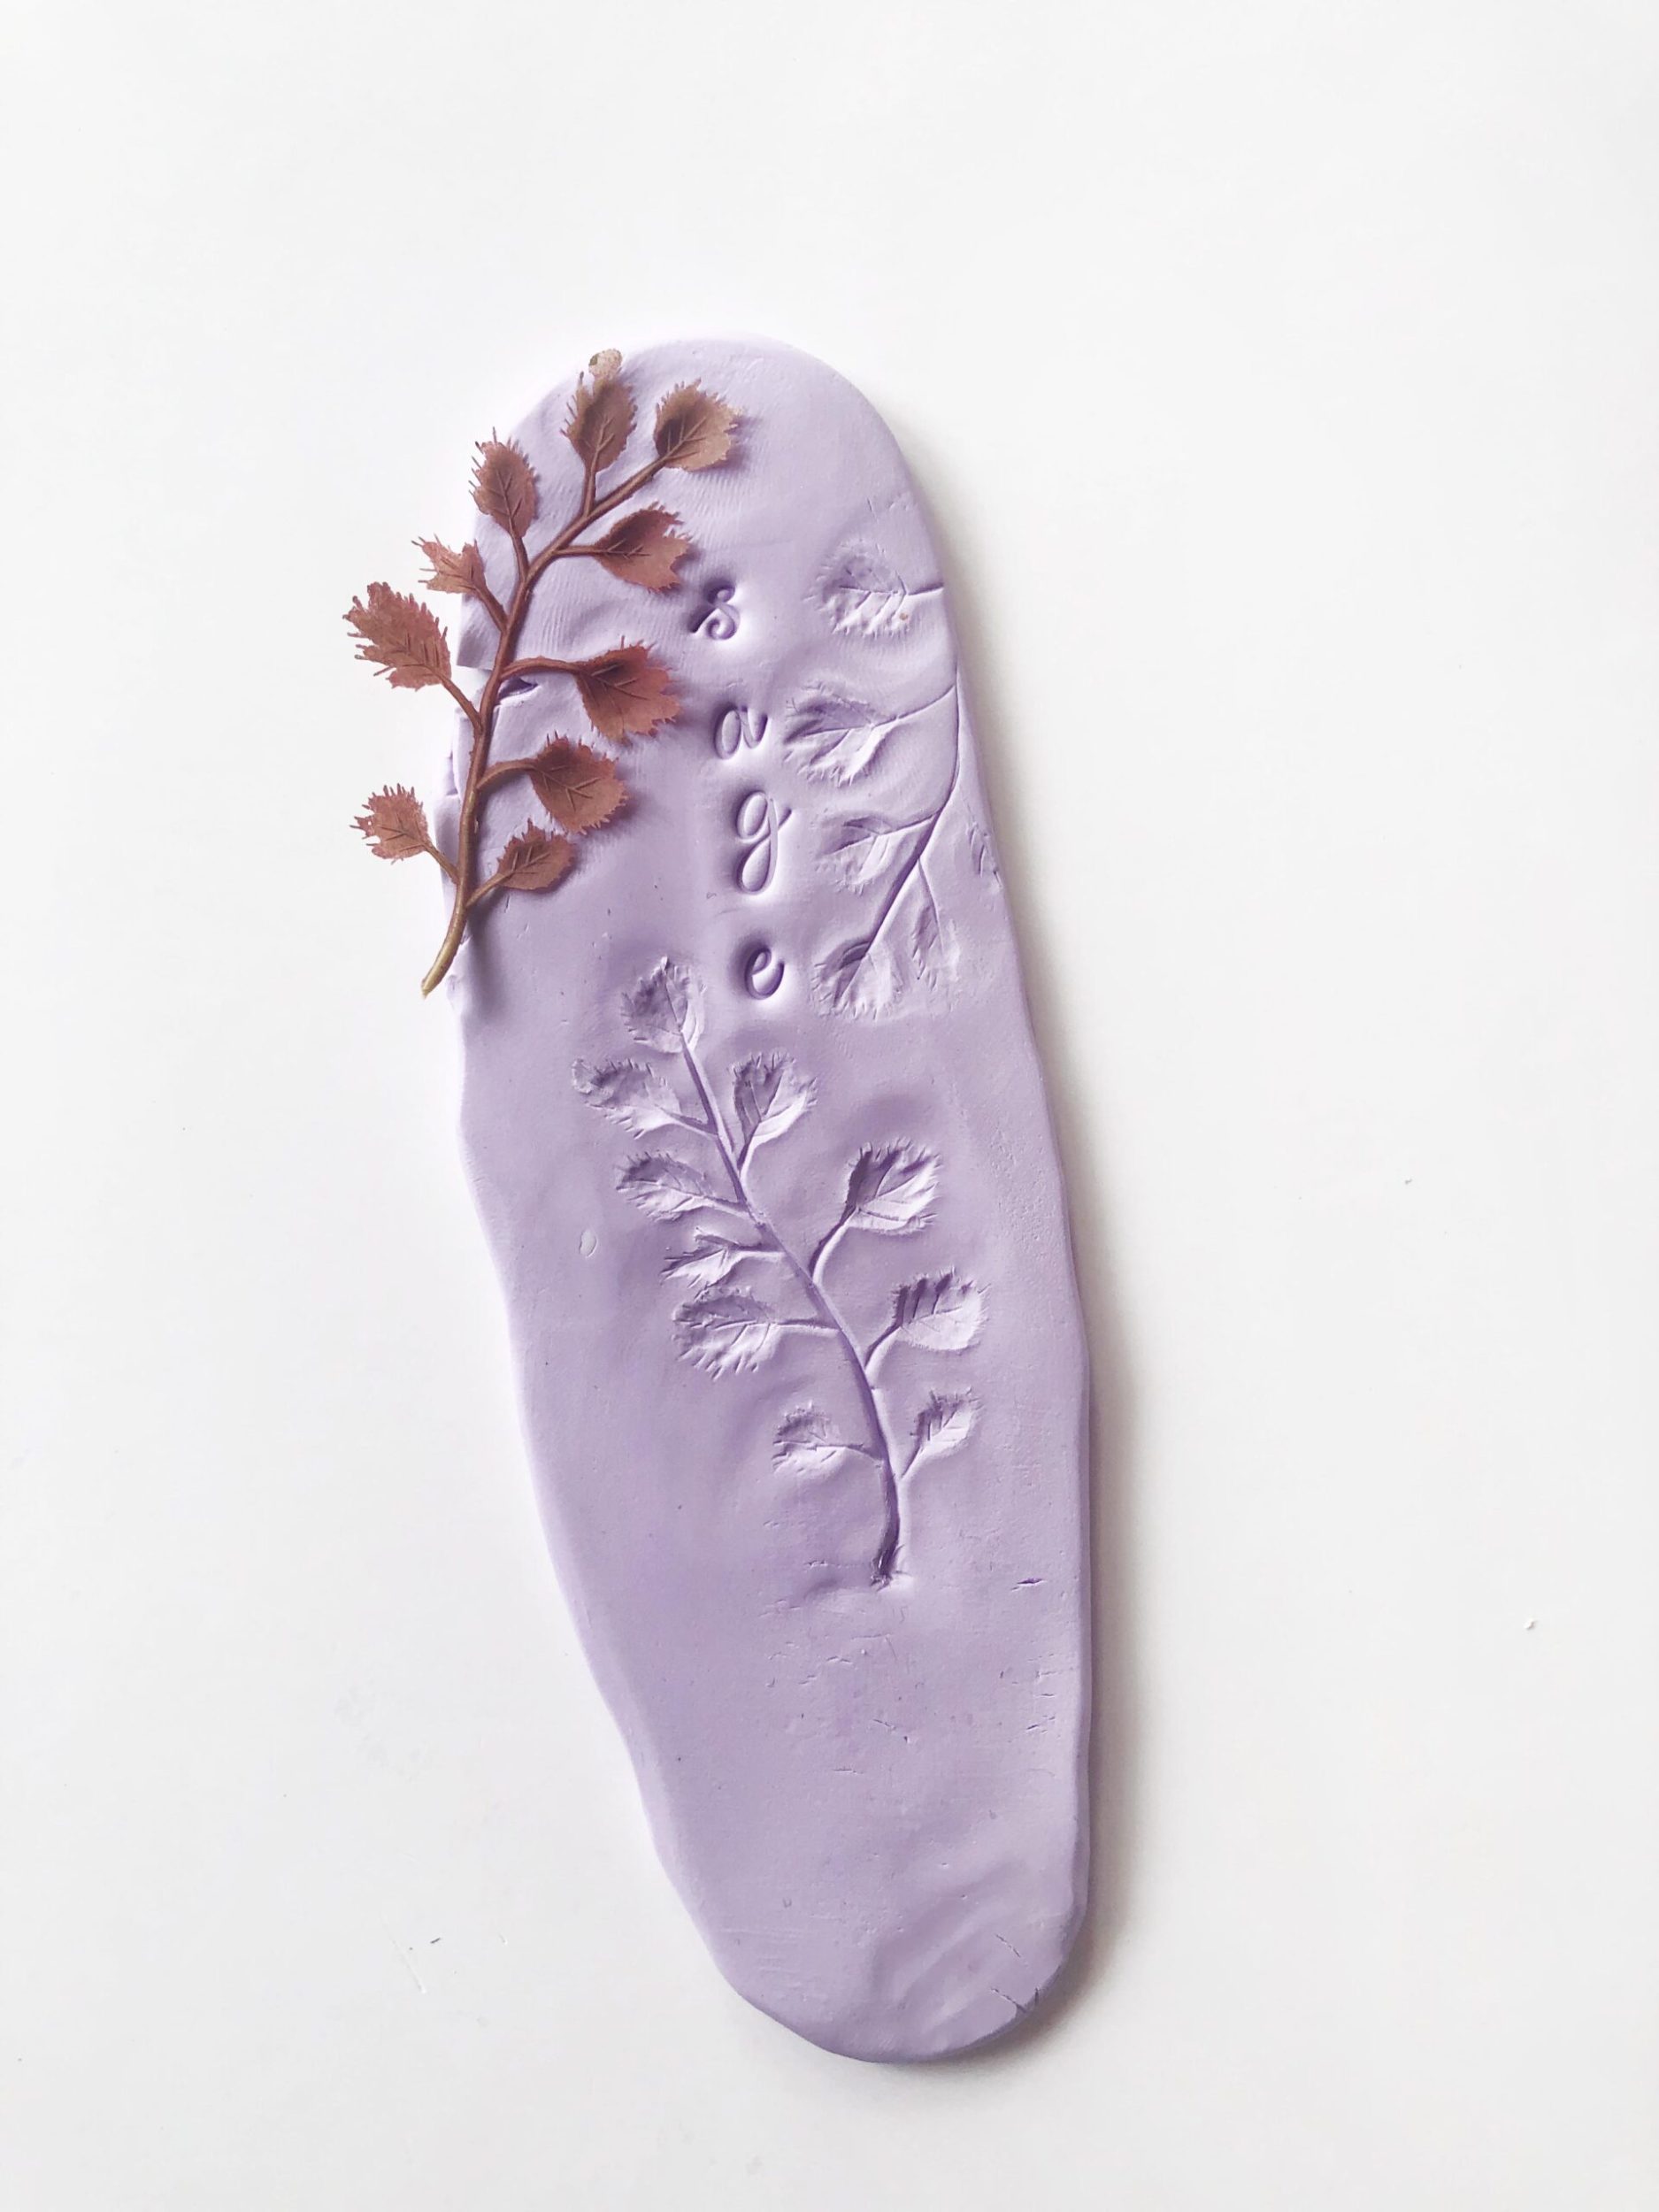
3 Take small pieces of faux foliage and, using finger pressure, make imprints around the herb name, continuing down the length of the marker (C-E). Vary the angles, shapes and sizes for interest. Use a palette knife or your finger to smooth any unwanted impressions.
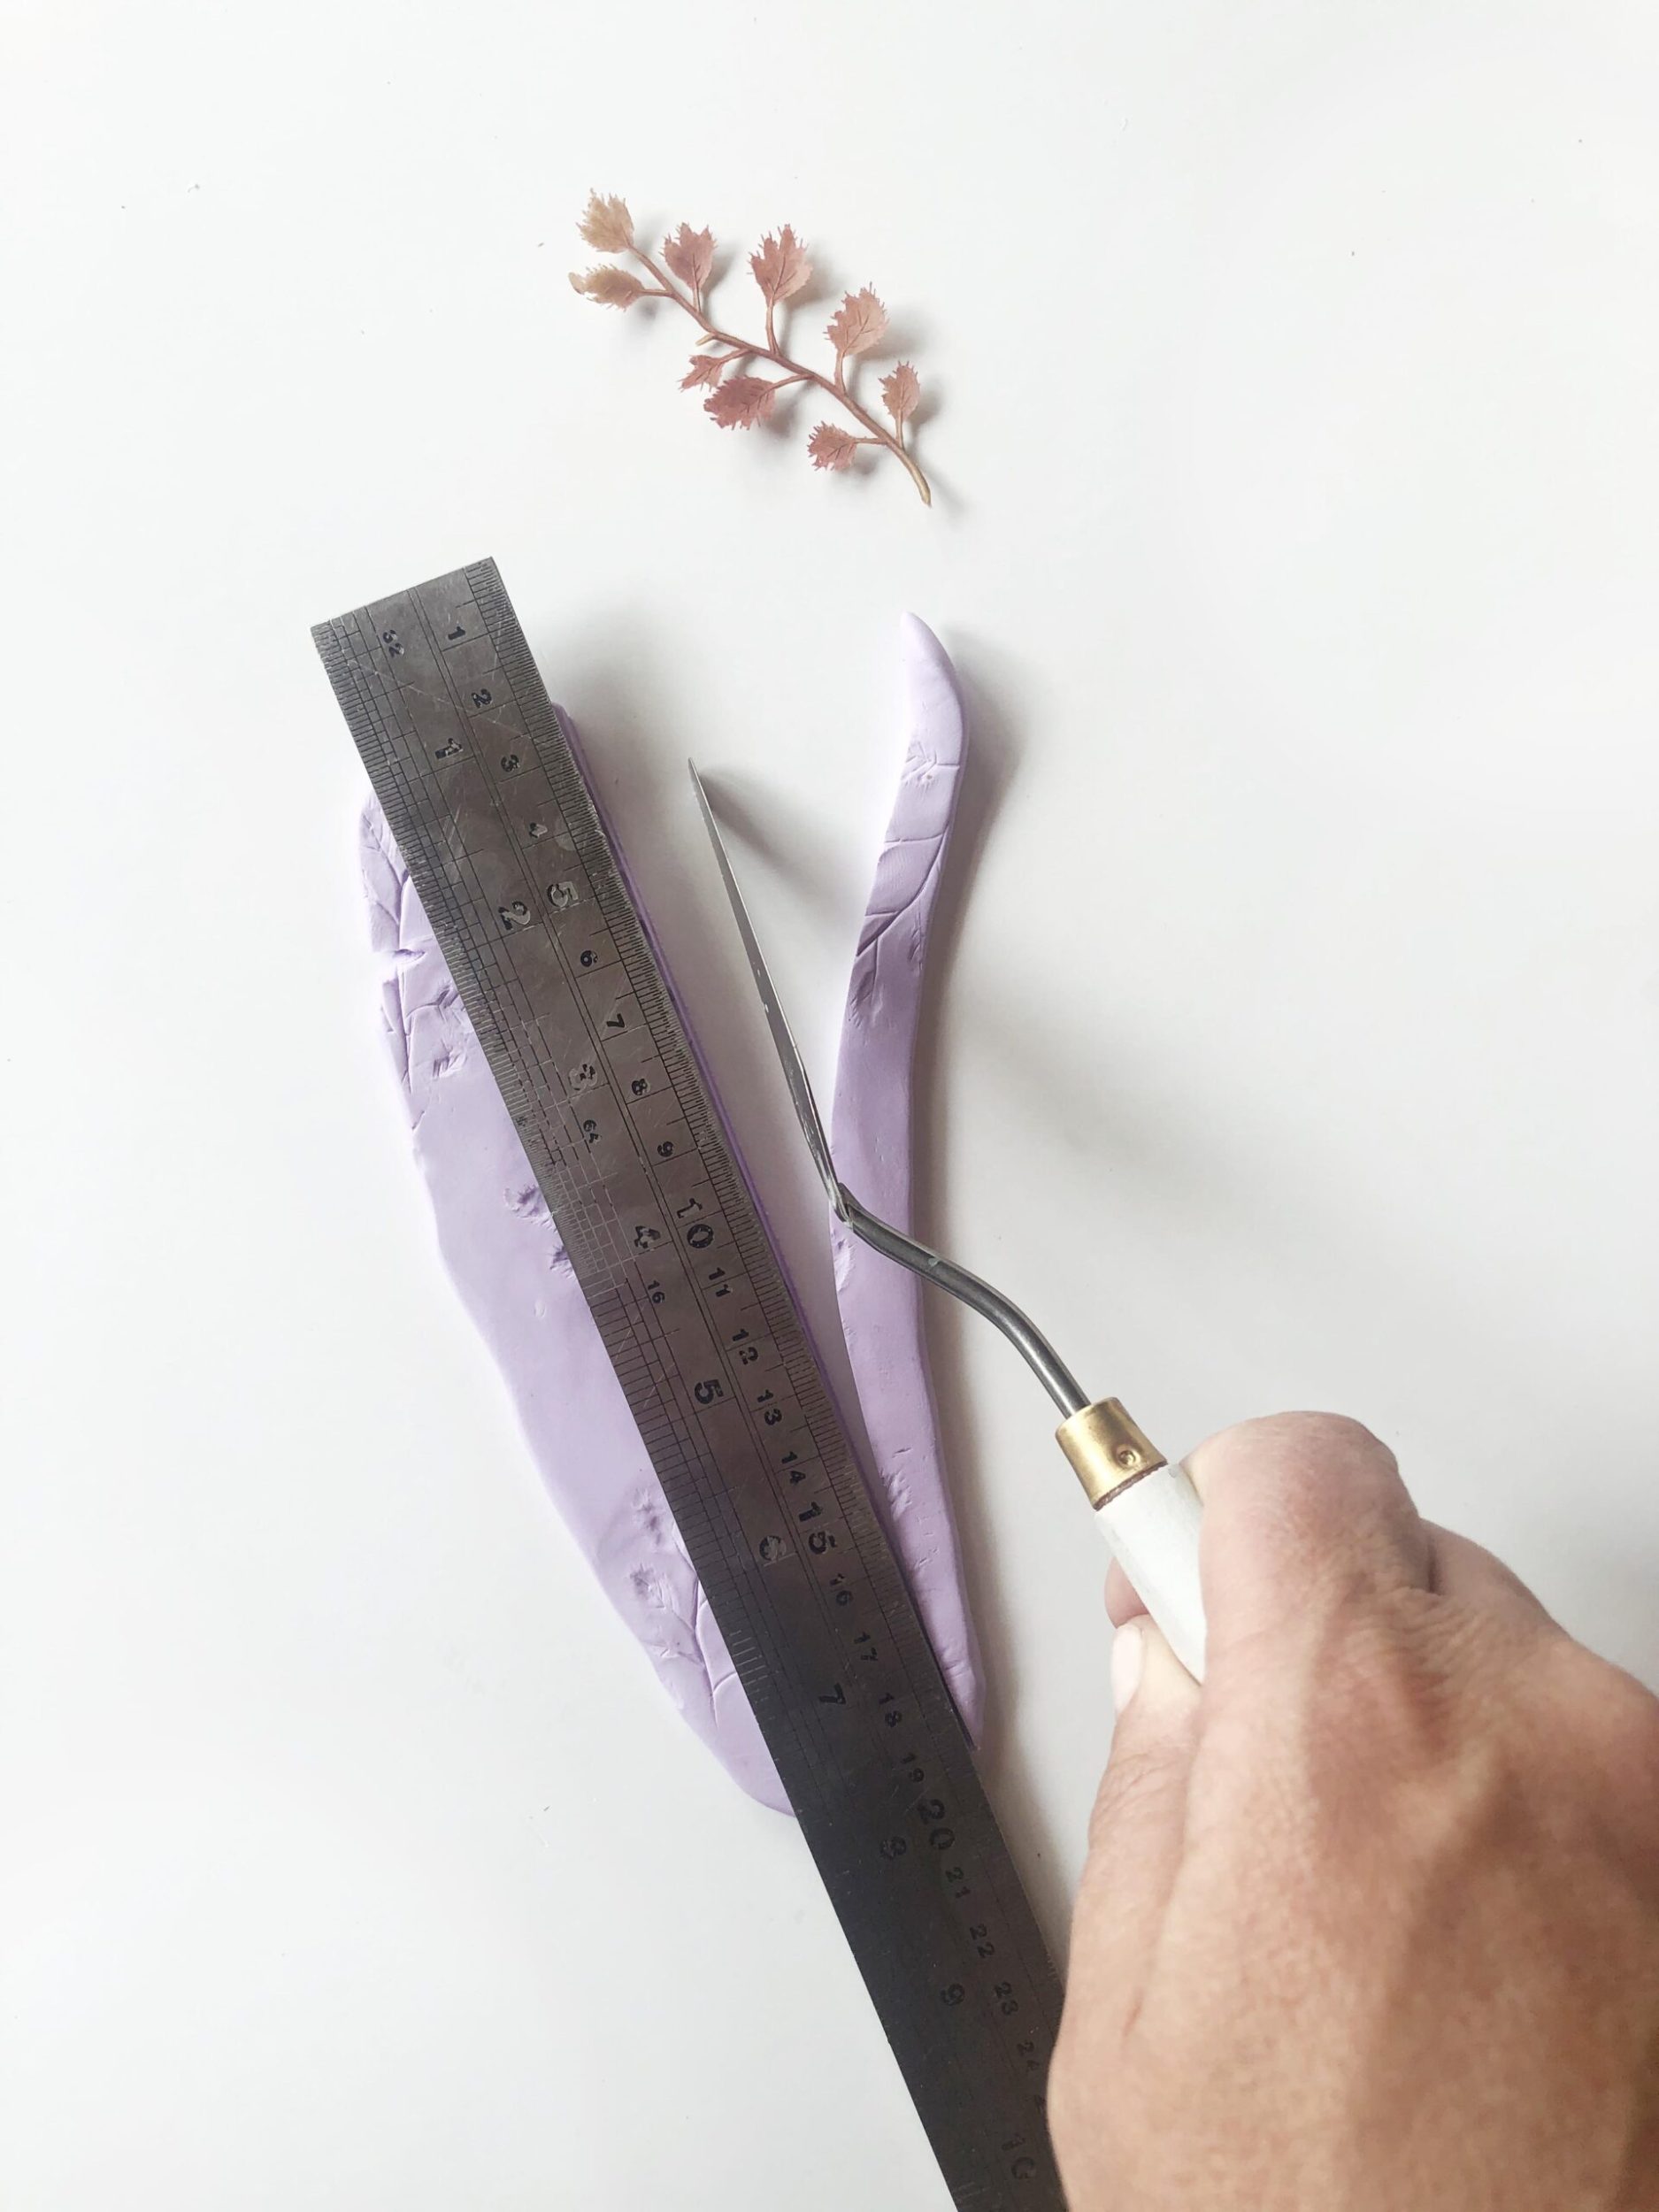
4 Using a ruler, trim the sides with the palette knife, making sure the herb name is centred and the marker is about 25mm wide (F).
5 Trim the top to make a flat edge. Find the centre point at the bottom and make two angled cuts to form a point at the base (G).

6 Use your finger to smooth all the edges.
7 Place markers, so they are not touching, on a baking tray lined with non-stick paper. Preheat oven then cook according to instructions. Baking clay at this thickness and size normally takes about 15 minutes on 130°C (H).
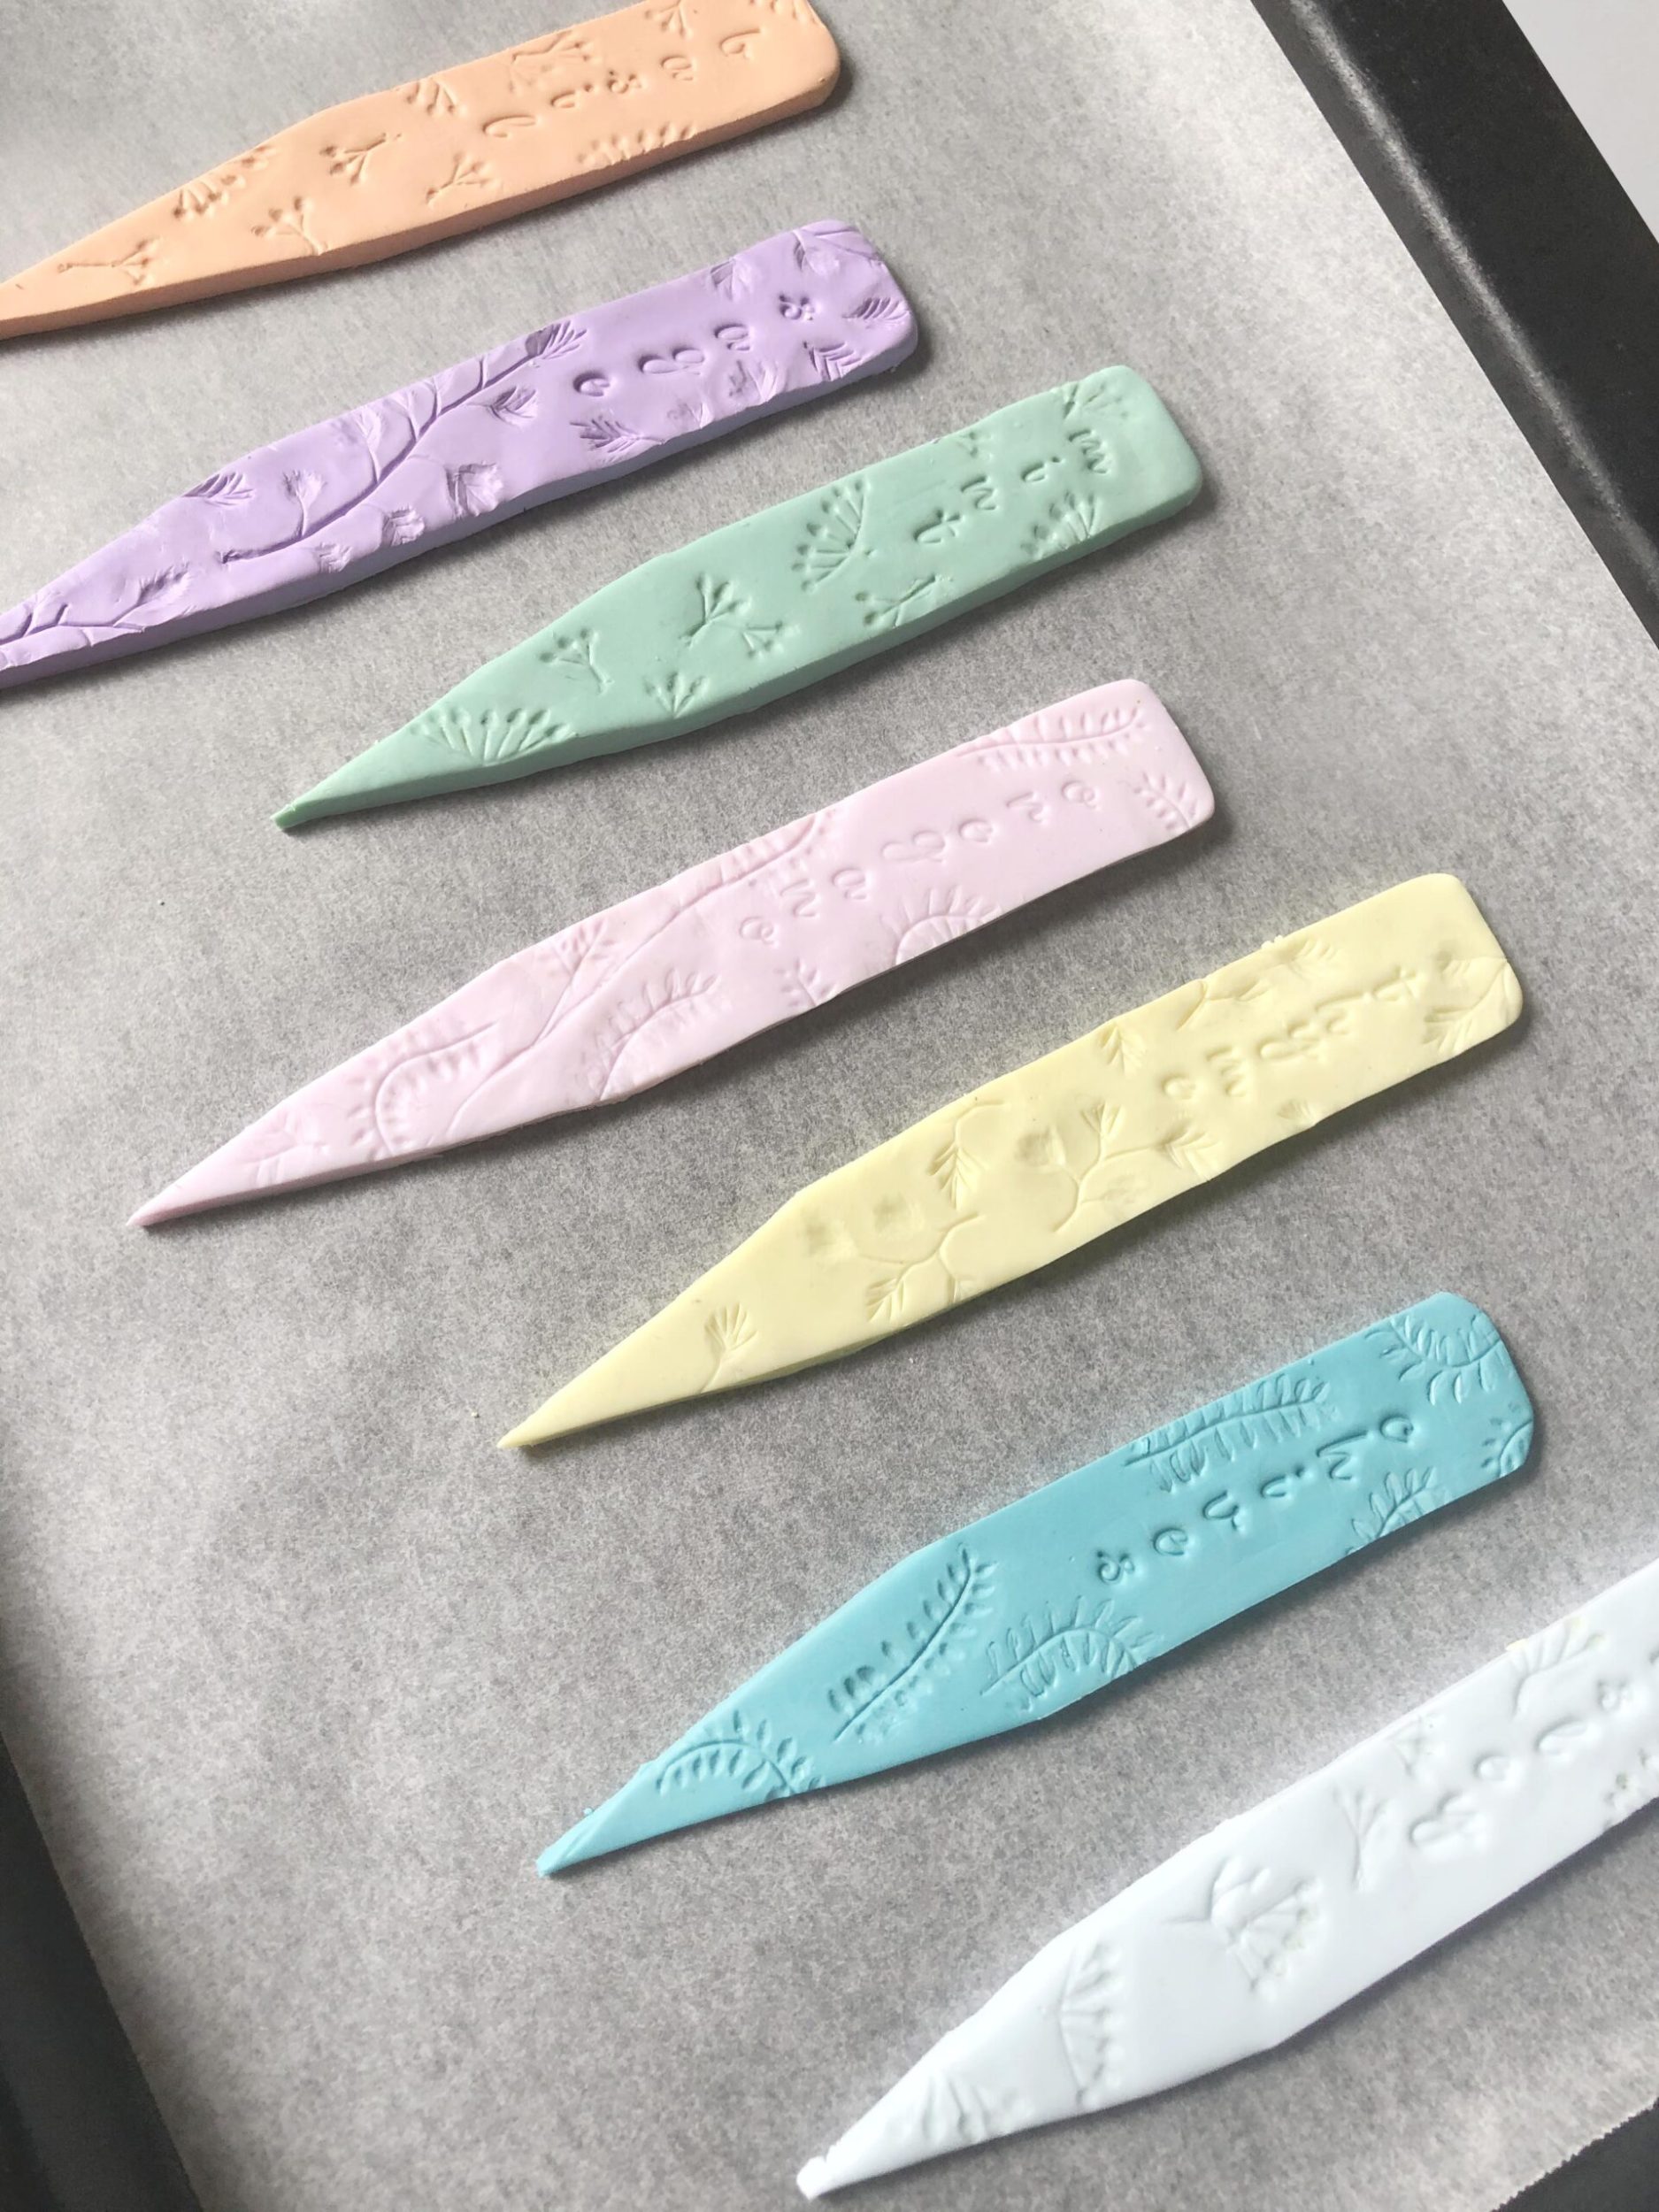
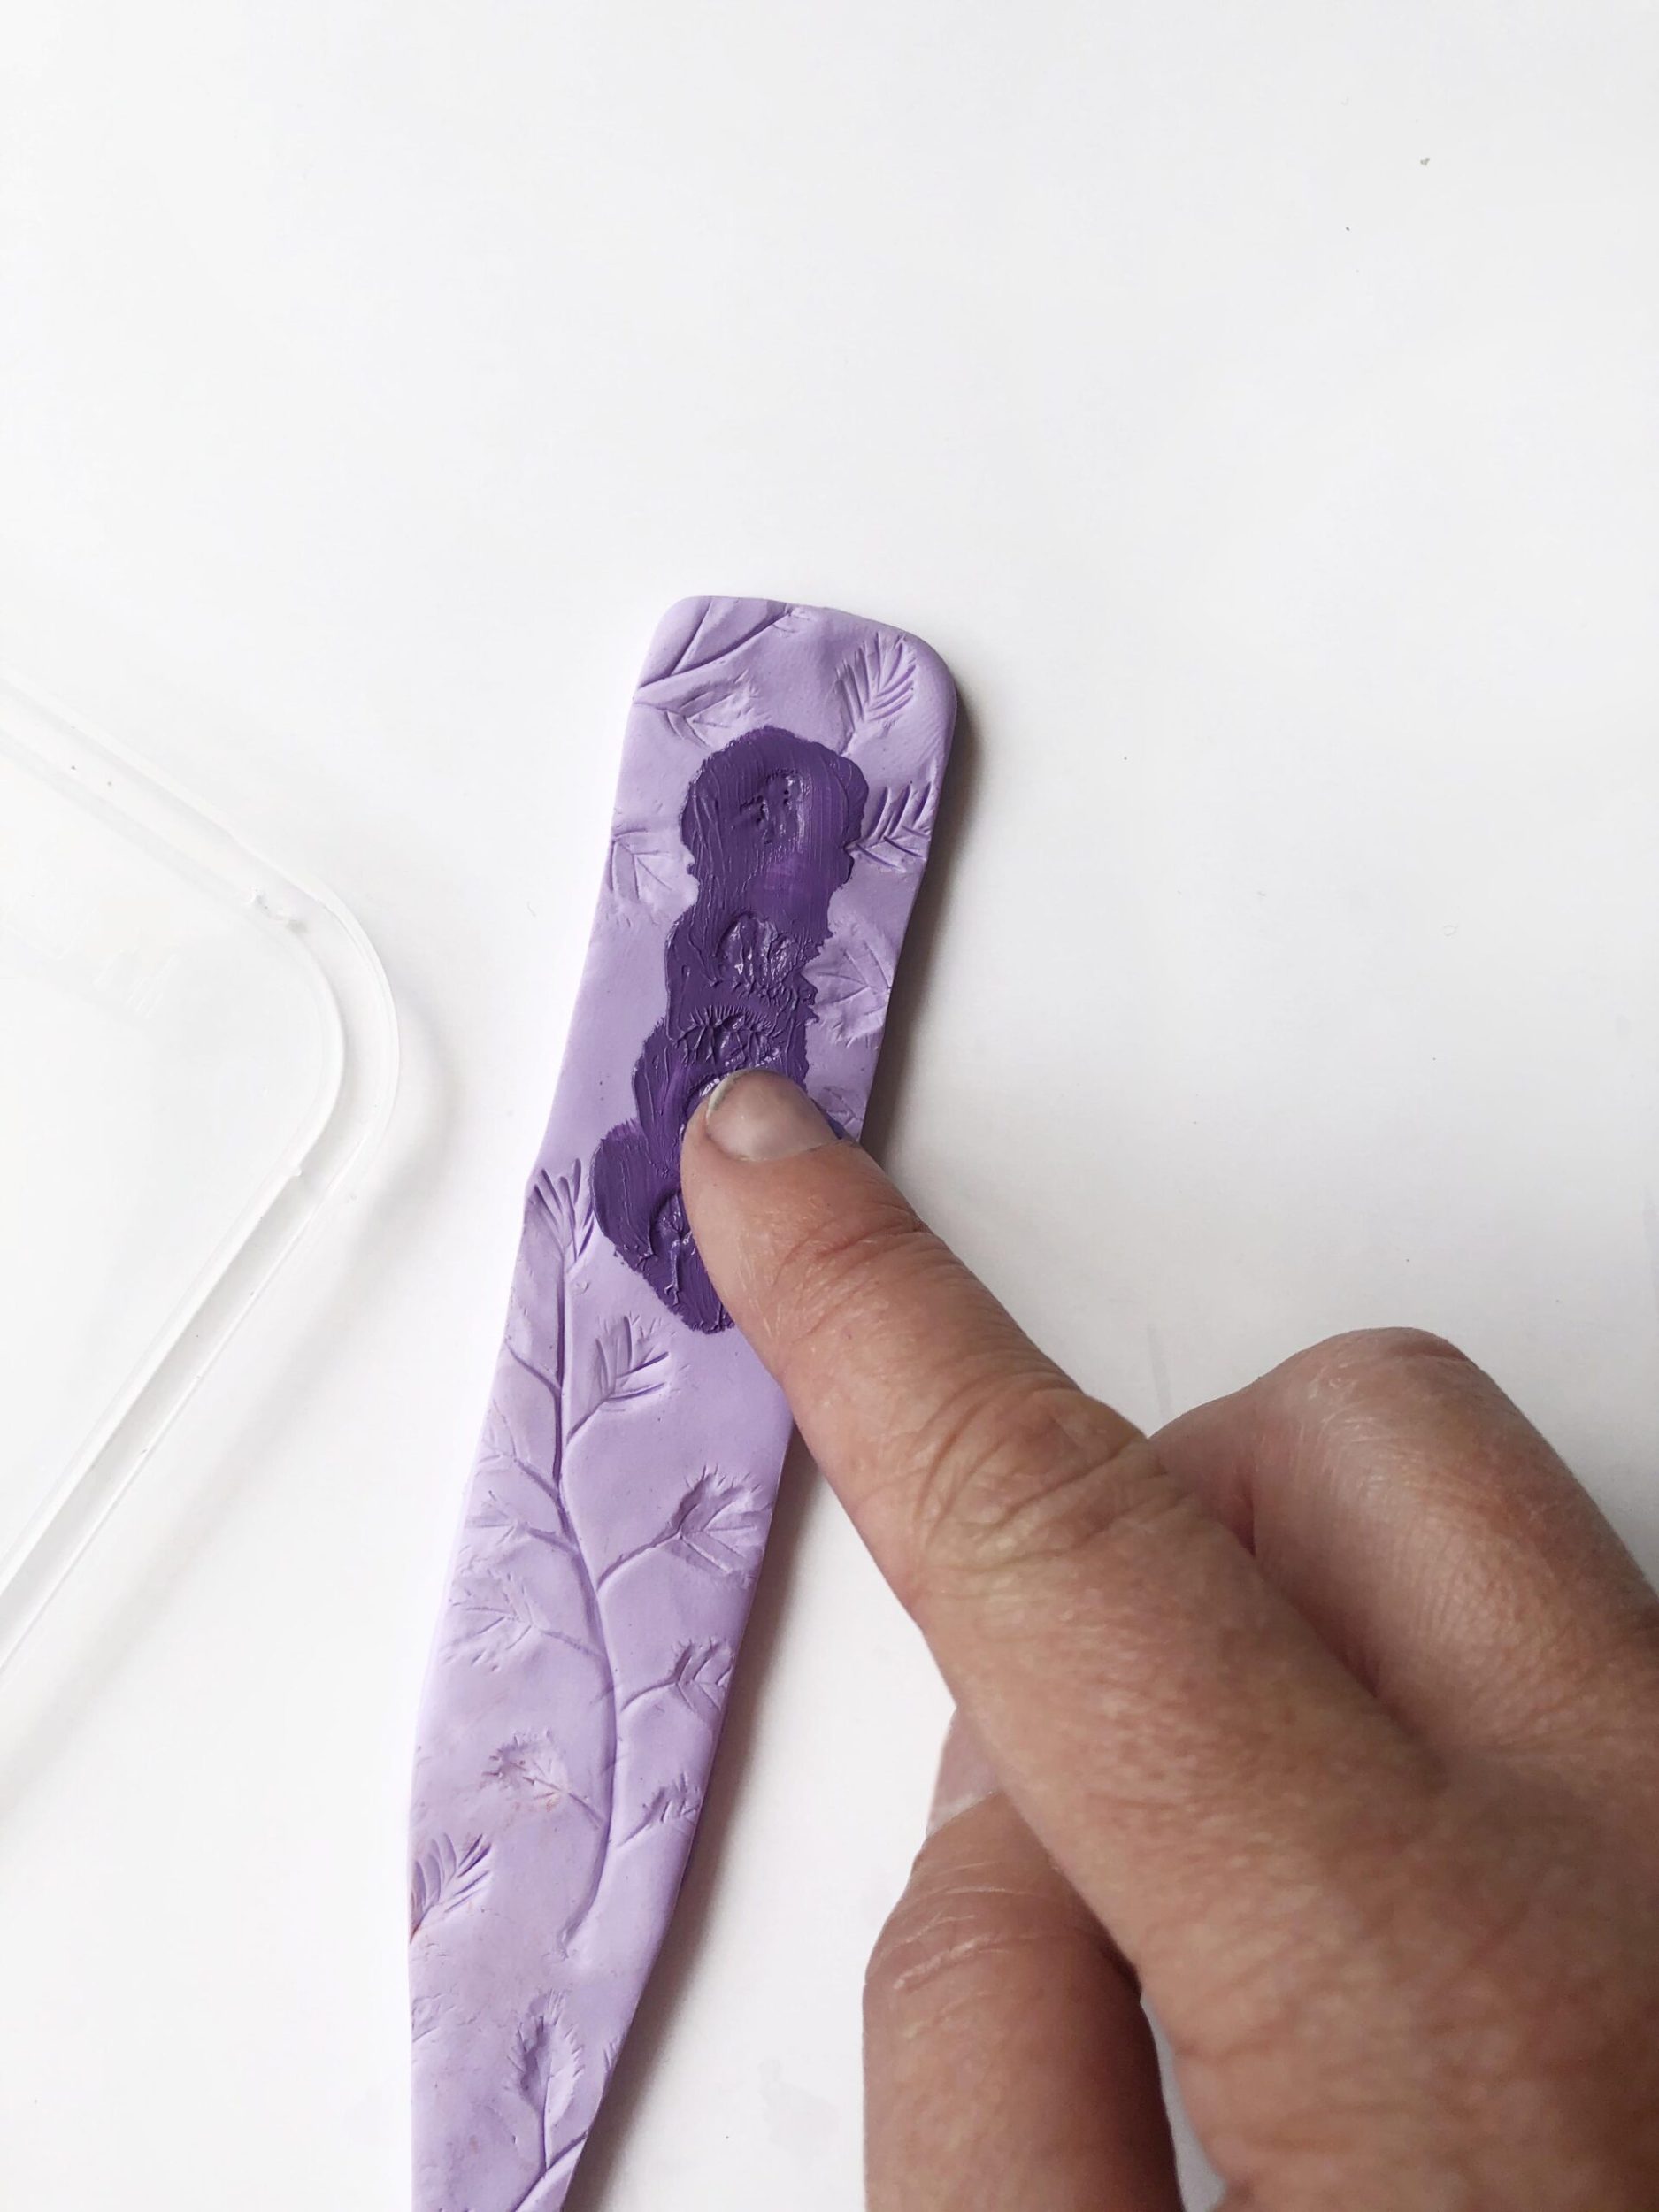
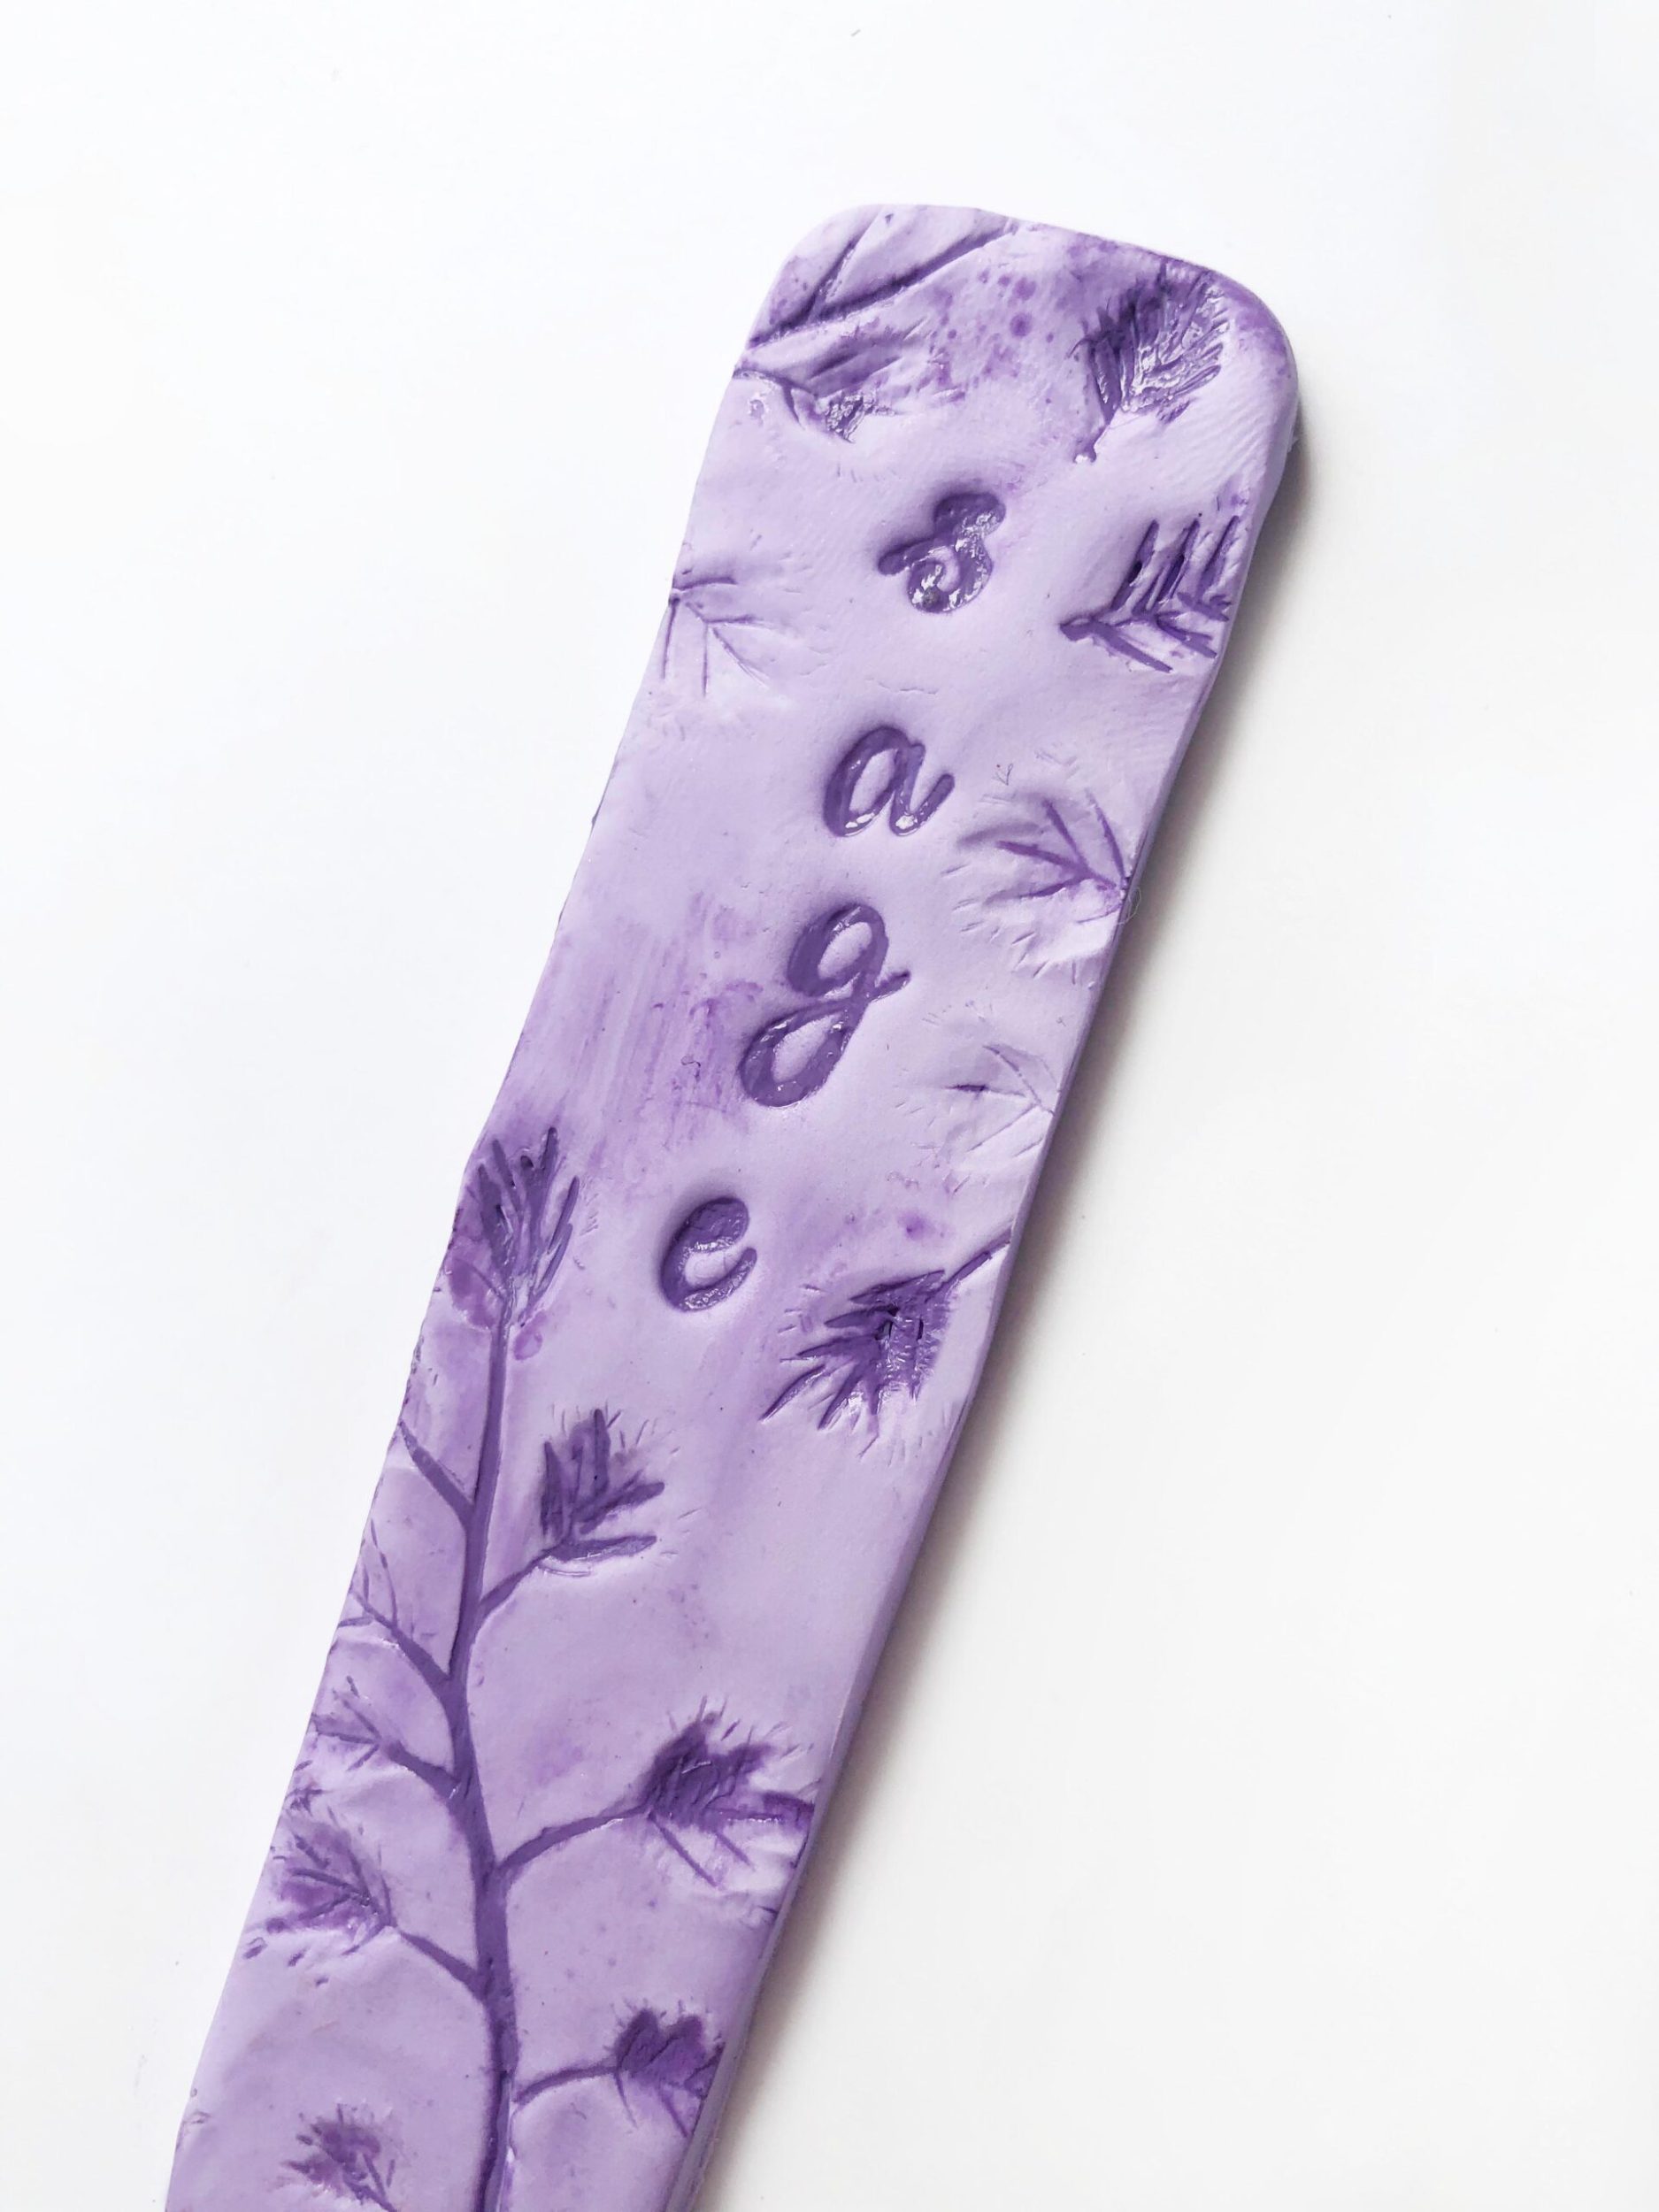
8 Once baked, the imprints can be pale and hard to read, so we used a darker shade of craft paint to enhance our beautiful patterns and herb name.
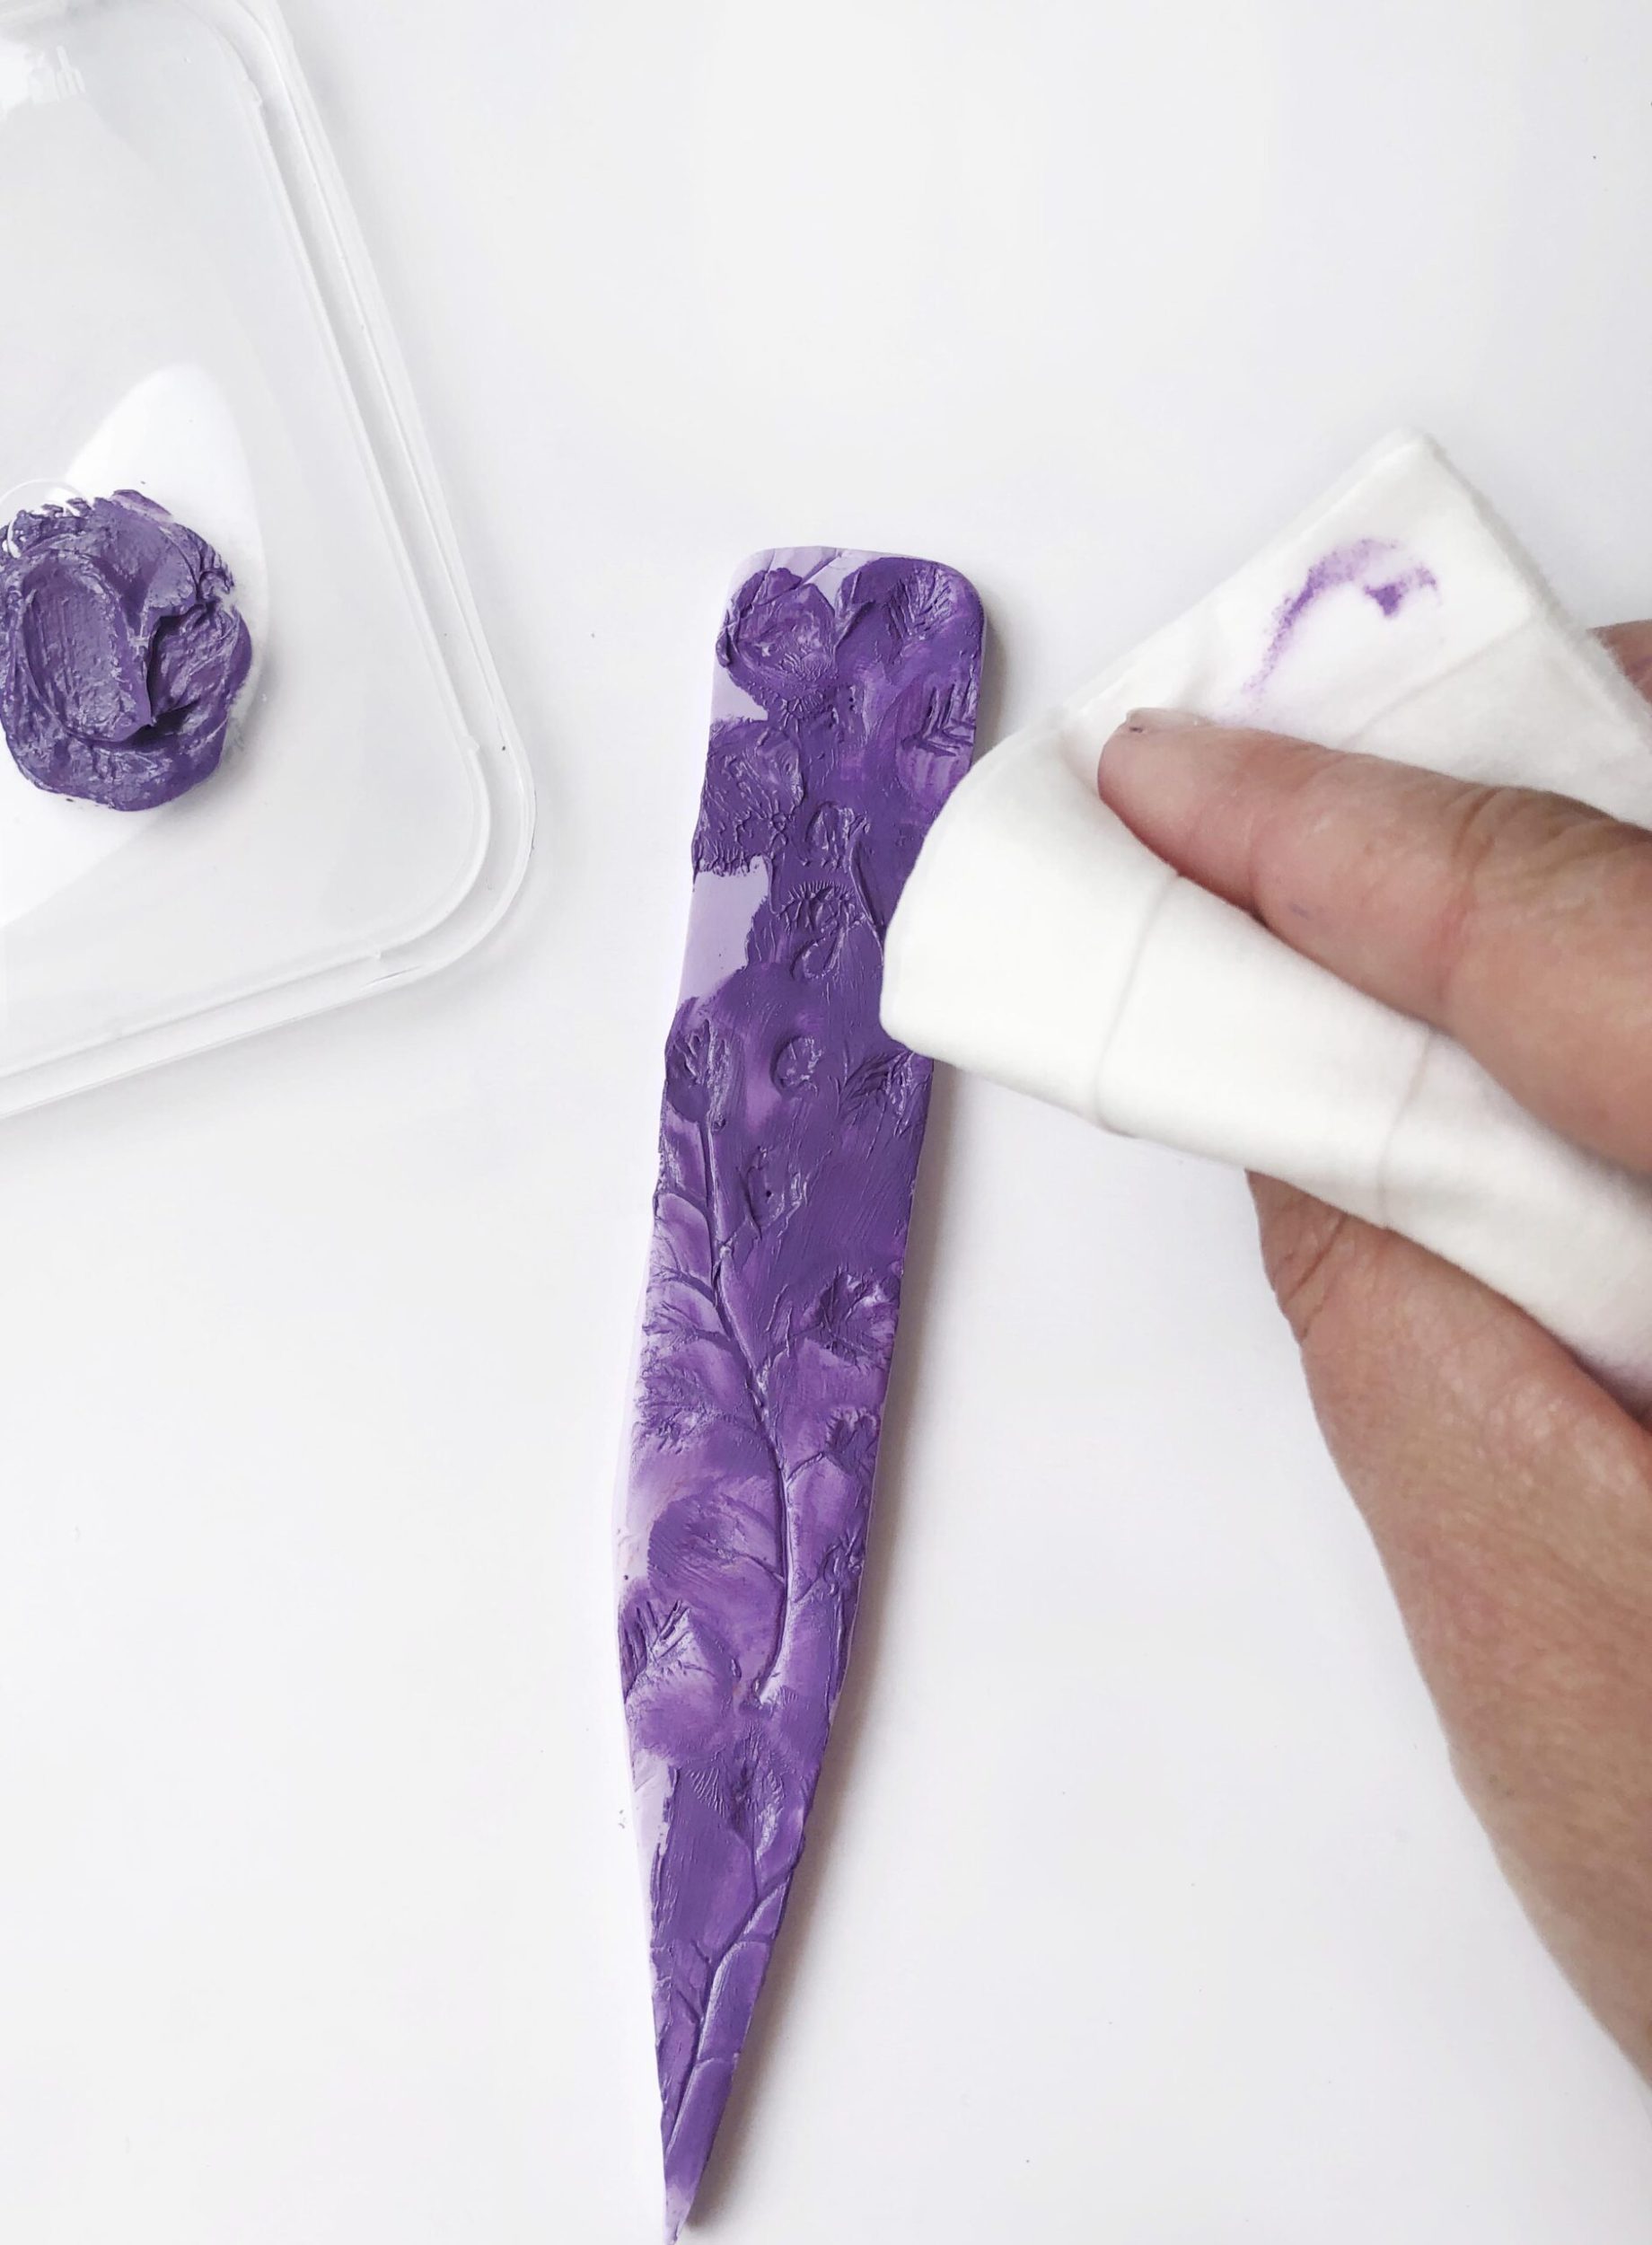
9 Push paint into all the crevasses, using your finger (I). Take a damp rag or wet wipe and gently run over the surface, removing excess paint, while leaving paint in the impressions (J). Once you are happy with the effect, set aside to dry (K).
NOTE: To make the markers last longer, particularly if you are using them outside, you can spray them with a coat of paint sealant, although this step is not necessary.