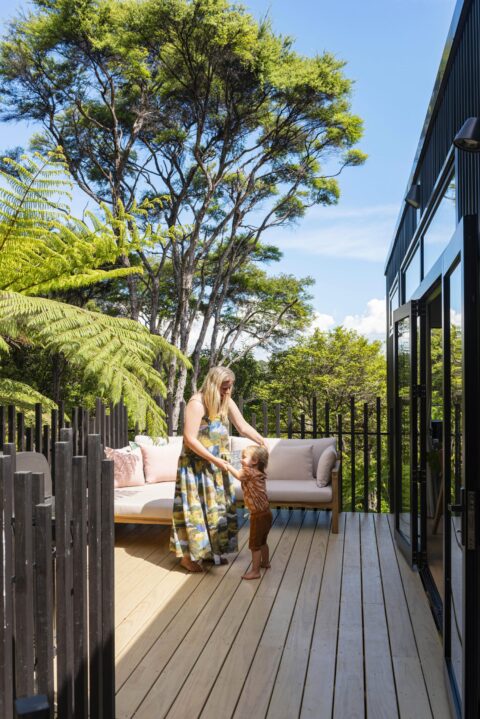
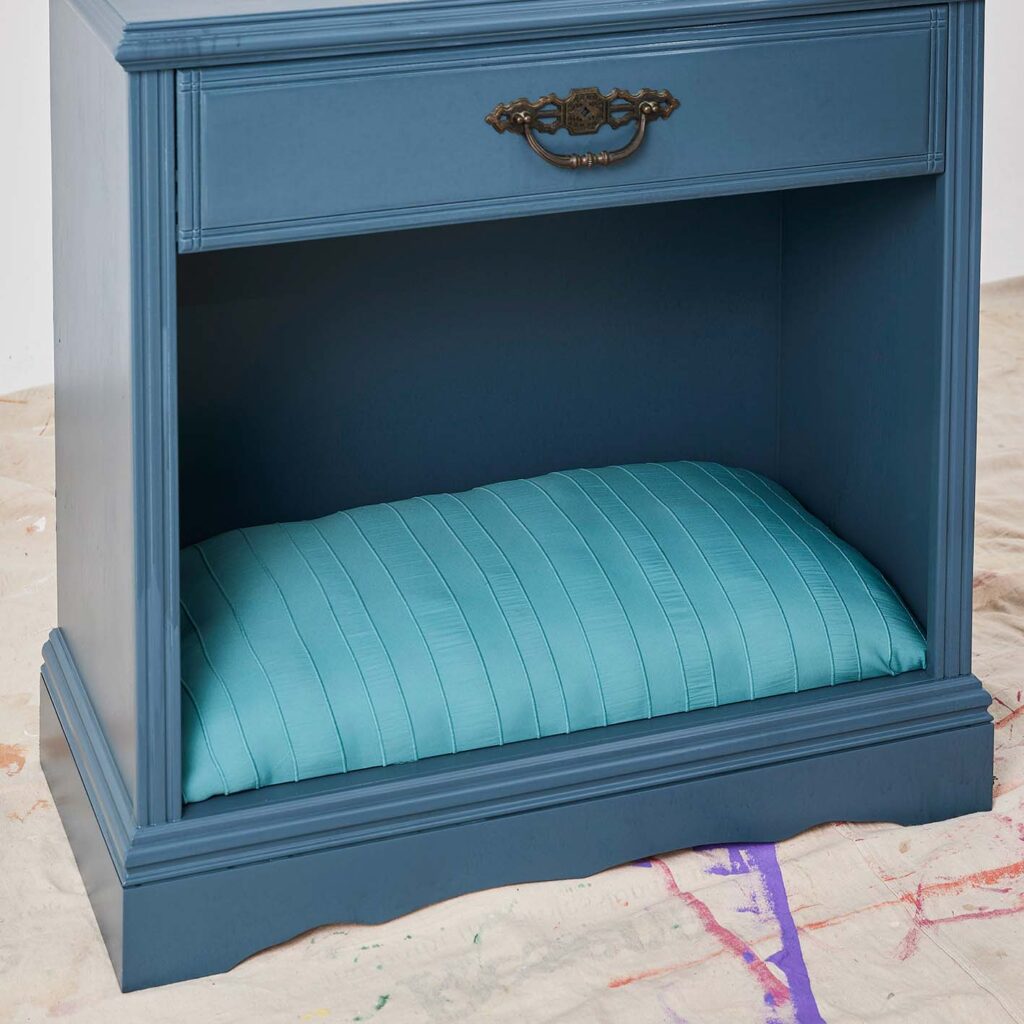
Stylist Melissa Marriott creates a cute and cosy nook so that Rolo can snooze right beside his favourite people.
What you need:
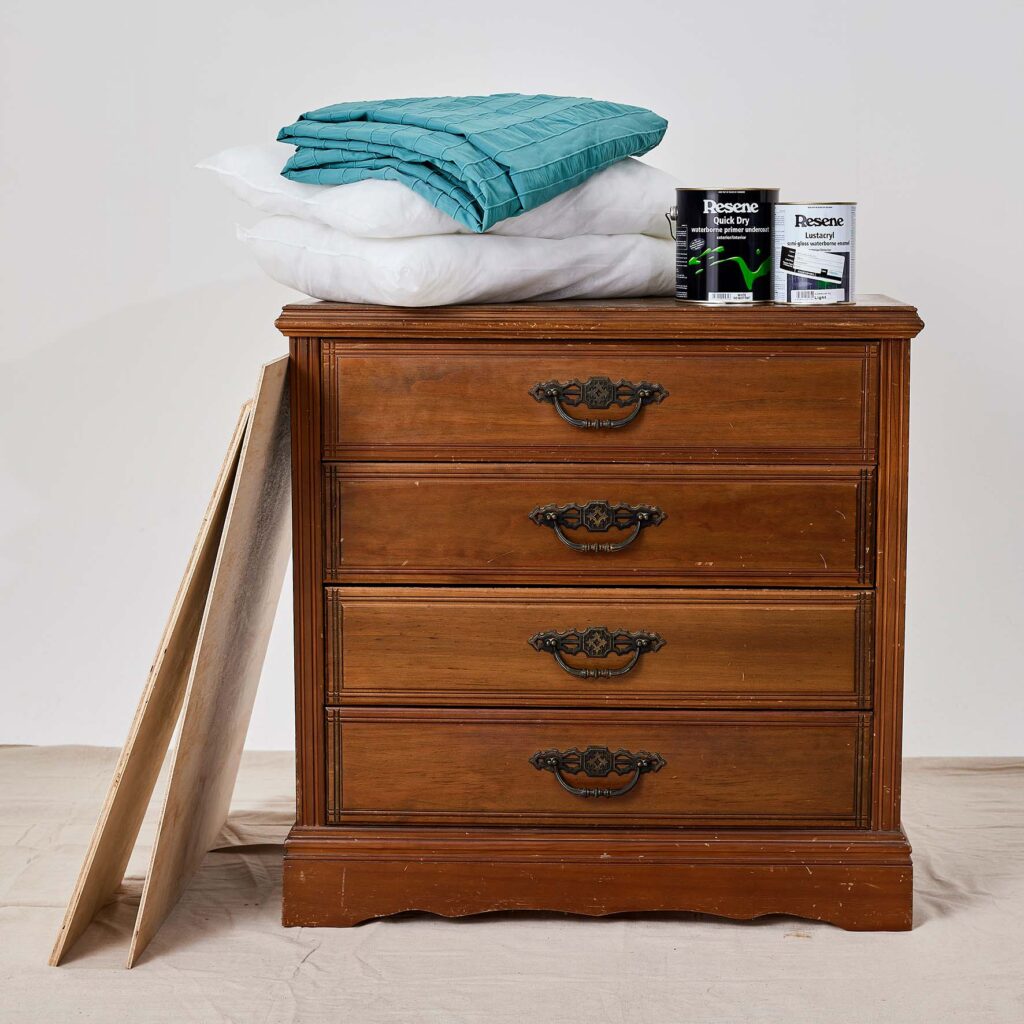
- An old chest of drawers
- Resene dropcloth
- Hammer
- Screwdriver
- Resene sandpaper sheet
- Putty knife
- Resene EzyFill Quick
- 1 x 7mm plywood sheet
- 1 x 12mm plywood sheet
- Nails
- Resene Quick Dry waterborne primer undercoat
- Resene Lustacryl semi-gloss waterborne enamel in your chosen colour (we used Resene Atomic)
- Resene MacGyver all-purpose paintbrush
- Your choice of Resene paint roller
- An old duvet cover or curtain and stuffing to make the padded base, or use a cushion
- Staple gun
![](https://media.womanmagazine.co.nz/wp-content/uploads/2022/10/Thr0622_CRAFT_ReseneFlip_01-1-1024x1024.jpeg?strip=all&lossy=1&quality=88&webp=85&sharp=1&ssl=1&fit=1024%2C1024)
Method
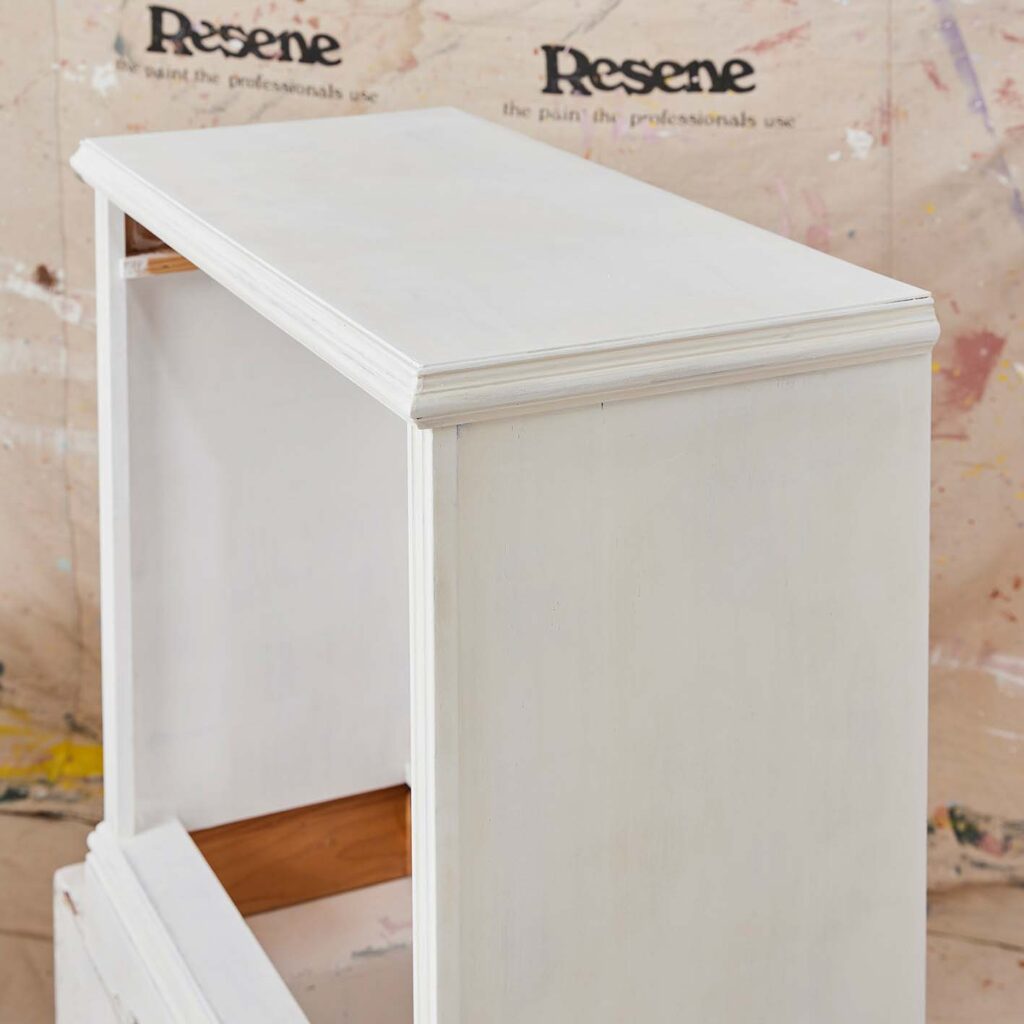
1. Place the chest of drawers on the Resene dropcloth and remove the bottom drawers, keeping the top drawer.
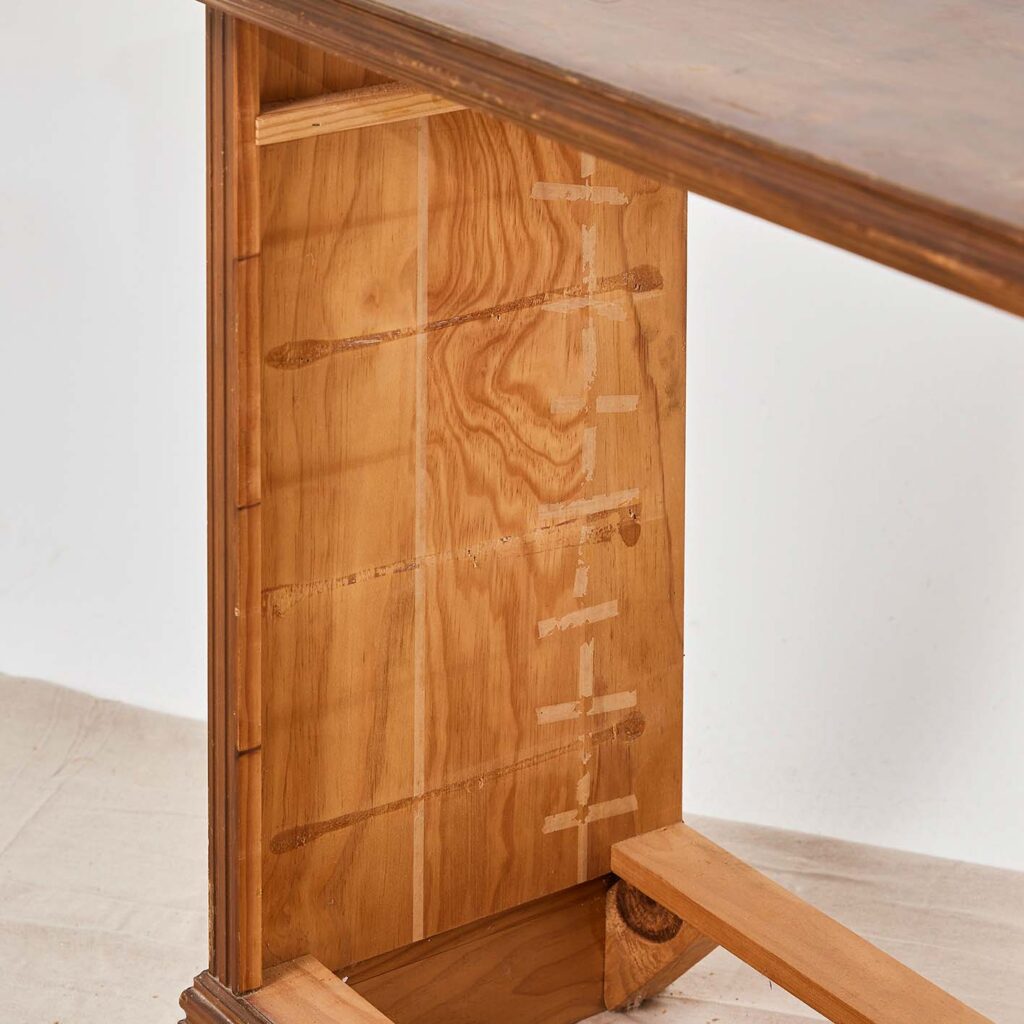
2. Remove the back panel of the chest of drawers. We used a hammer to do this.
![The chest of drawers with the drawers and back panel removed](https://media.womanmagazine.co.nz/wp-content/uploads/2022/10/Thr0622_CRAFT_ReseneFlip_03-1024x1024.jpeg?strip=all&lossy=1&quality=88&webp=85&sharp=1&ssl=1&fit=1024%2C1024)
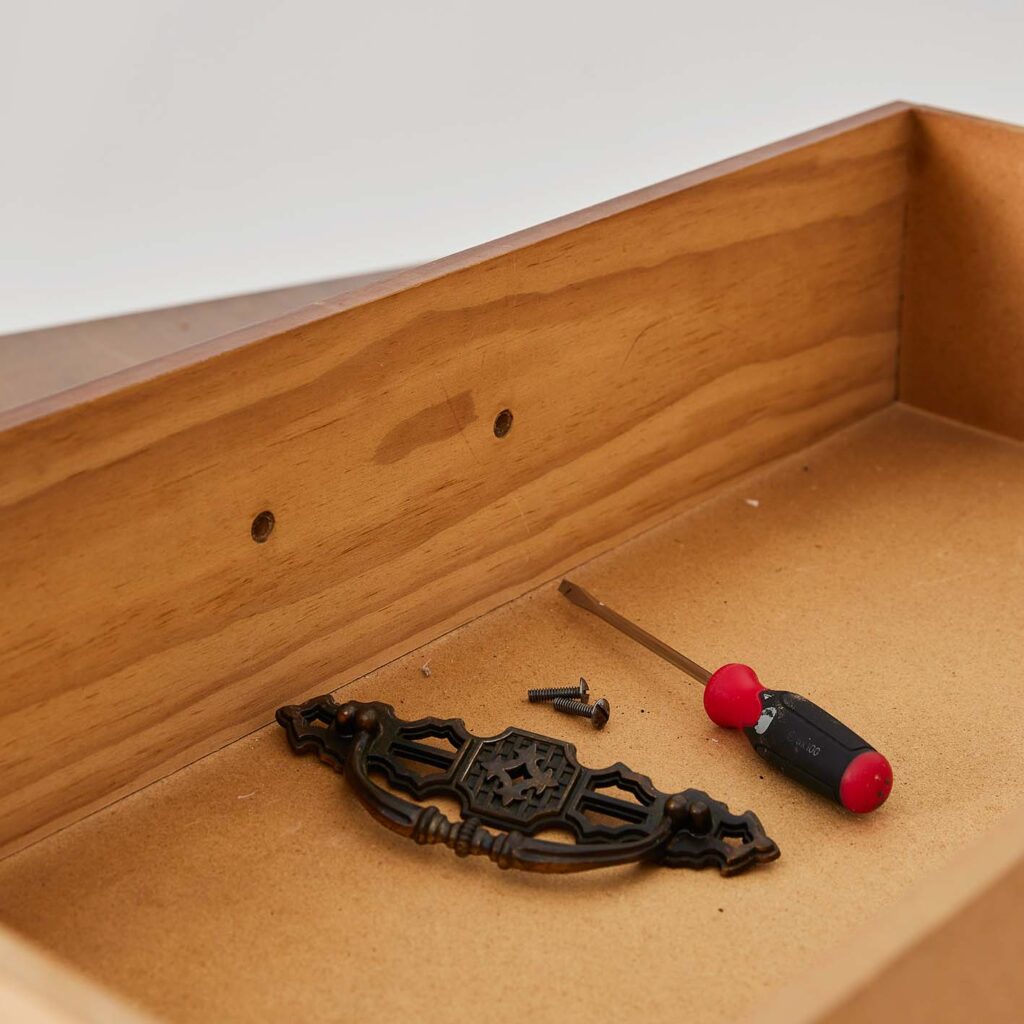
3. Remove the drawer sliders, except the one for the top drawer, again using a hammer.
![chest of drawers with the drawer slides removed](https://media.womanmagazine.co.nz/wp-content/uploads/2022/10/Thr0622_CRAFT_ReseneFlip_04-1024x1024.jpeg?strip=all&lossy=1&quality=88&webp=85&sharp=1&ssl=1&fit=1024%2C1024)
4. Using a screwdriver, remove the drawer hardware.
![A screwdriver next to screws and the drawers hardware](https://media.womanmagazine.co.nz/wp-content/uploads/2022/10/Thr0622_CRAFT_ReseneFlip_05-1024x1024.jpeg?strip=all&lossy=1&quality=88&webp=85&sharp=1&ssl=1&fit=1024%2C1024)
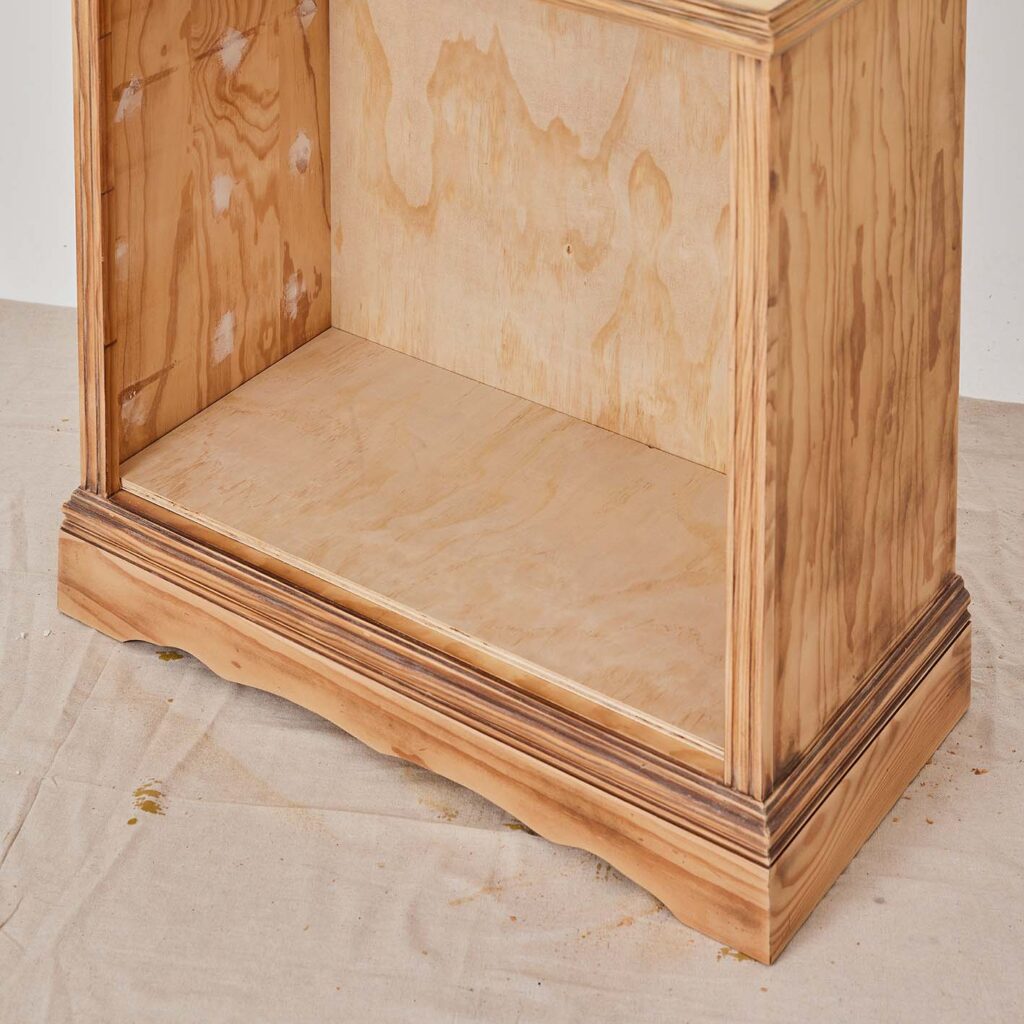
5. Sand the drawer and cabinet.
![Sandpaper on top of the chest of drawers and next to the drawer](https://media.womanmagazine.co.nz/wp-content/uploads/2022/10/Thr0622_CRAFT_ReseneFlip_06-1024x1024.jpeg?strip=all&lossy=1&quality=88&webp=85&sharp=1&ssl=1&fit=1024%2C1024)
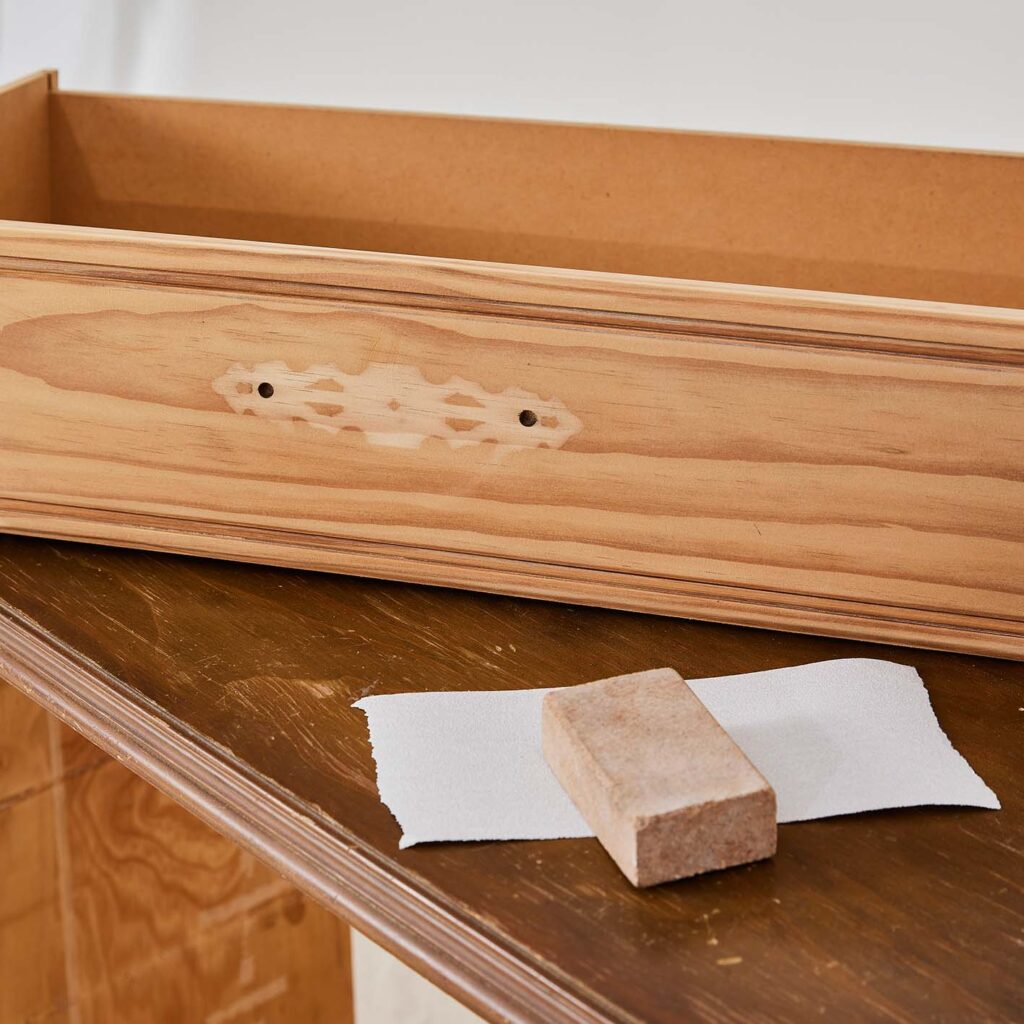
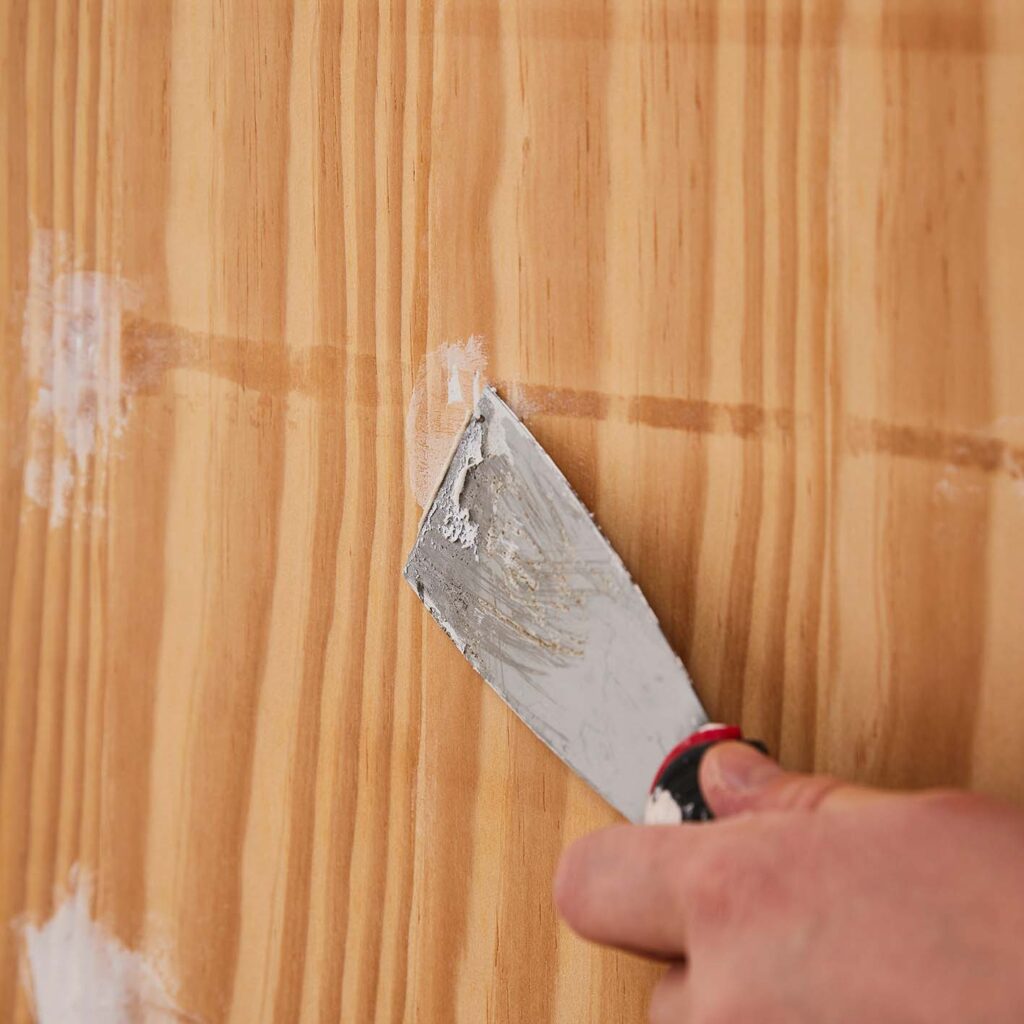
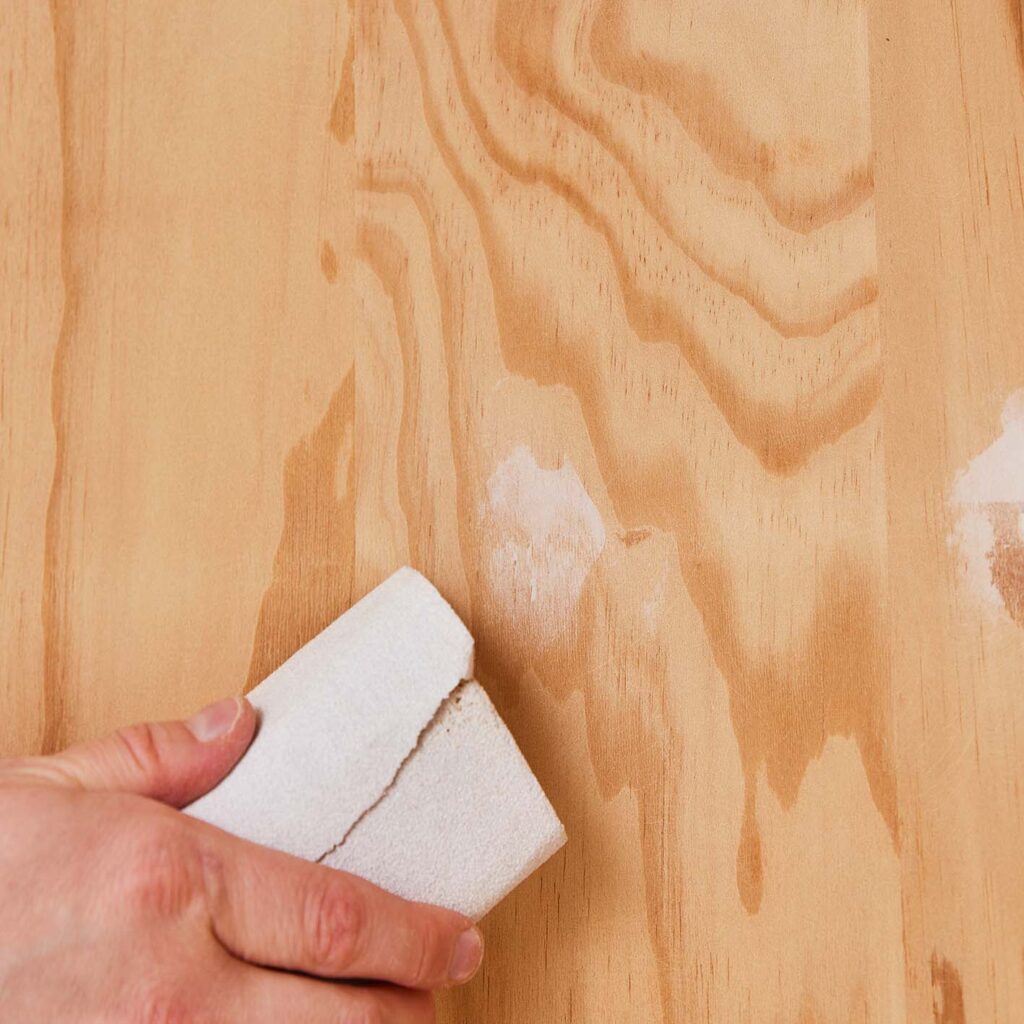
6. Fill any holes using the putty knife and Resene EzyFill Quick. Once dry, smooth with sandpaper.
![Using a putty knife to fill in any holes](https://media.womanmagazine.co.nz/wp-content/uploads/2022/10/Thr0622_CRAFT_ReseneFlip_08-1024x1024.jpeg?strip=all&lossy=1&quality=88&webp=85&sharp=1&ssl=1&fit=1024%2C1024)
![sanding back the putty that filled the holes](https://media.womanmagazine.co.nz/wp-content/uploads/2022/10/Thr0622_CRAFT_ReseneFlip_12-1024x1024.jpeg?strip=all&lossy=1&quality=88&webp=85&sharp=1&ssl=1&fit=1024%2C1024)
7. Cut the back panel (7mm plywood) and base (12mm plywood) to size. You can get this done at your local timber supplier.
8. Attach the back panel using a hammer and nails. Note: if you are using an existing cushion for your pet bed, attach the base panel now.
![Hammering in the back panel](https://media.womanmagazine.co.nz/wp-content/uploads/2022/10/Thr0622_CRAFT_ReseneFlip_10-1024x1024.jpeg?strip=all&lossy=1&quality=88&webp=85&sharp=1&ssl=1&fit=1024%2C1024)
![A base panel sitting inside the chest of drawers](https://media.womanmagazine.co.nz/wp-content/uploads/2022/10/Thr0622_CRAFT_ReseneFlip_11-1024x1024.jpeg?strip=all&lossy=1&quality=88&webp=85&sharp=1&ssl=1&fit=1024%2C1024)
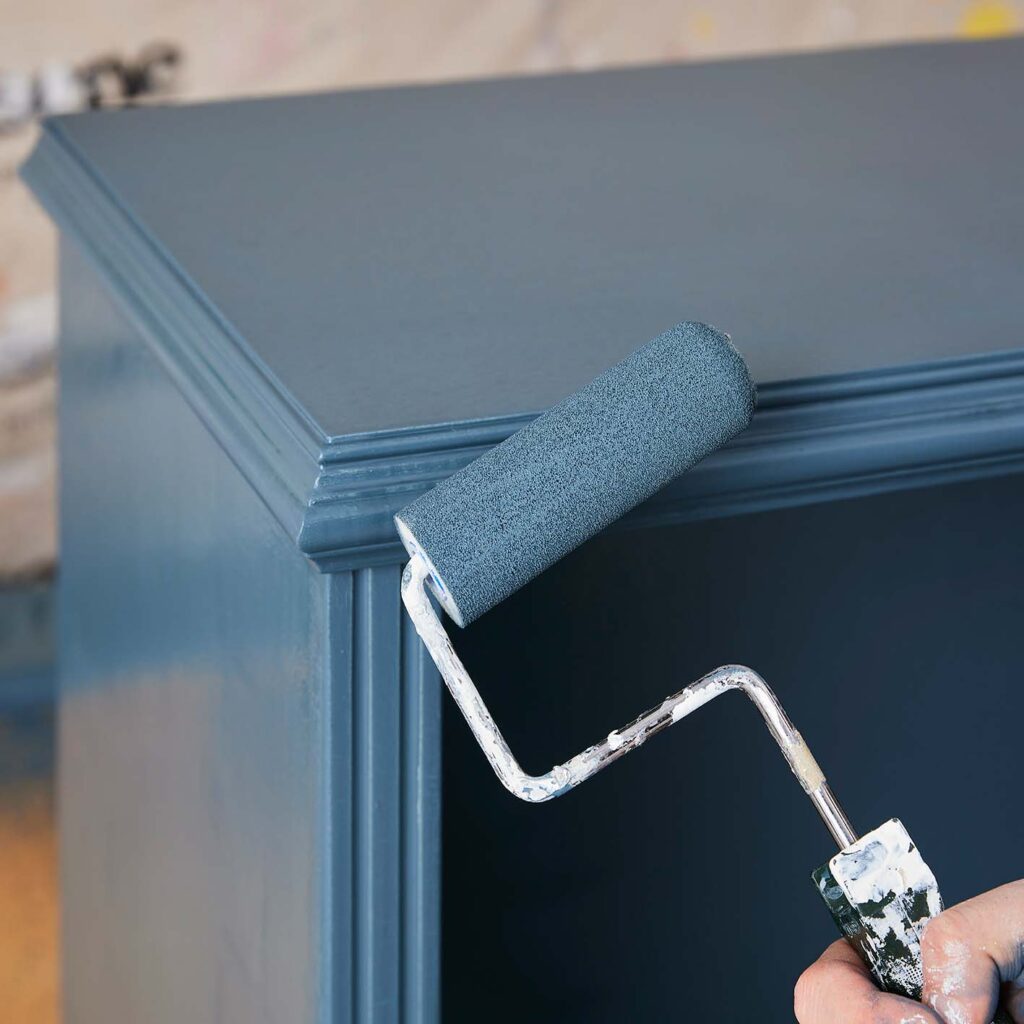
9. Prime the whole cabinet and drawer with Resene Quick Dry waterborne primer undercoat, using a Resene MacGyver all-purpose paintbrush.
![The chest of drawers painted with Resene primer](https://media.womanmagazine.co.nz/wp-content/uploads/2022/10/Thr0622_CRAFT_ReseneFlip_13-1024x1024.jpeg?strip=all&lossy=1&quality=88&webp=85&sharp=1&ssl=1&fit=1024%2C1024)
10. Paint the cabinet with Resene Lustacryl semi-gloss waterborne enamel in your chosen colour, using a Resene paint roller. Resene Lustacryl is pet-safe and vegan. When the first coat is completely dry, apply a second coat, if needed.
![A roller painting the chest of drawers](https://media.womanmagazine.co.nz/wp-content/uploads/2022/10/Thr0622_CRAFT_ReseneFlip_14-1024x1024.jpeg?strip=all&lossy=1&quality=88&webp=85&sharp=1&ssl=1&fit=1024%2C1024)
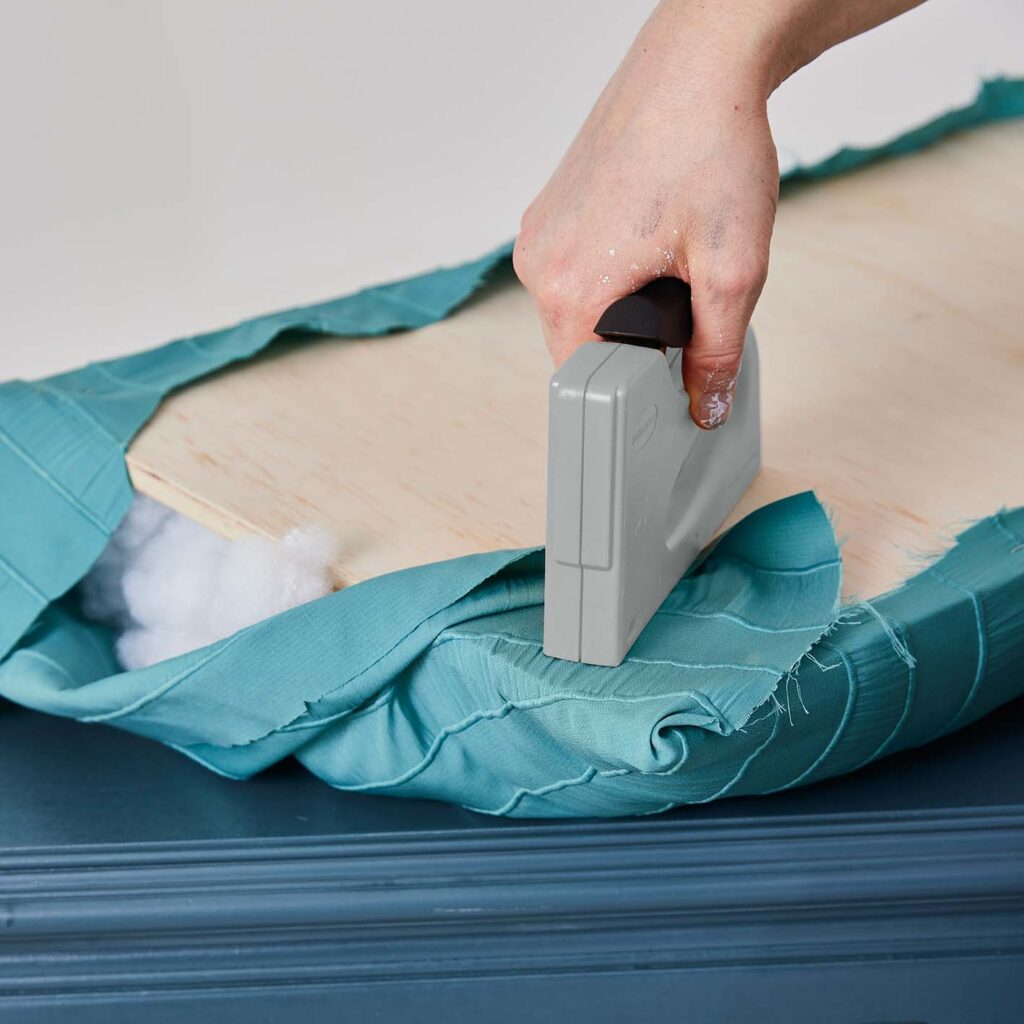
11. Cut the fabric for the padded base 25cm larger on all sides than the plywood base.
12. Using the staple gun, secure the wrong side of the fabric to a long edge on the underside of the plywood base. Pad the top with an even layer of stuffing. Then cover the stuffing with the fabric and secure to the underside of the plywood base with staples.
![Stapling fabric for the cushion](https://media.womanmagazine.co.nz/wp-content/uploads/2022/10/Thr0622_CRAFT_ReseneFlip_16-1024x1024.jpeg?strip=all&lossy=1&quality=88&webp=85&sharp=1&ssl=1&fit=1024%2C1024)
13. Insert the cushioned base into the bottom of your new side table and pet bed.
![The completed cushion sitting inside the chest of drawers](https://media.womanmagazine.co.nz/wp-content/uploads/2022/10/Thr0622_CRAFT_ReseneFlip_17-1024x1024.jpeg?strip=all&lossy=1&quality=88&webp=85&sharp=1&ssl=1&fit=1024%2C1024)
Related article: Refresh an old cabinet with Resene paint and rattan